Authenticate with Okta
Okta is an OpenID Connect identity hub. Okta can be used to expose a consistent OpenID Connect interface to your applications while allowing your users to authenticate using credentials managed by Okta.
In this guide we will see how to authenticate users with your application via an OIDC flow that uses Okta as the identity provider. This guide is an example to get you started for test purposes with Okta. It omits many of the factors that need to be considered for full production deployments.
First, we will use Gloo Gateway to expose a simple httpbin Service running on Kubernetes.
Second, we’ll secure the access using Okta OIDC. Okta will return a JWT token, and we’ll use Gloo Gateway to extract some claims from this token create new headers corresponding to these claims.
Finally, we’ll see how Gloo Gateway RBAC rules can be created to leverage the claims contained in the JWT token.
Expose a Kubernetes Service
Deploy the Service
Start by deploying the httpbin service on a Kubernetes cluster. Use kubectl to apply the resources below to your cluster.
apiVersion: v1
kind: ServiceAccount
metadata:
  name: httpbin
---
apiVersion: v1
kind: Service
metadata:
  name: httpbin
  labels:
    app: httpbin
spec:
  ports:
  - name: http
    port: 8000
    targetPort: 80
  selector:
    app: httpbin
---
apiVersion: apps/v1
kind: Deployment
metadata:
  name: httpbin
spec:
  replicas: 1
  selector:
    matchLabels:
      app: httpbin
      version: v1
  template:
    metadata:
      labels:
        app: httpbin
        version: v1
    spec:
      serviceAccountName: httpbin
      containers:
      - image: docker.io/kennethreitz/httpbin
        imagePullPolicy: IfNotPresent
        name: httpbin
        ports:
        - containerPort: 80
Verify the Upstream
Gloo Gateway discovers Kubernetes services automatically. So, running the glooctl get upstreams command, you should be able to see a new Gloo Gateway Upstream default-httpbin-8000, based on the naming convention namespace-serviceName-portNumber:
% glooctl get upstreams default-httpbin-8000
+----------------------+------------+----------+------------------------+
|       UPSTREAM       |    TYPE    |  STATUS  |        DETAILS         |
+----------------------+------------+----------+------------------------+
| default-httpbin-8000 | Kubernetes | Accepted | svc name:      httpbin |
|                      |            |          | svc namespace: default |
|                      |            |          | port:          8000    |
|                      |            |          |                        |
+----------------------+------------+----------+------------------------+
Create the Virtual Service
Use kubectl to create the following Gloo Gateway Virtual Service that will route all requests from domain glootest.com to the new Upstream.
apiVersion: gateway.solo.io/v1
kind: VirtualService
metadata:
  name: httpbin-okta-vs
  namespace: gloo-system
spec:
  virtualHost:
    domains:
    - 'glootest.com'
    routes:
    - matchers:
      - prefix: /
      routeAction:
        single:
          upstream:
            name: default-httpbin-8000
            namespace: gloo-system
Run the following glooctl command to confirm that the new Route was accepted by Gloo Gateway.
% glooctl get virtualservice httpbin-okta-vs
+-----------------+--------------+--------------+-----+----------+-----------------+----------------------------------+
| VIRTUAL SERVICE | DISPLAY NAME |   DOMAINS    | SSL |  STATUS  | LISTENERPLUGINS |              ROUTES              |
+-----------------+--------------+--------------+-----+----------+-----------------+----------------------------------+
| httpbin-okta-vs |              | glootest.com |     | Accepted |                 | / ->                             |
|                 |              |              |     |          |                 | gloo-system.default-httpbin-8000 |
|                 |              |              |     |          |                 | (upstream)                       |
+-----------------+--------------+--------------+-----+----------+-----------------+----------------------------------+
Configure DNS and Test
Update your /etc/hosts file to resolve glootest.com by the IP address returned by the glooctl proxy address command (without the port number).
% glooctl proxy address
34.73.0.61:80

% tail -1 /etc/hosts
34.73.0.61 glootest.com
You can now access the application using the glootest.com domain.
% curl http://glootest.com/get
{
  "args": {},
  "headers": {
    "Accept": "*/*",
    "Content-Length": "0",
    "Host": "glootest.com",
    "User-Agent": "curl/7.64.1",
    "X-Envoy-Expected-Rq-Timeout-Ms": "15000"
  },
  "origin": "10.68.1.7",
  "url": "http://glootest.com/get"
}
Note that the httpbin service sends back information mirroring the request that we issued.
Secure the application using HTTPS
In this section, we will begin securing the application by provisioning an https service endpoint.
For test purposes only, we’ll begin by creating a self-signed certificate for the glootest.com domain.
% openssl req -x509 -nodes -days 365 -newkey rsa:2048 -keyout tls.key -out tls.crt -subj "/CN=glootest.com"
Generating a 2048 bit RSA private key
...+++
....+++
writing new private key to 'tls.key'
Second, we’ll create a Kubernetes secret containing this certificate.
kubectl create secret tls upstream-tls --key tls.key --cert tls.crt --namespace gloo-system
apiVersion: v1
kind: Secret
metadata:
  name: okta-client-secret
  namespace: gloo-system
type: extauth.solo.io/oauth
data:
  client-secret: <base64secret>
Third, we enable HTTPS for our Virtual Service by using kubectl to apply the following change.
apiVersion: gateway.solo.io/v1
kind: VirtualService
metadata:
  name: httpbin-okta-vs
  namespace: gloo-system
spec:
  sslConfig:
    secretRef:
      name: upstream-tls
      namespace: gloo-system
  virtualHost:
    domains:
    - 'glootest.com'
    routes:
    - matchers:
      - prefix: /
      routeAction:
        single:
          upstream:
            name: default-httpbin-8000
            namespace: gloo-system
Finally, we will use curl to confirm that we can access the new https endpoint.
% curl -k https://glootest.com/get
{
  "args": {},
  "headers": {
    "Accept": "*/*",
    "Content-Length": "0",
    "Host": "glootest.com",
    "User-Agent": "curl/7.64.1",
    "X-Envoy-Expected-Rq-Timeout-Ms": "15000"
  },
  "origin": "10.68.1.7",
  "url": "https://glootest.com/get"
}
Authenticate with Okta OIDC
In this section, we will establish an Okta account and application, then modify our Gloo Gateway configuration to authenticate using Okta.
Establish Okta Account
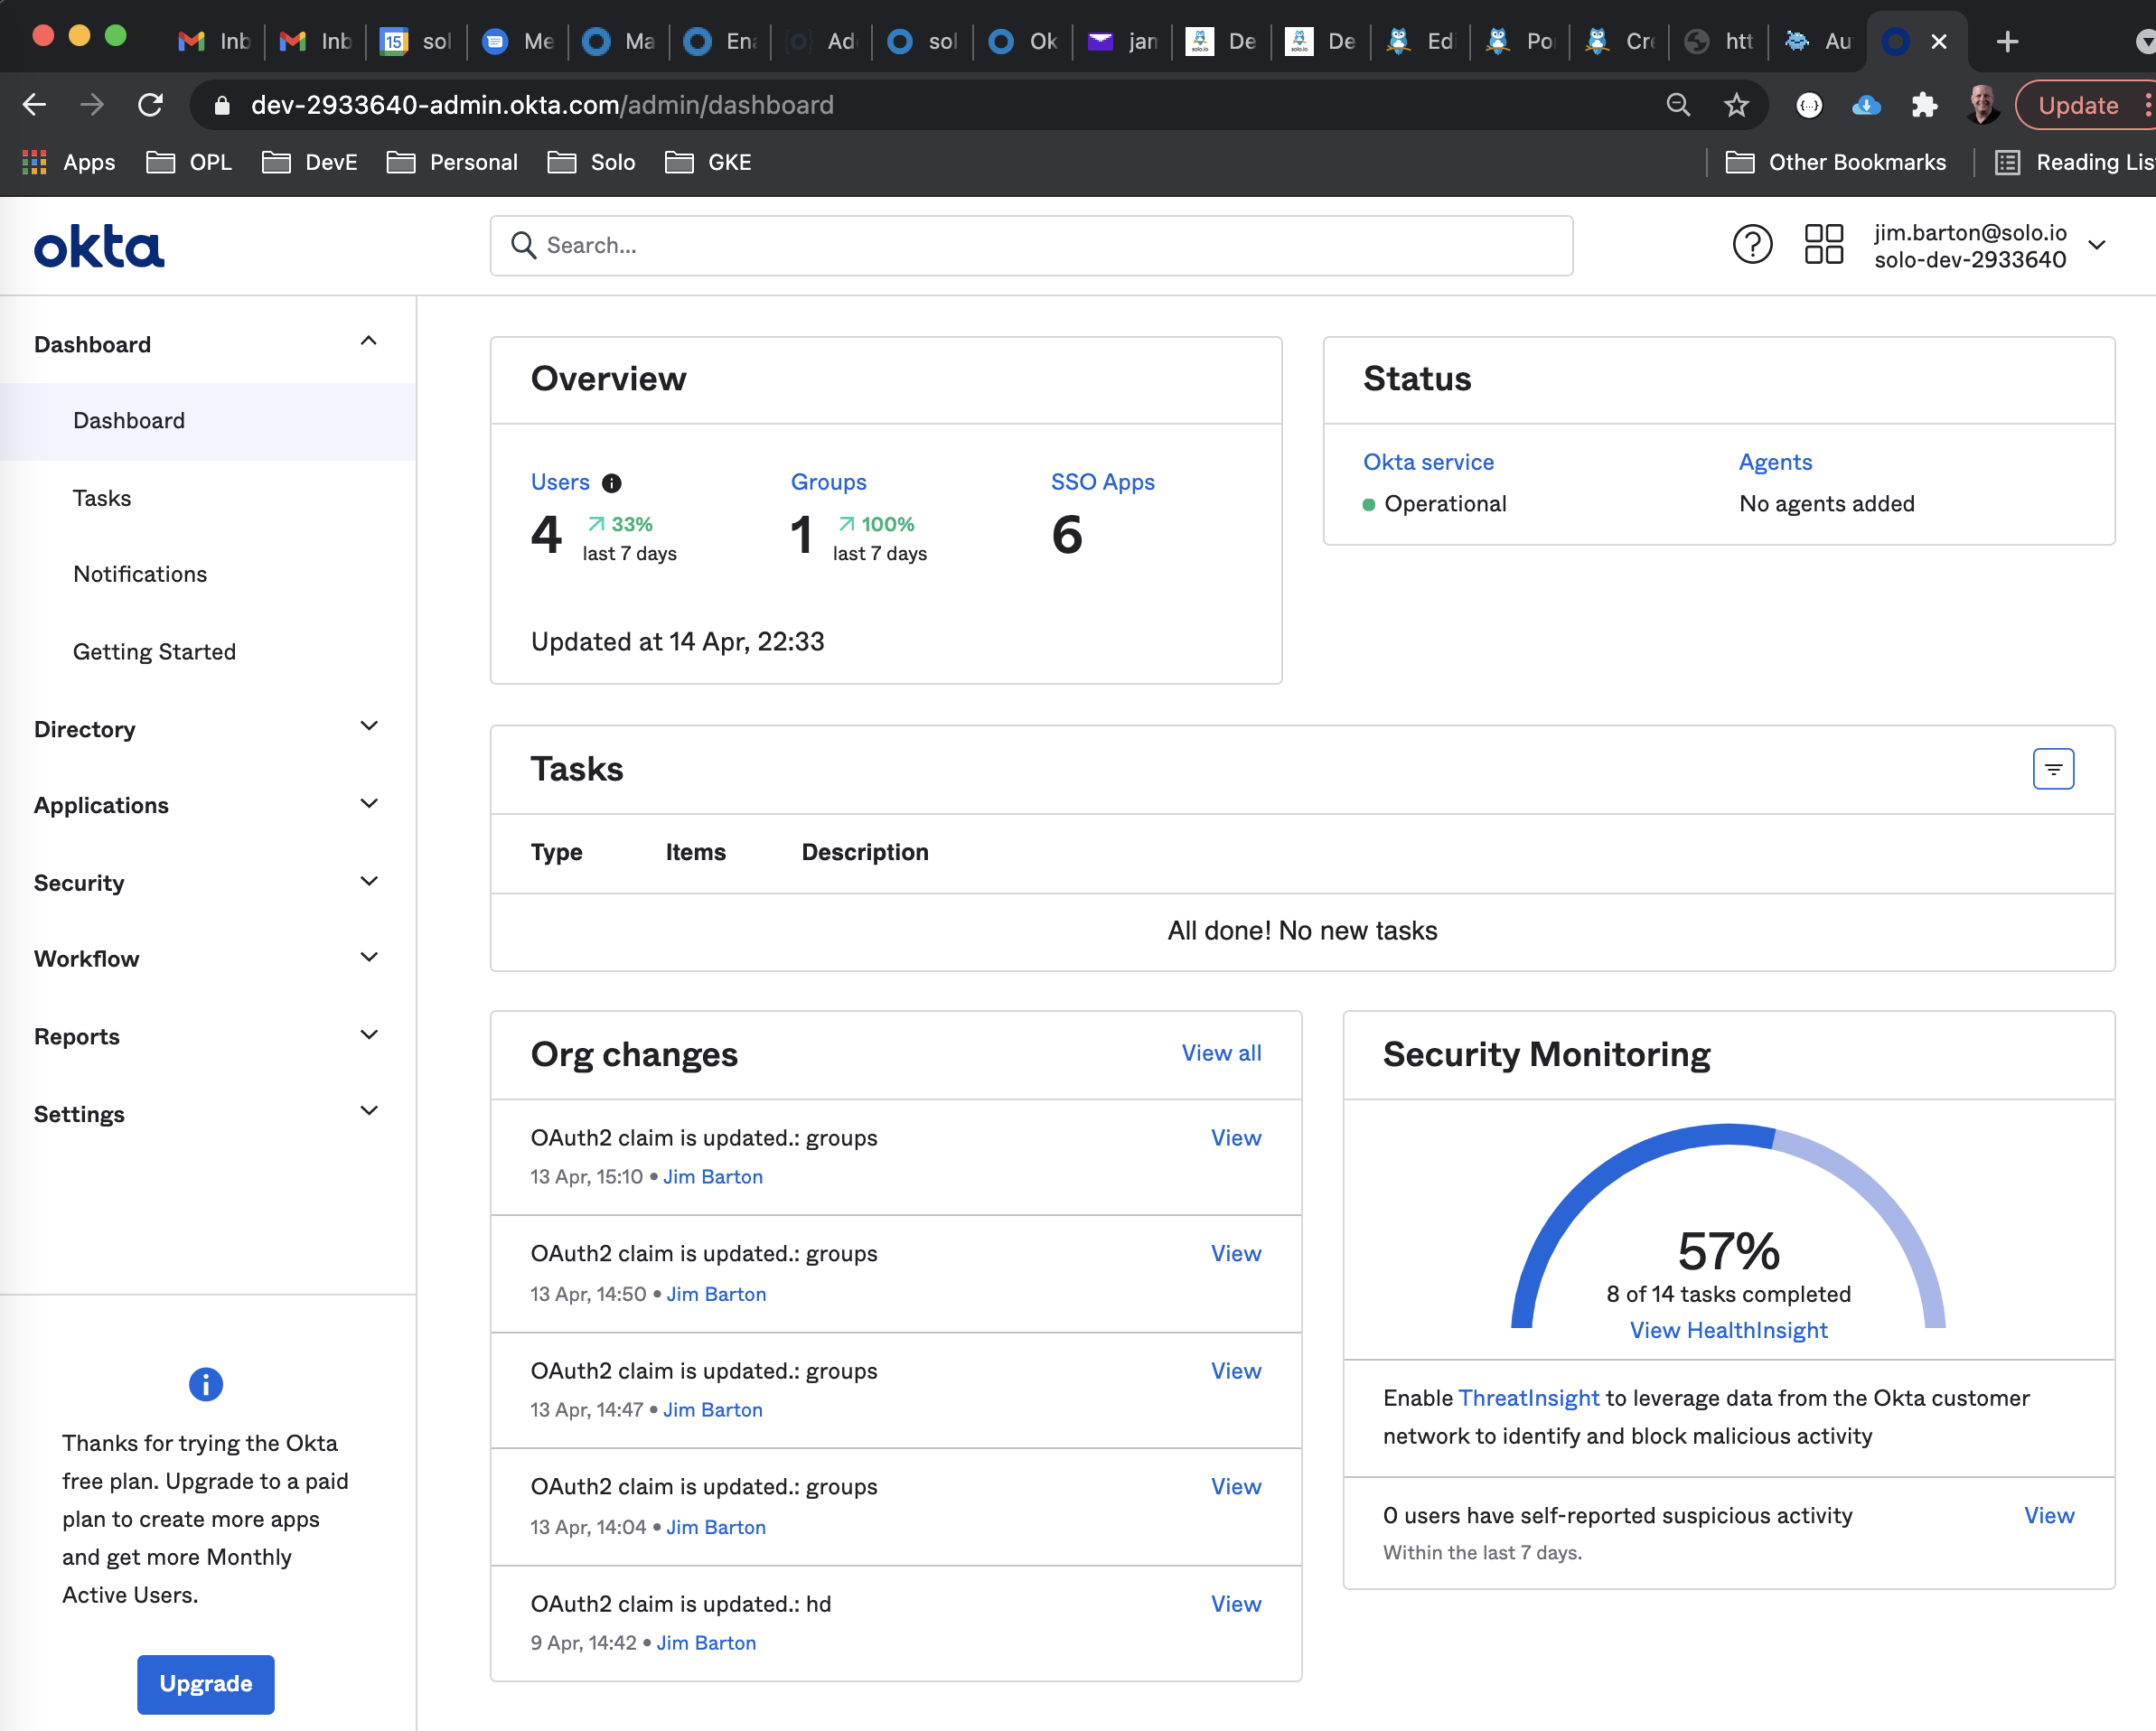
If you are an existing Okta customer, then this section is optional for you. But even if you are not an established Okta customer, it is easy to establish a free developer account that allows you to complete the integration exercise outlined in this guide. First, visit the developer signup page and walk through their process. Okta then provisions a developer account that you can access via a URL like this: https://dev-2933640-admin.okta.com/ . This provides access to an account dashboard and tools to manage Okta applications and users.
Establish Okta Users
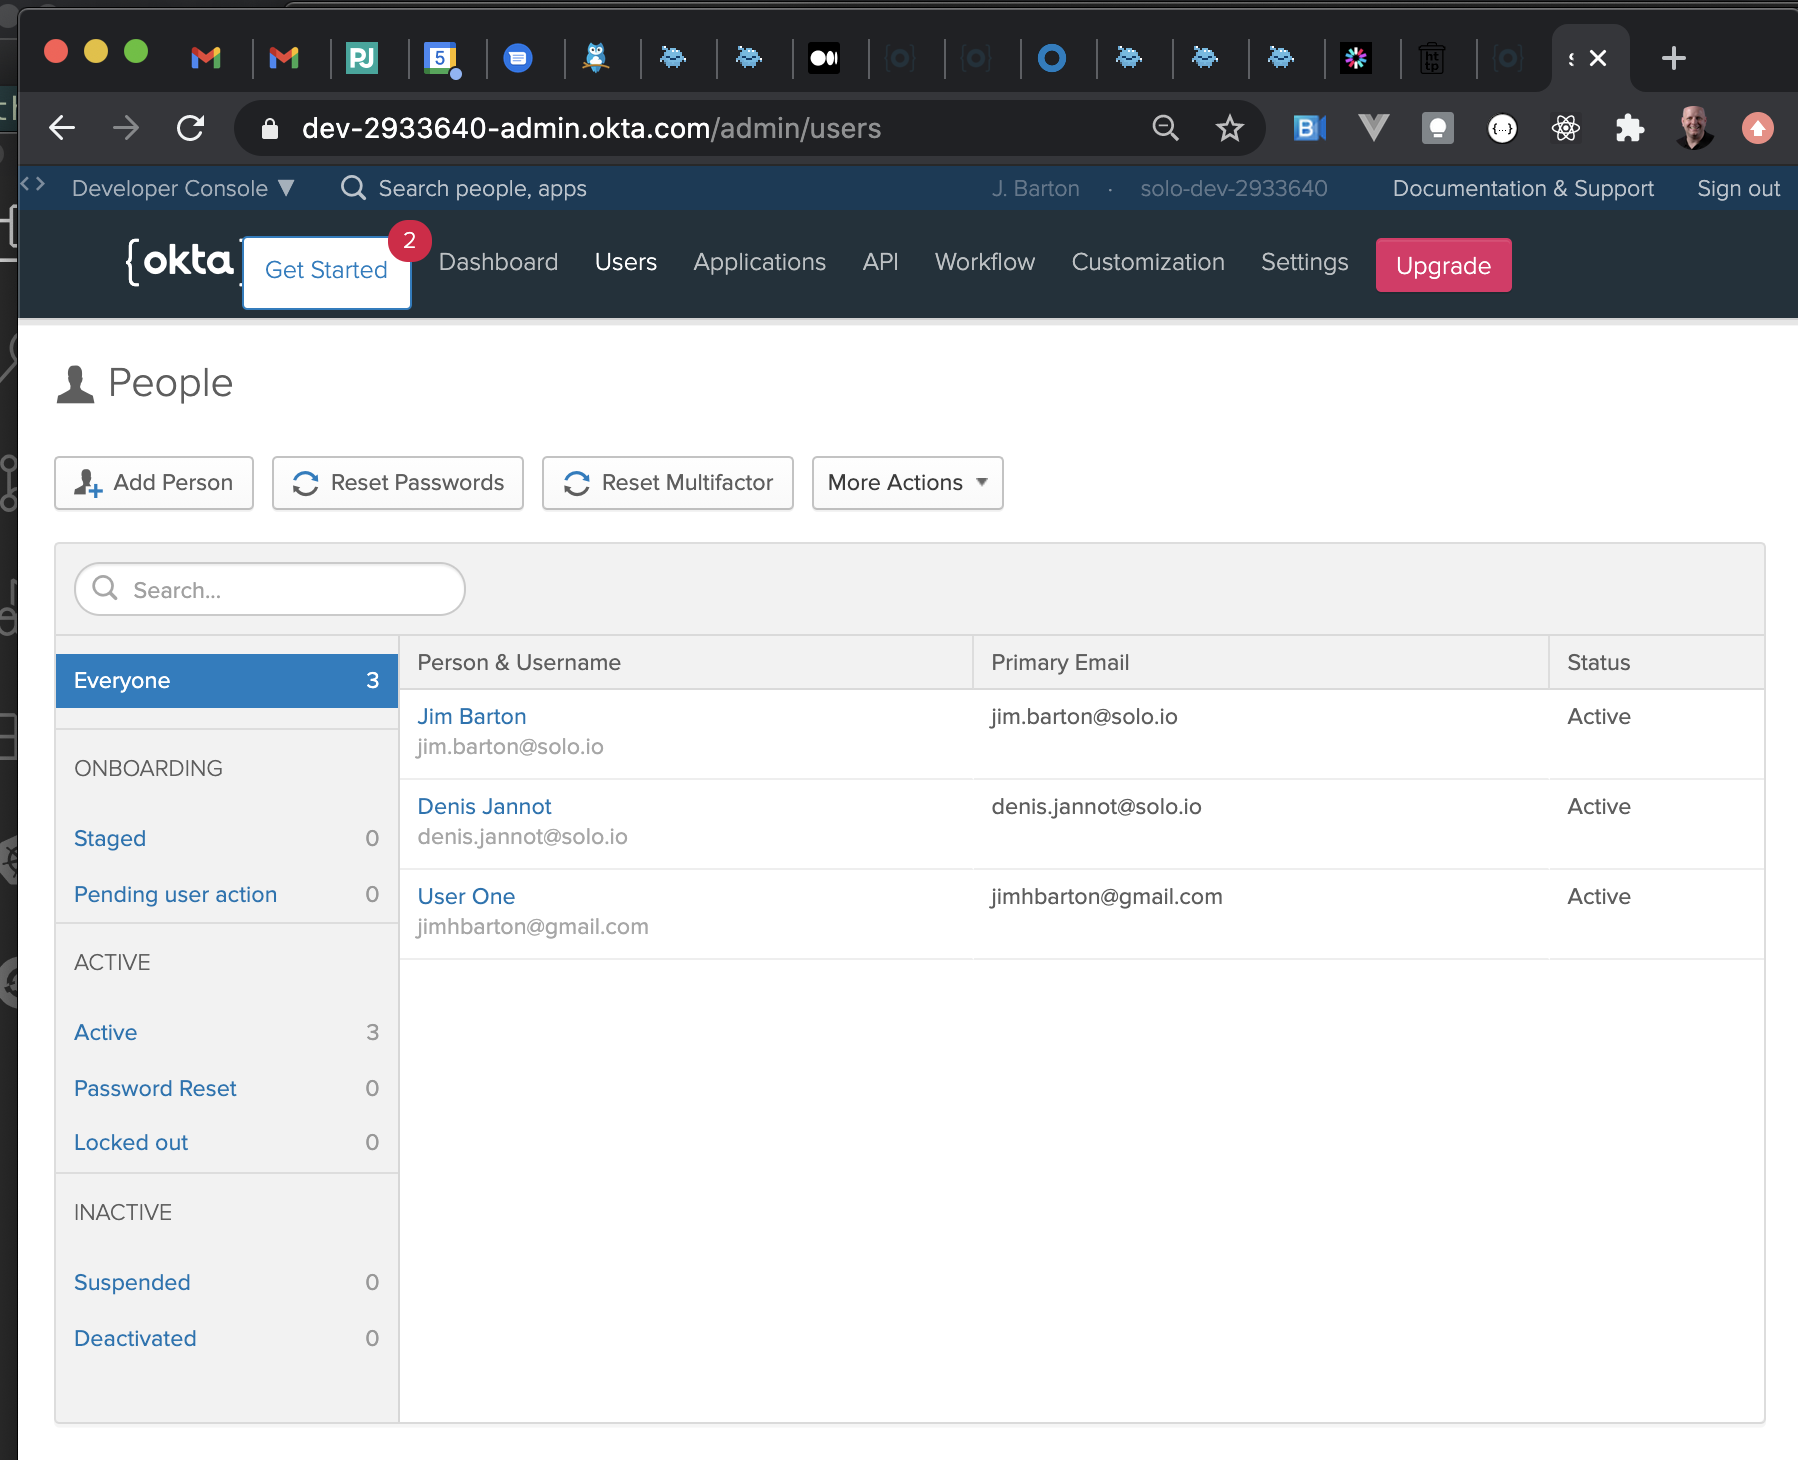
For new developer accounts, you need to establish one or more Okta users for testing. The simplest quickstart approach for adding new users is via the console, although Okta offers other options as well. A full description is beyond the scope of this guide, and we recommend you follow Okta’s own technical docs to find the best approach for your requirements.
Establish Okta Application
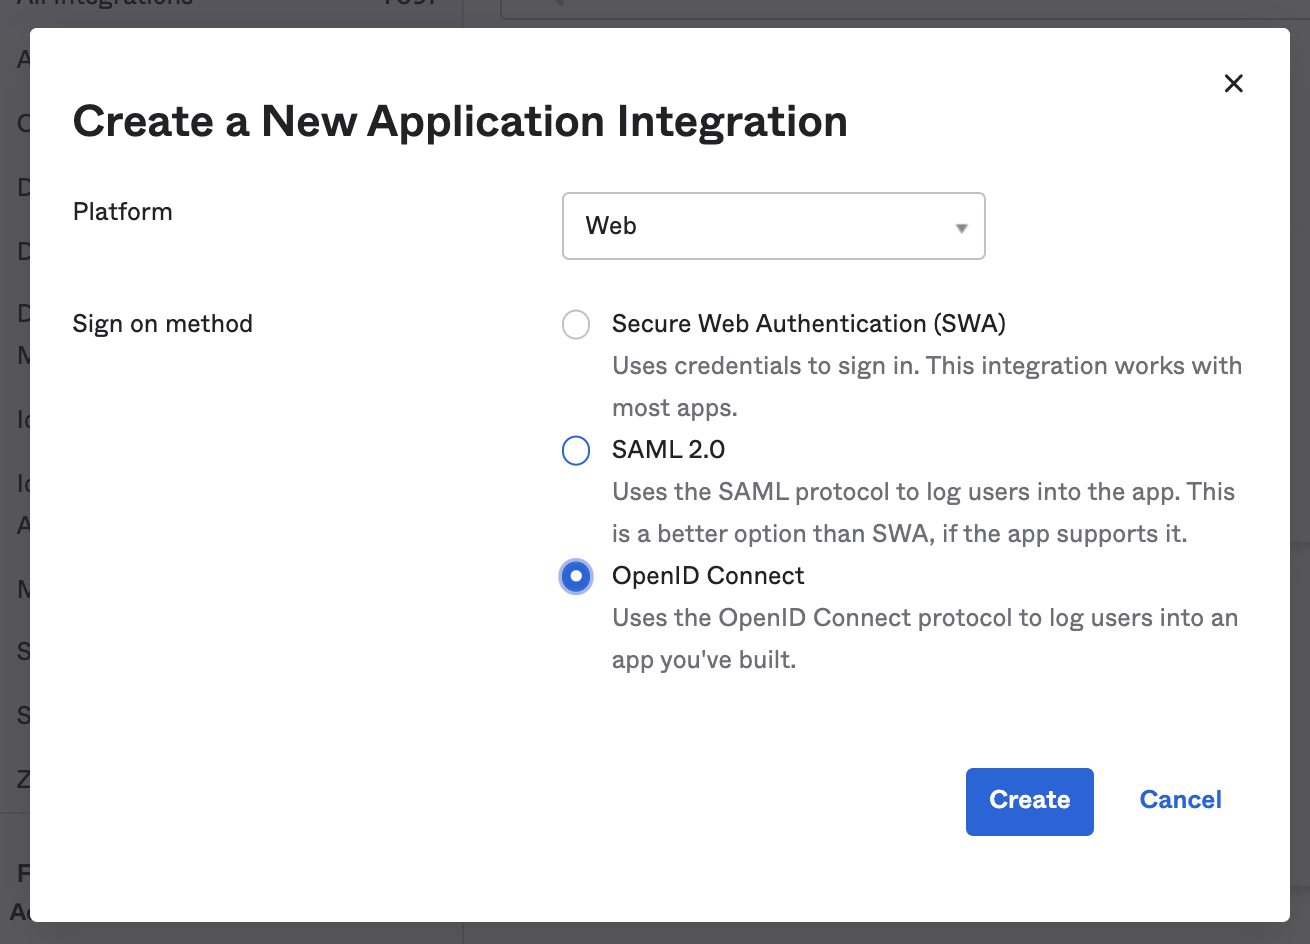
You will need to establish an Okta application to integrate with Gloo Gateway. In this guide we prioritized providing a quickstart for testing over production readiness. In establishing the Okta application from the dashboard wizard, we defined this as a Web type application, set a Sign on method of OpenID Connect, and gave the application a name GlooTest.
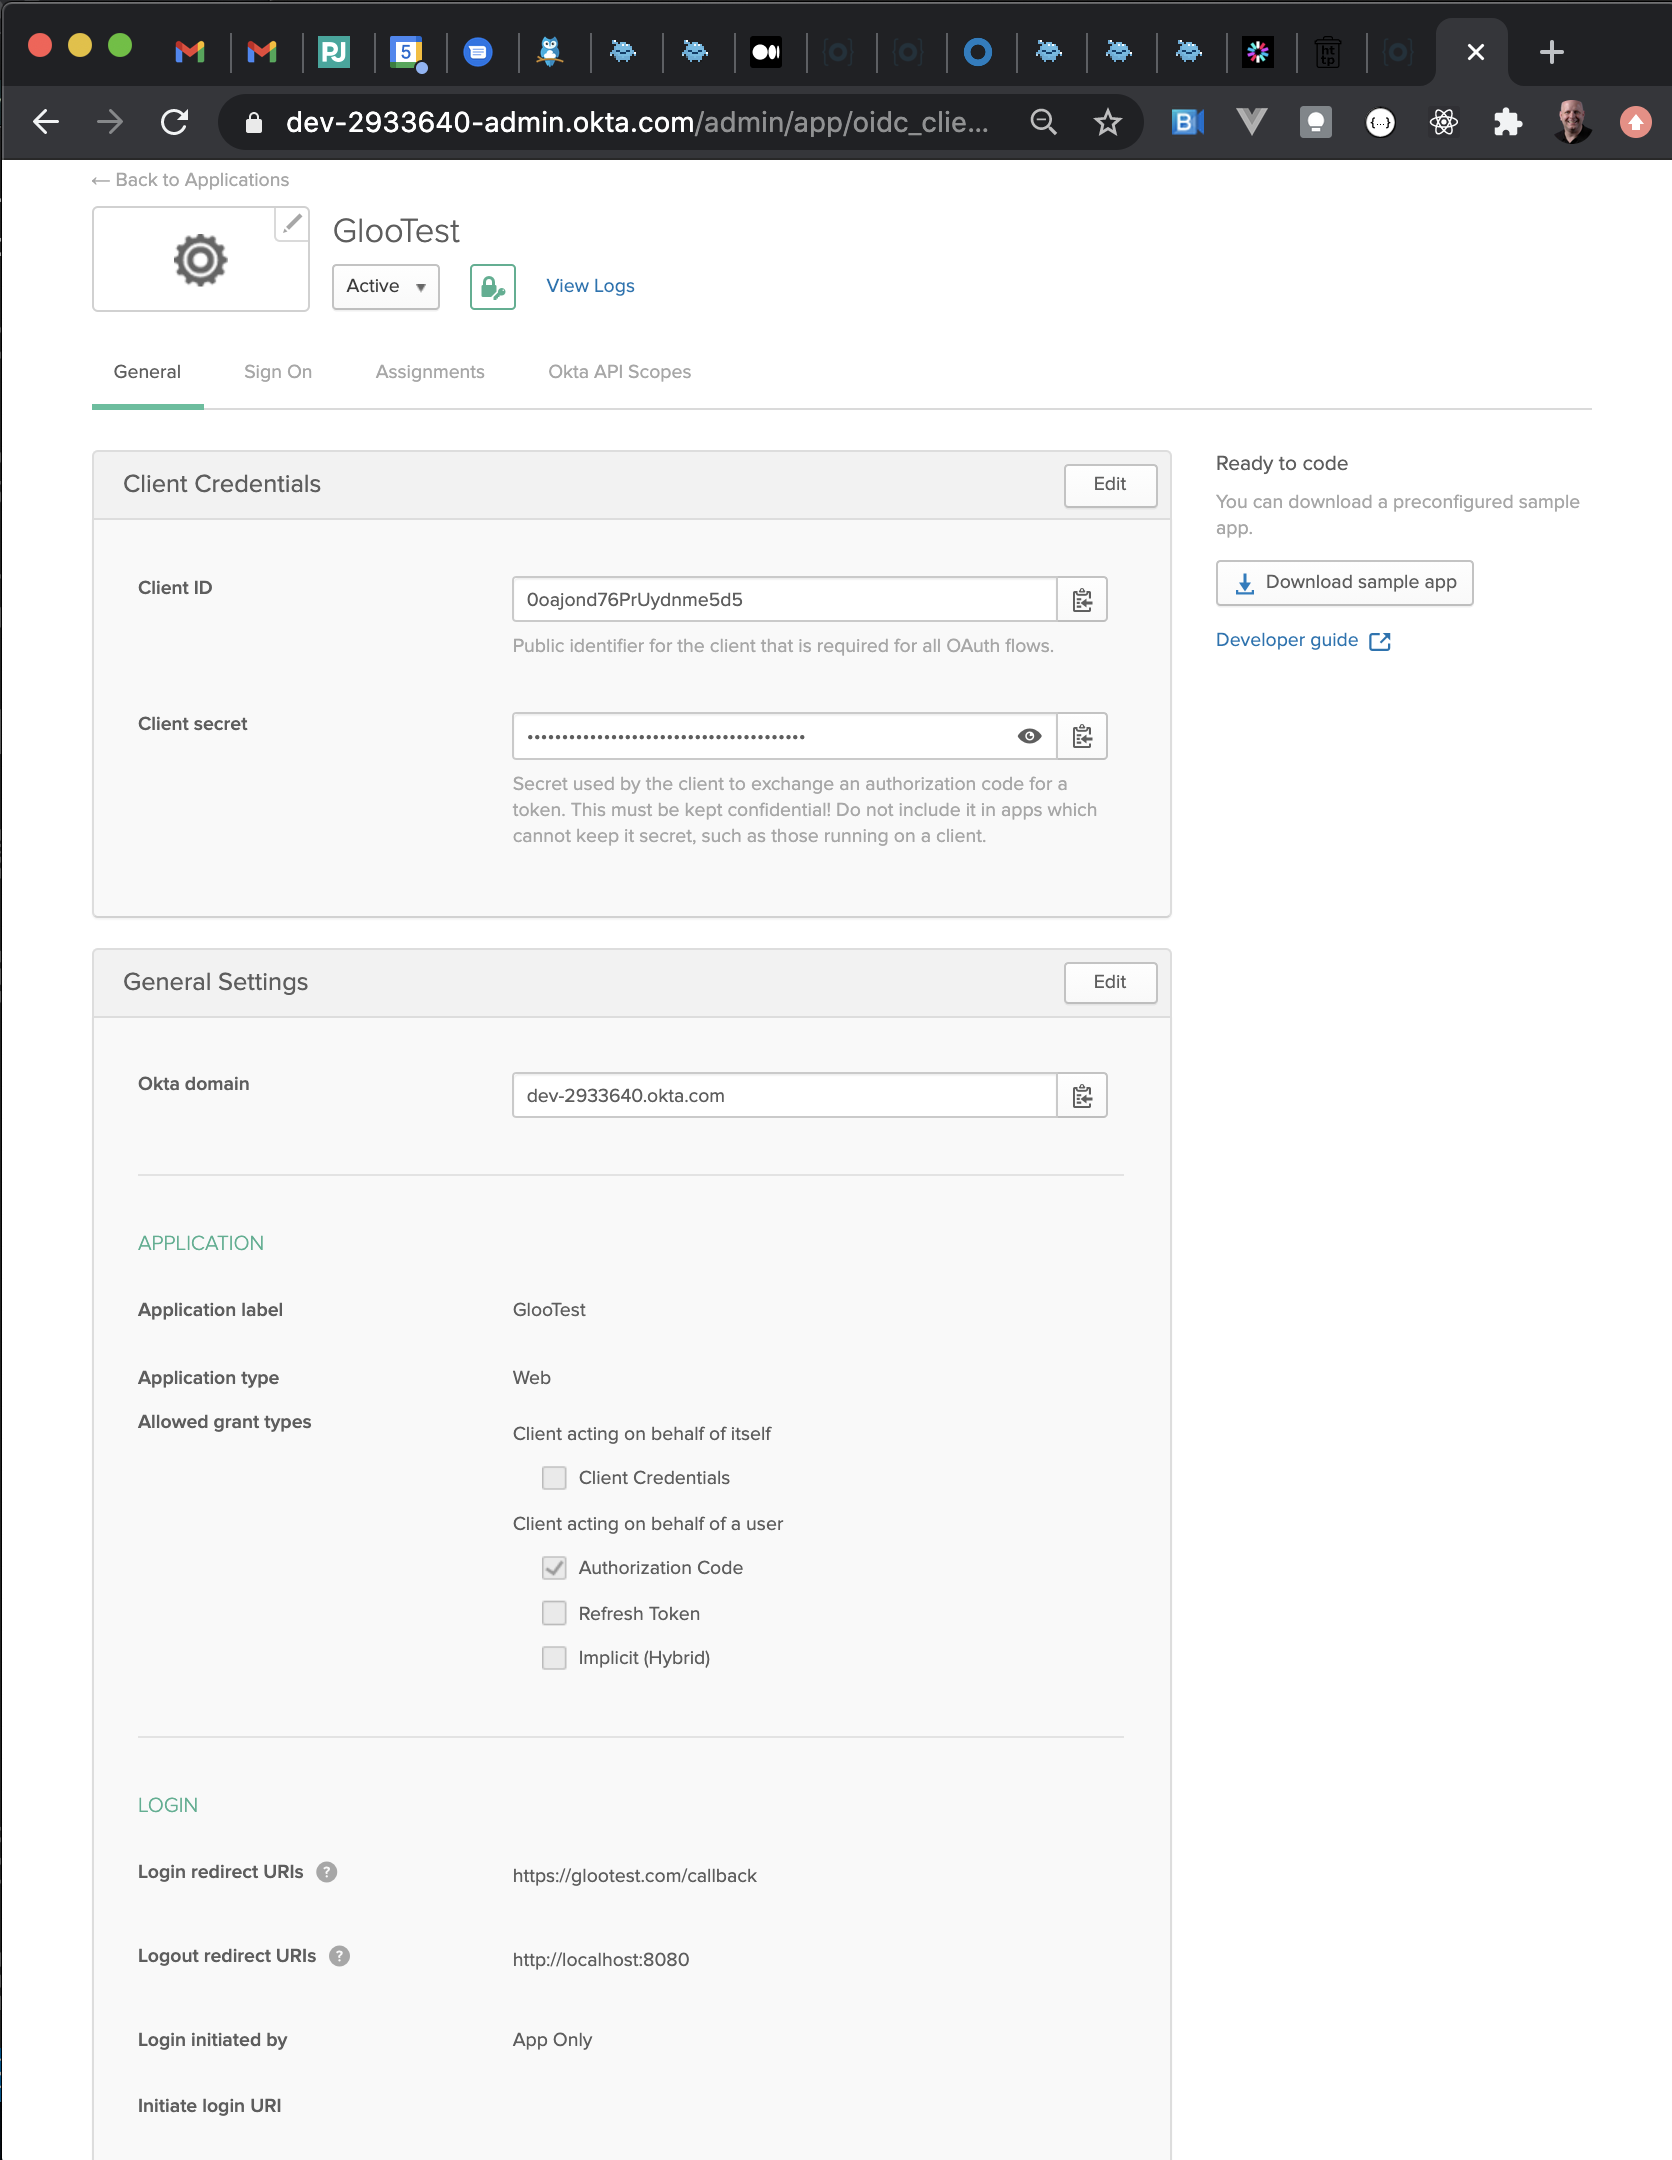
Beyond that, we changed only one of the default settings from the new-application wizard: Login redirect URIs, for which we provided a single value https://glootest.com/callback. For more details on creating Web type application integrations with Okta, we found this guide helpful.
Our final Okta GlooTest application profile looked like this.
Finally, ensure from the Okta application’s Assignment tab that at least some of your Okta users have been assigned to your new application.

Establish Gloo Gateway AuthConfig for Okta App
In this section we will establish the oauth secret and an AuthConfig resource to connect Gloo Gateway with the OIDC provider. Be sure to have your Okta client ID and client secret ready, available from the Okta application profile page, under Client Credentials.
Create the oauth secret in Kubernetes using glooctl with the Okta application secret.
% glooctl create secret oauth --namespace gloo-system --name okta-client-secret --client-secret $CLIENT_SECRET
+--------------------+-------+
|       SECRET       | TYPE  |
+--------------------+-------+
| okta-client-secret | OAuth |
+--------------------+-------+
Create a Gloo Gateway AuthConfig object to finish connecting the gateway to the OIDC provider. Use kubectl to apply this change.
apiVersion: enterprise.gloo.solo.io/v1
kind: AuthConfig
metadata:
  name: okta-oidc
  namespace: gloo-system
spec:
  configs:
  - oauth2:
      oidcAuthorizationCode:
        appUrl: https://glootest.com
        callbackPath: /callback
        clientId: <insert-your-app-client-id-here>
        clientSecretRef:
          name: okta-client-secret
          namespace: gloo-system
        issuerUrl: https://dev-2933640.okta.com/oauth2/default
        scopes:
        - email
Note that we have used the scopes parameter to indicate to the identity provider to include the email of the user in the claims of the JWT token it will return.
Finally, use kubectl to update the Virtual Service to use Okta OIDC authentication:
apiVersion: gateway.solo.io/v1
kind: VirtualService
metadata:
  name: httpbin-okta-vs
  namespace: gloo-system
spec:
  sslConfig:
    secretRef:
      name: upstream-tls
      namespace: gloo-system
  virtualHost:
    domains:
    - 'glootest.com'
    routes:
    - matchers:
      - prefix: /
      routeAction:
        single:
          upstream:
            name: default-httpbin-8000
            namespace: gloo-system
    options:
      extauth:
        configRef:
          name: okta-oidc
          namespace: gloo-system
Note that the /callback path will be handled by this same Virtual Service because we used a catch-all / prefix matcher.
Verify Okta Integration
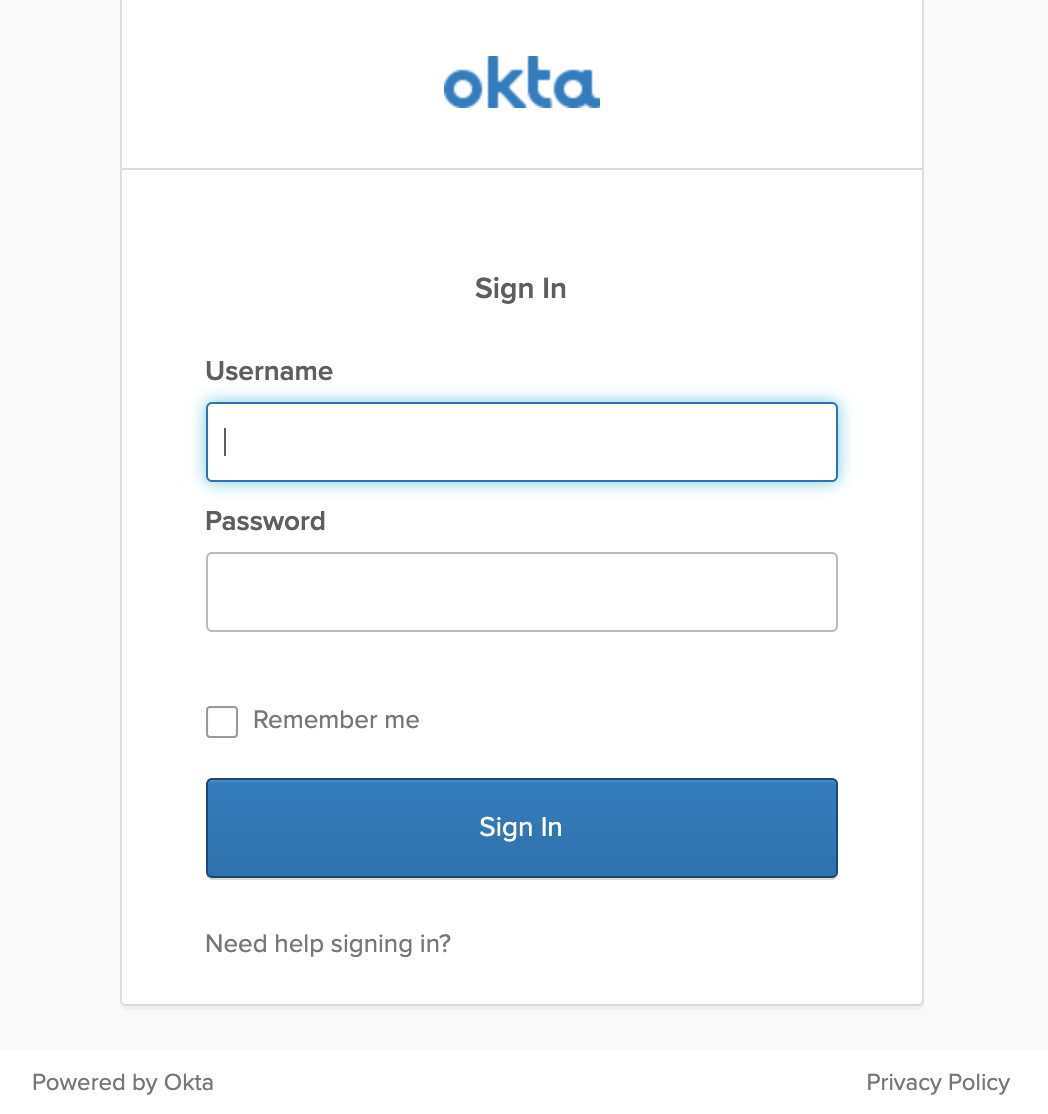
We will now confirm that the initial Okta integration using a web browser. First, navigate to https://glootest.com. You should be redirected to the Okta Login page. Sign in as one of your configured Okta users who is authorized for this application.
Gloo Gateway has redirected you to the /callback endpoint we configured in the AuthConfig, with the information it received from Okta OIDC added as a query string to create a Cookie. This cookie contains both an access_token and an id_token from Okta. The id_token is a JWT from which we will extract claims to drive fine-grained RBAC decisions later in this exercise.
After this callback, the normal request flow continues and the upstream application responds. You should get output that looks something like below. In particular, note the Cookie header supplied by Okta containing both an access_token and an id_token.

You can also test other httpbin endpoints via the Gloo Gateway gateway. For example, consider this base64 conversion service endpoint: https://glootest.com/base64/R2xvbyBpcyBhd2Vzb21lCg==

Troubleshooting Okta Integration
The examples in this guide were tested using both Safari and Chrome on MacOS. You may experience some issues in development mode due to the use of self-signed certificates. These present as 403 Forbidden errors, possibly with an ERR_CERT_INVALID error code. With Safari, you can work through this by clicking through advanced settings and indicating you understand the risks. With Chrome, you may need to use the thisisunsafe workaround described here.
You may experience browser issues if there is an overlap between the email of your Okta user and an active Google oauth connection in your browser. Issuing these requests in Incognito (Chrome) or Private (Safari) windows resolves these problems.
It is common for initial requests that are routed through Okta, or any external security service provider, to fail due to an untuned requestTimeout parameter in the Gloo Settings object. The default timeout is 200ms, which is often inadequate to account for the external network hop to Okta. Increasing that timeout should resolve the problem.
You can get the current state of the Settings object like this:
% kubectl get settings.gloo.solo.io -n gloo-system -oyaml
Then apply a change to the spec.extauth stanza to add a requestTimeout greater than 200ms, like this:
    extauth:
      requestTimeout: 1s
      extauthzServerRef:
        name: extauth
        namespace: gloo-system
JWT Claim Extraction
The id_token contains a JWT from which we can extract claims that may be useful in driving downstream RBAC policies. In this section, we will enhance our Virtual Service by applying a transformation.
Transform Okta Cookie to JWT Header
It will use a regular expression to extract the JWT token from the Cookie header. Then it will create a new Jwt header containing the token. Finally, we will remove the cookie header from the request.
Apply these transformation changes to the Gloo Gateway Virtual Service.
apiVersion: gateway.solo.io/v1
kind: VirtualService
metadata:
name: httpbin-okta-vs
namespace: gloo-system
spec:
sslConfig:
secretRef:
name: upstream-tls
namespace: gloo-system
virtualHost:
domains:
- 'glootest.com'
routes:
- matchers:
- prefix: /
routeAction:
single:
upstream:
name: default-httpbin-8000
namespace: gloo-system
options:
extauth:
configRef:
name: okta-oidc
namespace: gloo-system
stagedTransformations:
early:
requestTransforms:
- requestTransformation:
transformationTemplate:
extractors:
token:
header: 'cookie'
regex: '.*id_token=([^;]*).*'
subgroup: 1
headers:
jwt:
text: '{{ token }}'
headerManipulation:
requestHeadersToRemove:
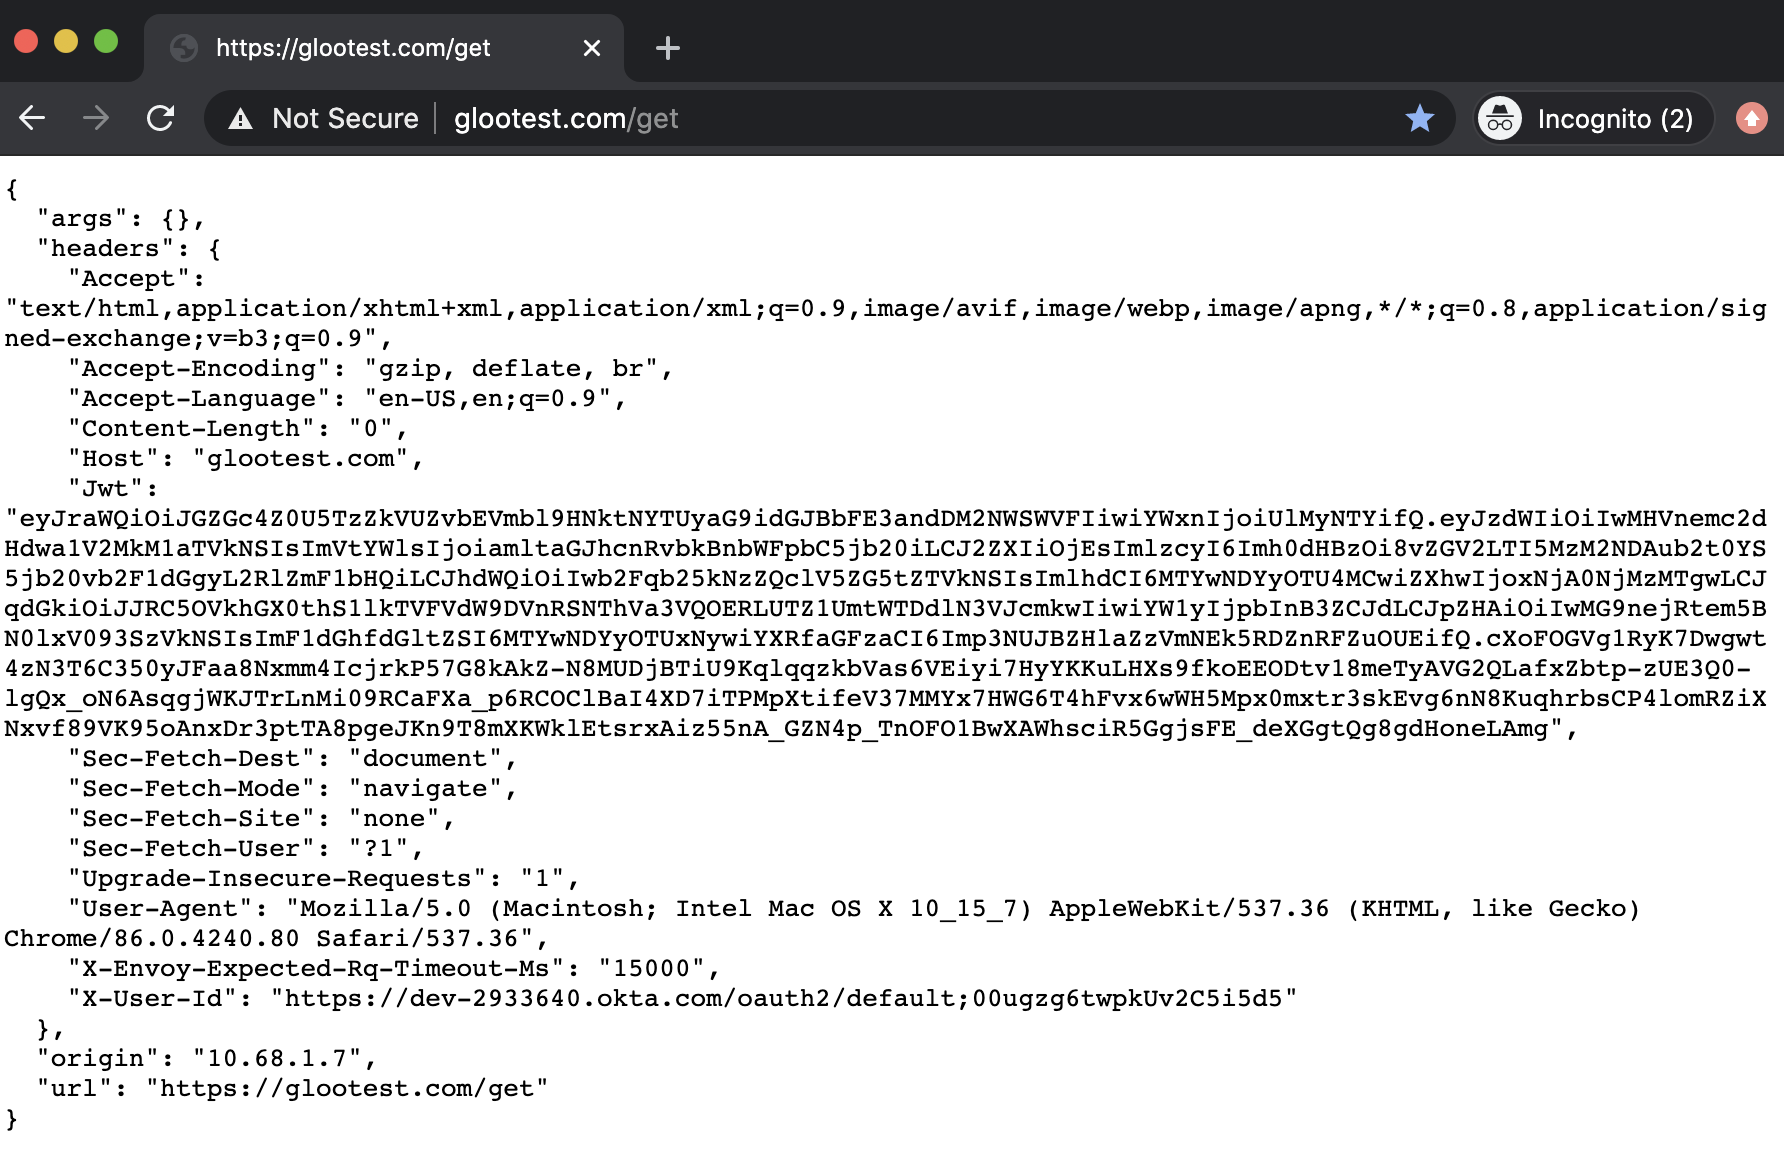
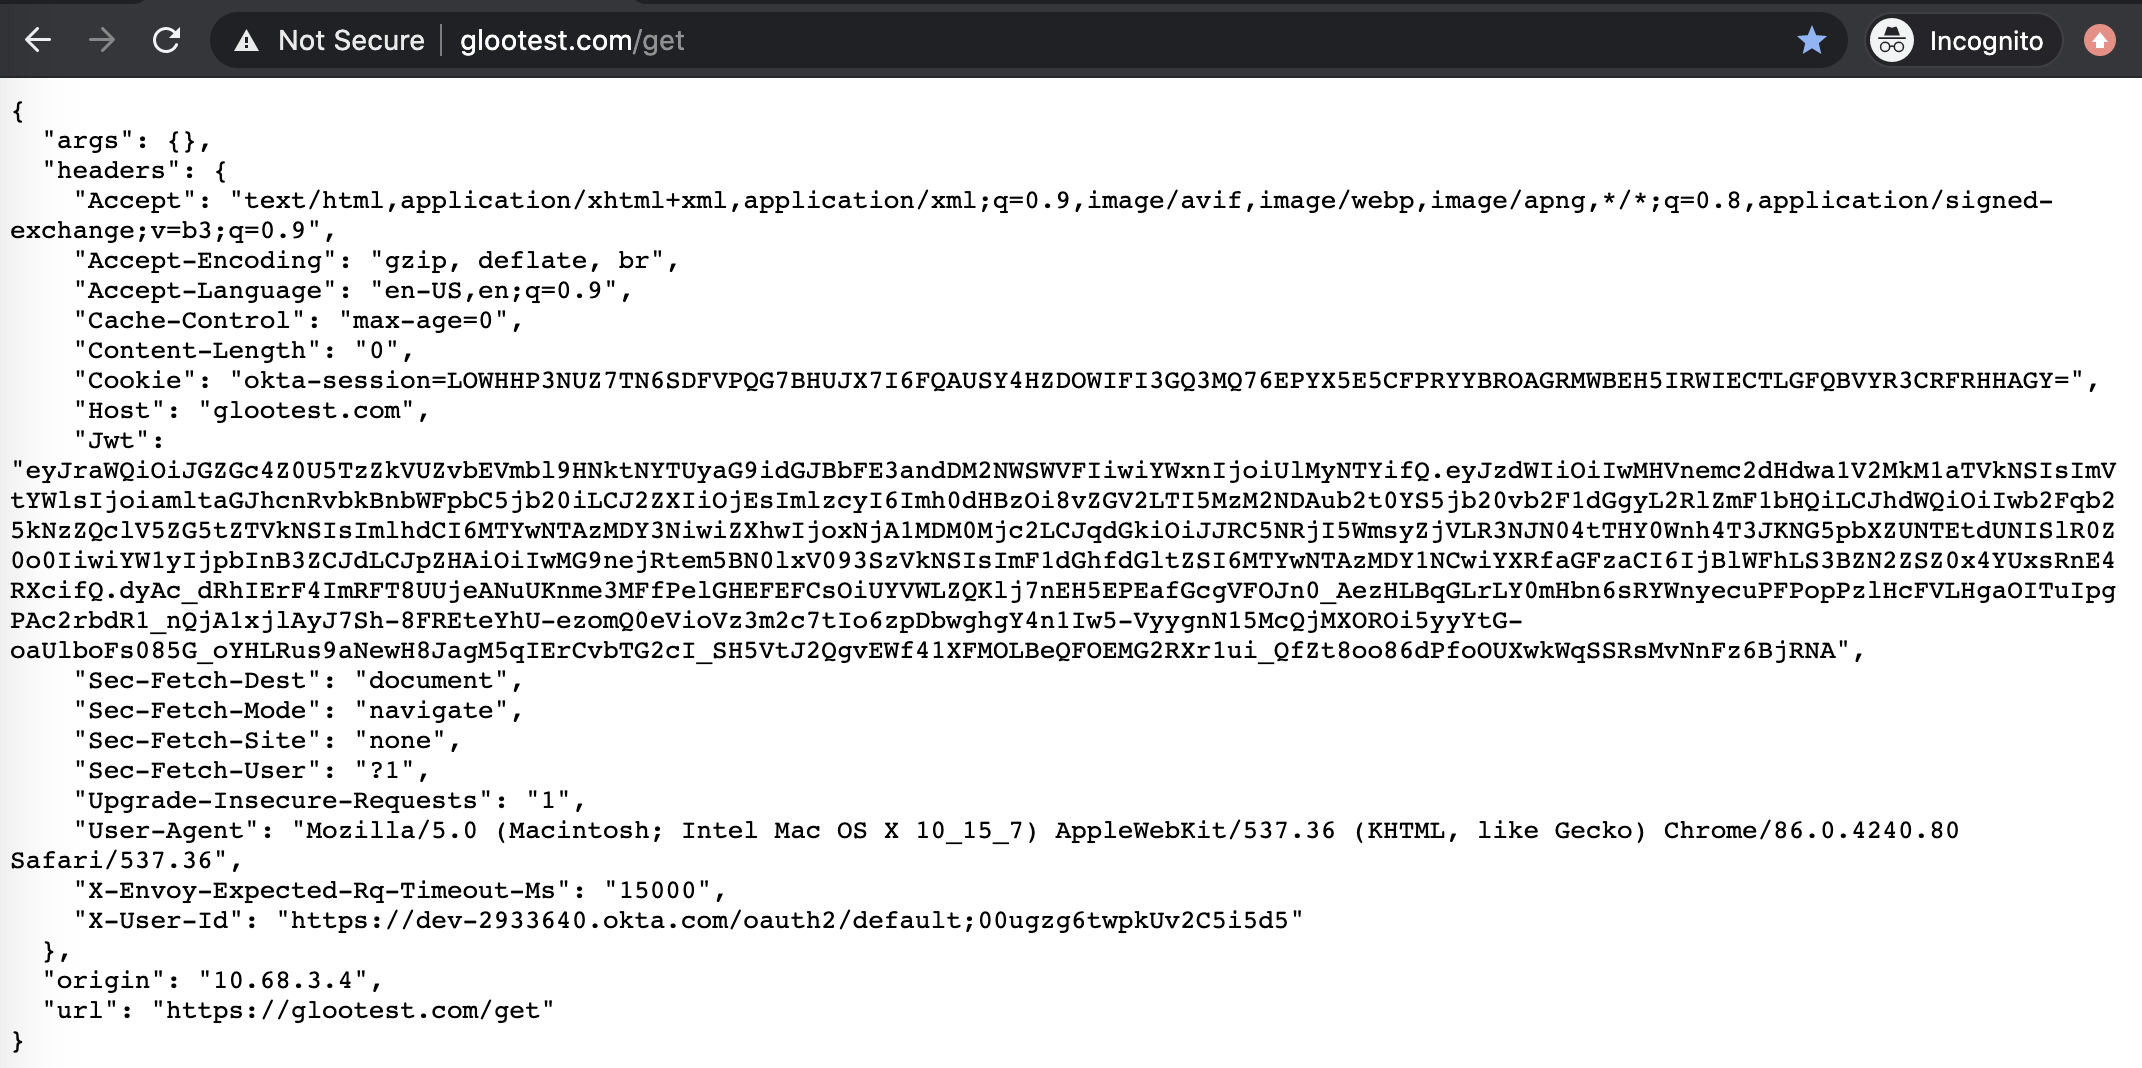
- "cookie"Below is the type of output you should see when you refresh the web page. Note that the Cookie header has been replaced by a Jwt header.
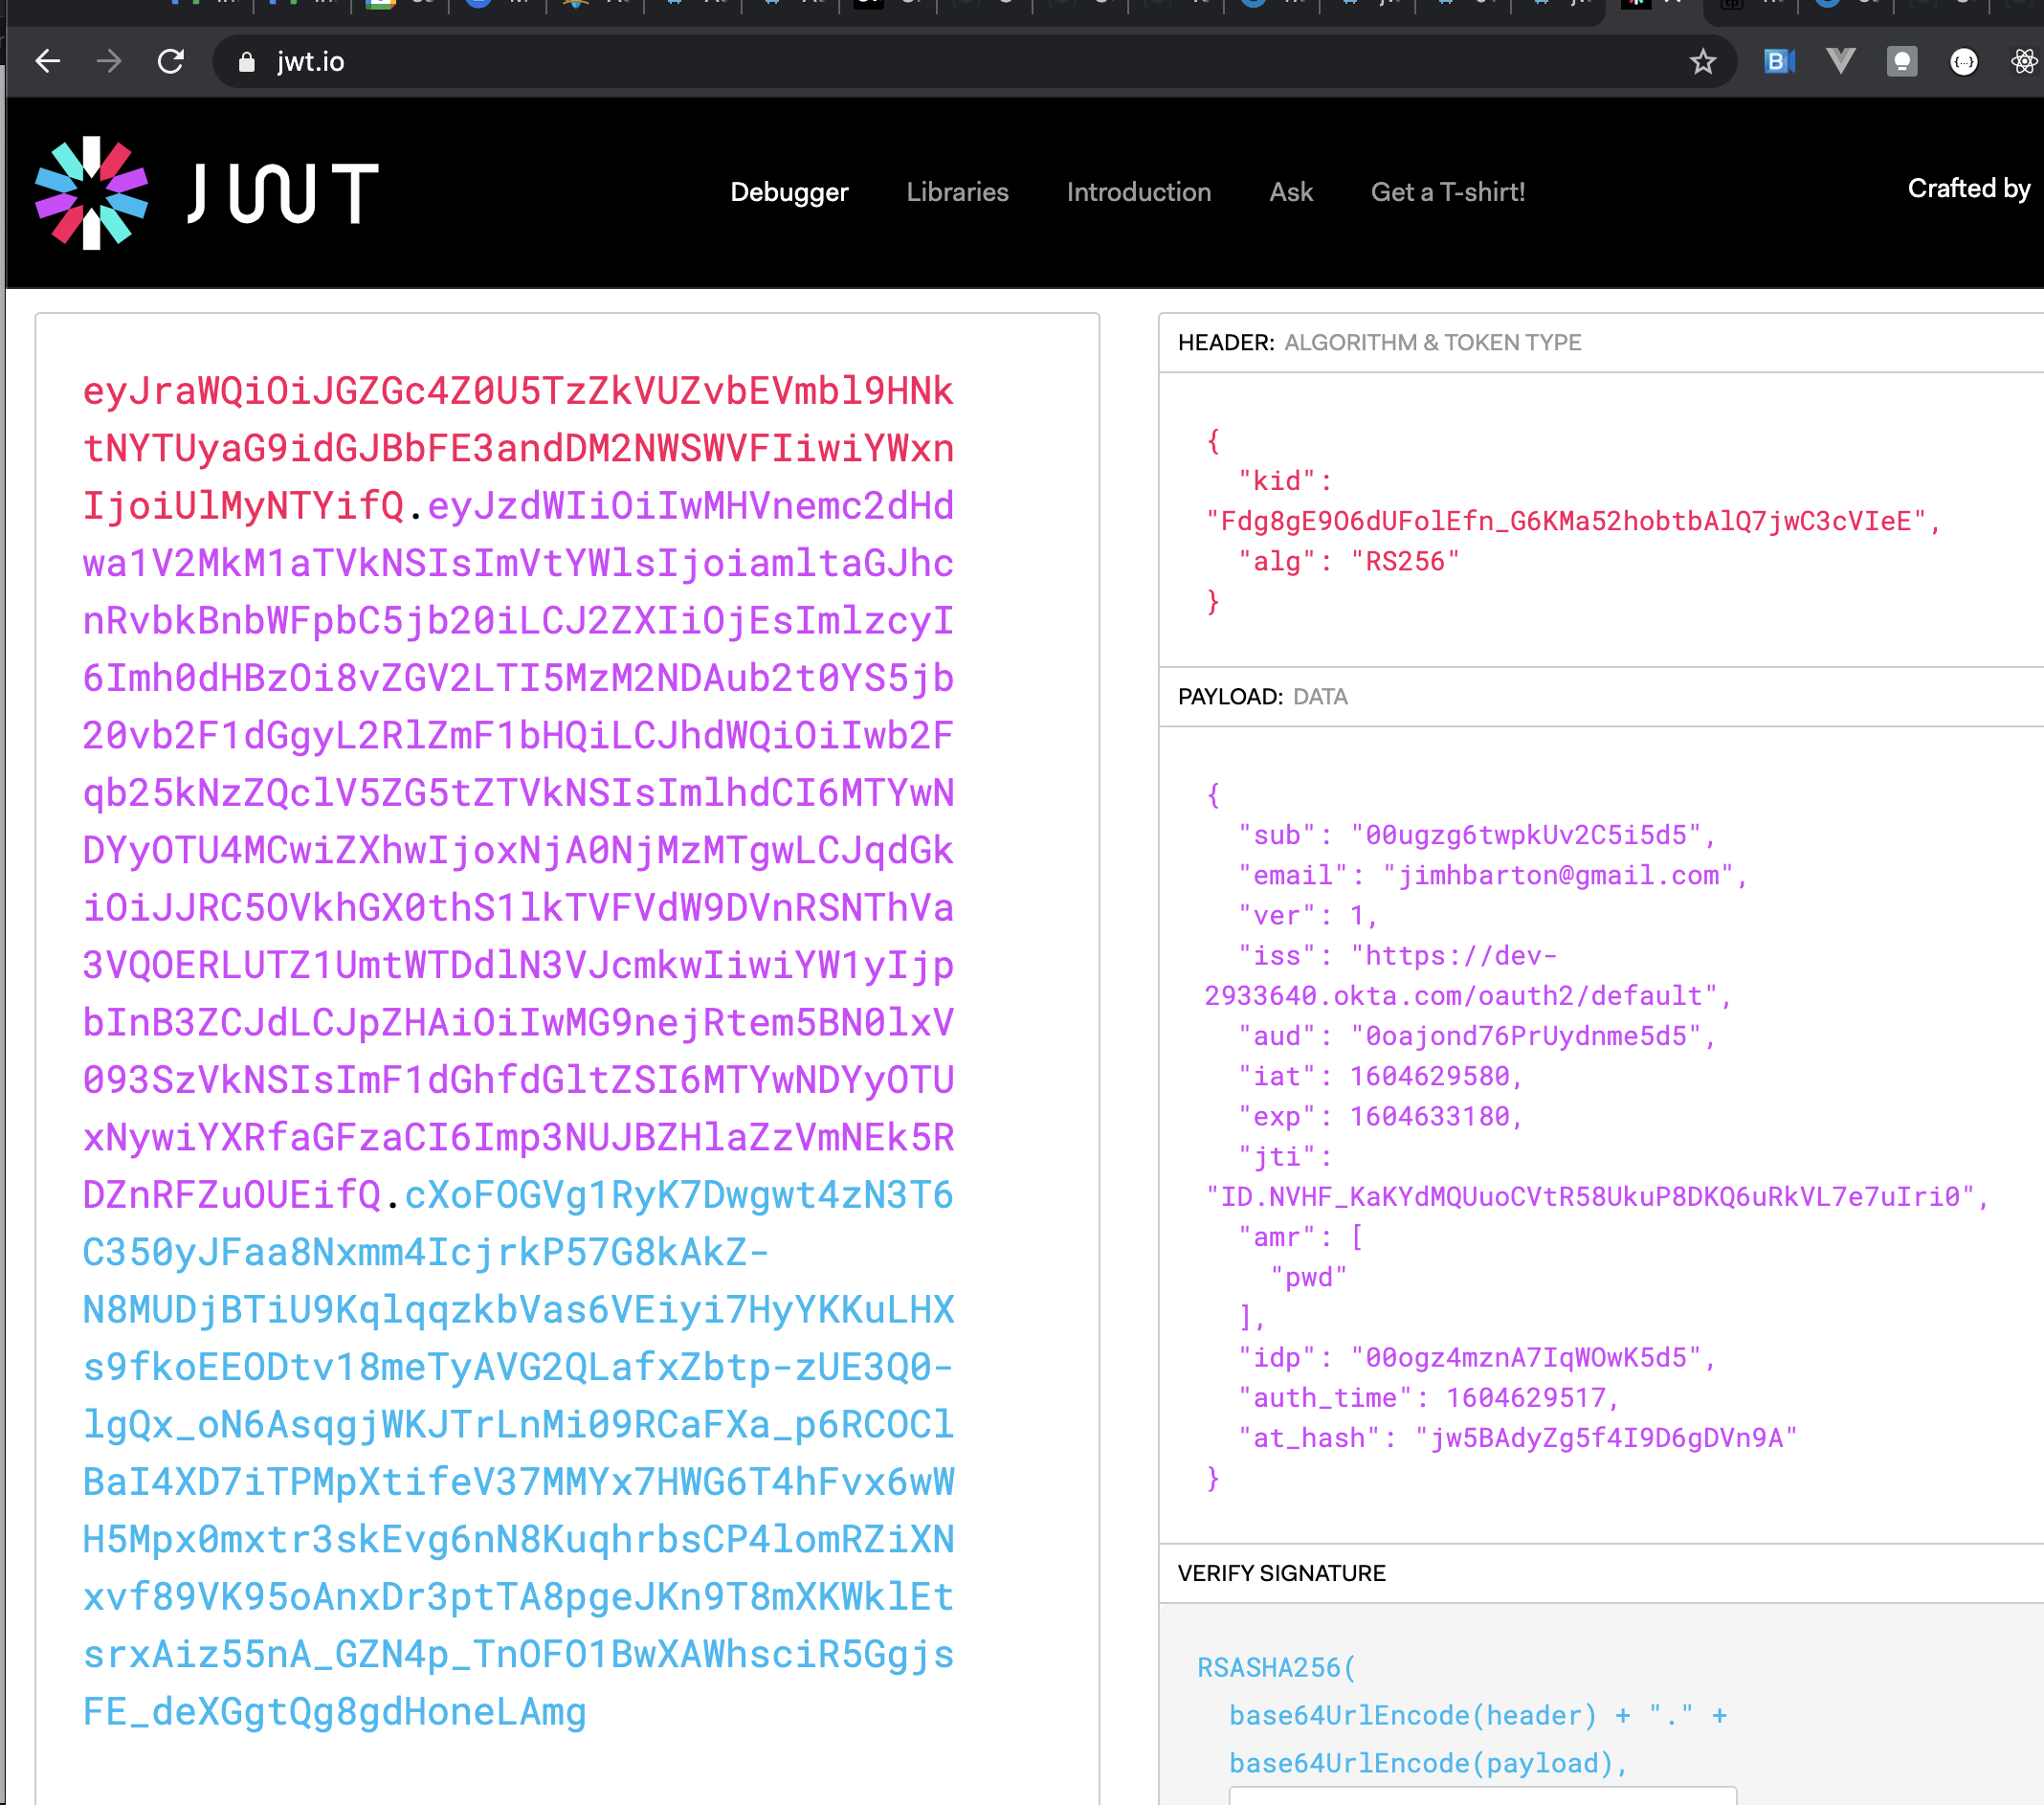
If we paste the contents of the Jwt header into the JWT decoder at jwt.io, we can see some of the JWT claims that are available for us to make routing and authorization decisions. In particular, note the email claim that we specified in the AuthConfig resource.
Convert JWT to Request Header
In this section, we will use JWKS (JSON Web Key Set) to transform the JWT we extracted from the Okta callback into a specific email header that can drive fine-grained authorization decisions. Okta publishes a read-only JWKS endpoint where public keys can be extracted that allow us to decode our JWT and then place its claims into request headers. Details about how Okta publishes its JWKS keys is available here.
First, we need to specify a Gloo Gateway Upstream that exposes the JWKS endpoint that Okta publishes for our development account. Use kubectl to apply this Upstream to our cluster.
apiVersion: gloo.solo.io/v1
kind: Upstream
metadata:
  name: okta-jwks
  namespace: gloo-system
spec:
  static:
    hosts:
      # This upstream identifies the host where Okta publishes the JWKS endpoint for my dev account
      # See https://dev-2933640-admin.okta.com/oauth2/default/.well-known/oauth-authorization-server
      - addr: dev-2933640.okta.com
        port: 443
Next, we will update our Virtual Service to use the JWKS upstream to decode the JWT and convert the email claim to a custom header x-solo-claim-email. Apply these changes using kubectl.
apiVersion: gateway.solo.io/v1
kind: VirtualService
metadata:
name: httpbin-okta-vs
namespace: gloo-system
spec:
sslConfig:
secretRef:
name: upstream-tls
namespace: gloo-system
virtualHost:
domains:
- 'glootest.com'
routes:
- matchers:
- prefix: /
routeAction:
single:
upstream:
name: default-httpbin-8000
namespace: gloo-system
options:
extauth:
configRef:
name: okta-oidc
namespace: gloo-system
stagedTransformations:
early:
requestTransforms:
- requestTransformation:
transformationTemplate:
extractors:
token:
header: 'cookie'
regex: '.*id_token=([^;]*).*'
subgroup: 1
headers:
jwt:
text: '{{ token }}'
headerManipulation:
requestHeadersToRemove:
- "cookie"
jwt:
providers:
okta:
issuer: https://dev-2933640.okta.com/oauth2/default
tokenSource:
headers:
- header: Jwt
claimsToHeaders:
- claim: email
header: x-solo-claim-email
jwks:
remote:
url: https://dev-2933640.okta.com/oauth2/default/v1/keys
upstreamRef:
name: okta-jwks
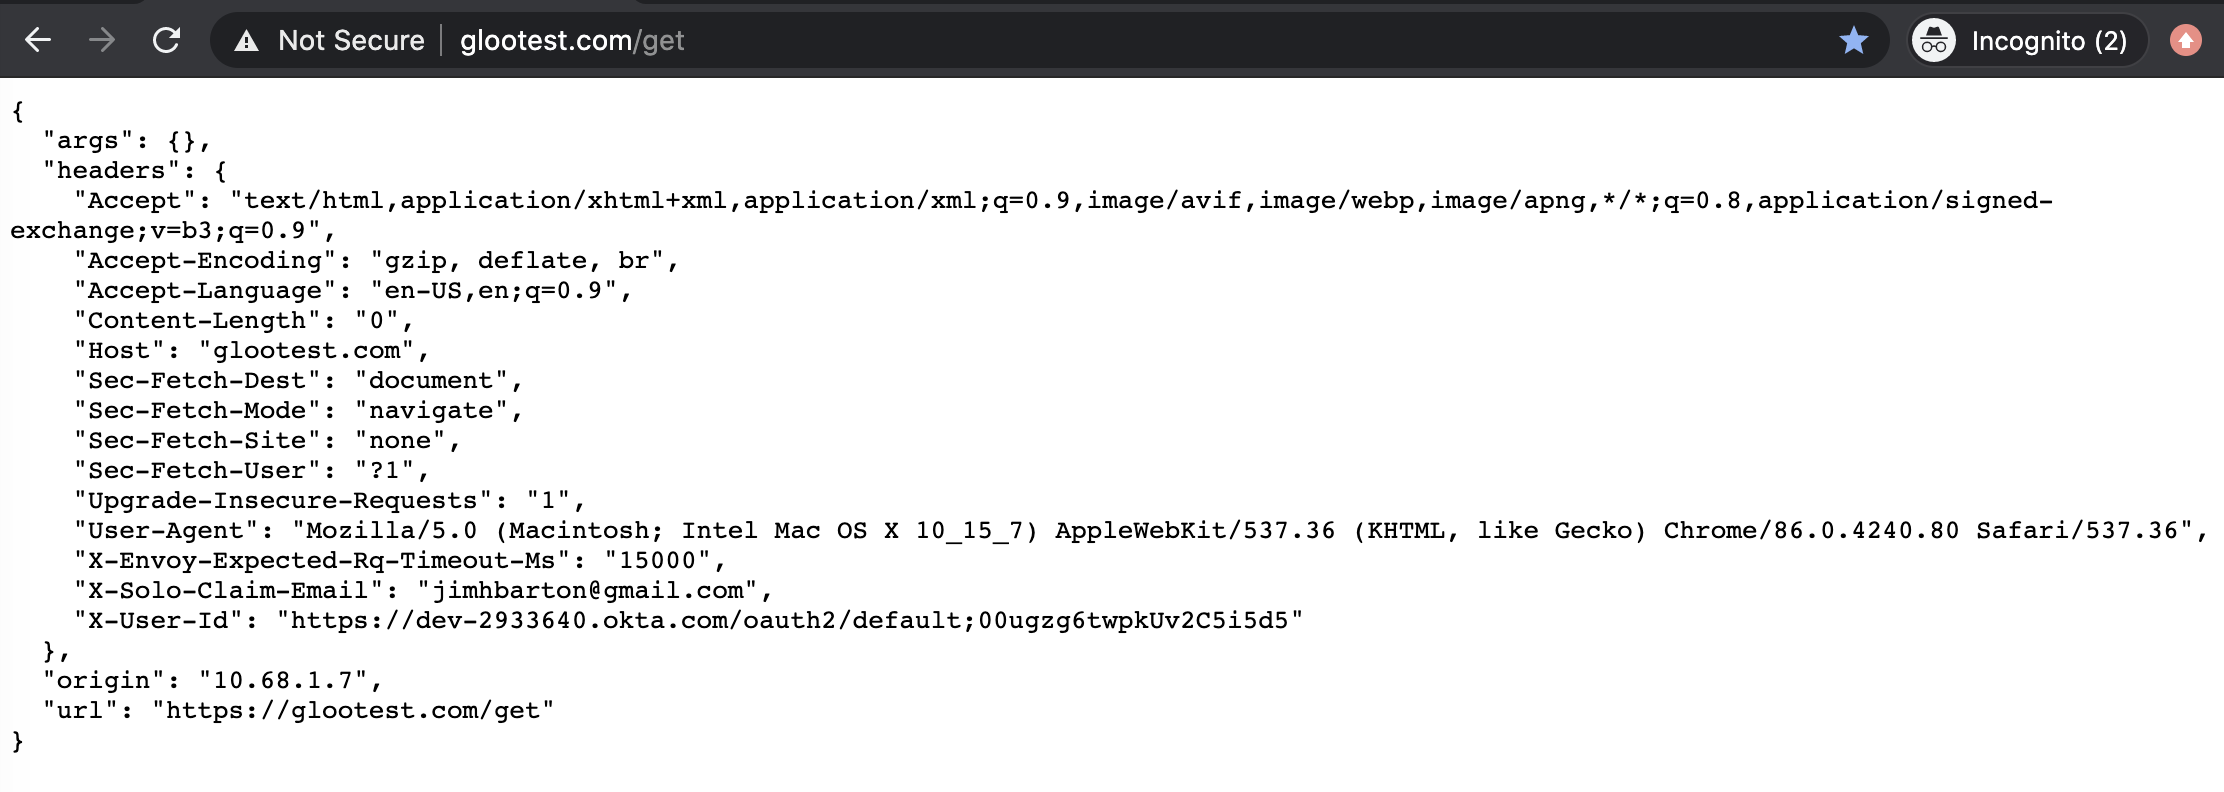
namespace: gloo-systemRefreshing the web page yields output like the following. Note in particular that the Jwt header is removed and has been replaced by the X-Solo-Claim-Email header, whose contents match the email claim in the JWT from the Okta callback.
Driving RBAC Decisions Using JWT Claims
In this section, we will use the email user identity extracted from the JWT to drive authorization decisions. Let’s apply it to a simple use case where we only want to allow the jimhbarton@gmail.com to have access to the httpbin /get endpoint but no others.
Apply the following change to your cluster using kubectl.
apiVersion: gateway.solo.io/v1
kind: VirtualService
metadata:
  name: httpbin-okta-vs
  namespace: gloo-system
spec:
  sslConfig:
    secretRef:
      name: upstream-tls
      namespace: gloo-system
  virtualHost:
    domains:
    - 'glootest.com'
    routes:
    - matchers:
      - prefix: /
      routeAction:
        single:
          upstream:
            name: default-httpbin-8000
            namespace: gloo-system
    options:
      extauth:
        configRef:
          name: okta-oidc
          namespace: gloo-system
      stagedTransformations:
        early:
          requestTransforms:
          - requestTransformation:
              transformationTemplate:
                extractors:
                  token:
                    header: 'cookie'
                    regex: '.*id_token=([^;]*).*'
                    subgroup: 1
                headers:
                  jwt:
                    text: '{{ token }}'
      headerManipulation:
        requestHeadersToRemove:
        - "cookie"
      jwt:
        providers:
          okta:
            issuer: https://dev-2933640.okta.com/oauth2/default
            tokenSource:
              headers:
              - header: Jwt
            claimsToHeaders:
            - claim: email
              header: x-solo-claim-email
            jwks:
              remote:
                url: https://dev-2933640.okta.com/oauth2/default/v1/keys
                upstreamRef:
                  name: okta-jwks
                  namespace: gloo-system
      rbac:
        policies:
          viewer:
            permissions:
              methods:
              - GET
              pathPrefix: /get
            principals:
            - jwtPrincipal:
                claims:
                  email: jimhbarton@gmail.com
If authenticated using the email in the rbac policy, the https://glootest.com/get endpoint will respond in the web browser exactly as before. However, authenticating as a different user or exercising a different endpoint will result in an access denied error like this.
Cache the JWT in Redis
Let’s briefly review where we are. The request flow that we have constructed so far does the following:
- responds to initial calls on the Gloo endpoint by forwarding the user to an Okta authentication dialog
- accepts a callback from Okta containing a JWT in a cookie header
- extracts and validates the token from the cookie
- extracts “interesting” claims from the JWT, like the end user’s email address
- adds new request headers based on those claims
- applies RBAC rules to determine if the request should be authorized based on those headers
While this approach is functional, some users will raise concerns about its security and scalability. From a security standpoint, many will balk at holding bearer token information in the web browser. They prefer the actual token to be stored on the server side with a simple pointer to it managed by the browser. In addition, for some users this approach doesn’t scale well to production deployments because a JWT with many claims can exceed cookie size thresholds enforced by web browsers.
For these reasons, Gloo offers a facility that allows users to cache the actual token in the Gloo Redis instance with only a handle stored in the browser.
To show this, we will expand our AuthConfig to use Redis to store our access token and simply hold a reference to it in a cookie named okta-session. Apply these changes to your cluster.
apiVersion: enterprise.gloo.solo.io/v1
kind: AuthConfig
metadata:
  name: okta-oidc
  namespace: gloo-system
spec:
  configs:
  - oauth2:
      oidcAuthorizationCode:
        appUrl: https://glootest.com
        callbackPath: /callback
        clientId: <insert-your-app-client-id-here>
        clientSecretRef:
          name: okta-client-secret
          namespace: gloo-system
        issuerUrl: https://dev-2933640.okta.com/oauth2/default
        scopes:
        - email
        session:
          failOnFetchFailure: true
          redis:
            cookieName: okta-session
            options:
              host: redis.gloo-system.svc.cluster.local:6379
Then we will move back to a simpler Virtual Service that will enable us to see how Gloo manages our token. Apply these changes to your cluster as well.
apiVersion: gateway.solo.io/v1
kind: VirtualService
metadata:
  name: httpbin-okta-vs
  namespace: gloo-system
spec:
  sslConfig:
    secretRef:
      name: upstream-tls
      namespace: gloo-system
  virtualHost:
    domains:
    - 'glootest.com'
    routes:
    - matchers:
      - prefix: /
      routeAction:
        single:
          upstream:
            name: default-httpbin-8000
            namespace: gloo-system
    options:
      extauth:
        configRef:
          name: okta-oidc
          namespace: gloo-system
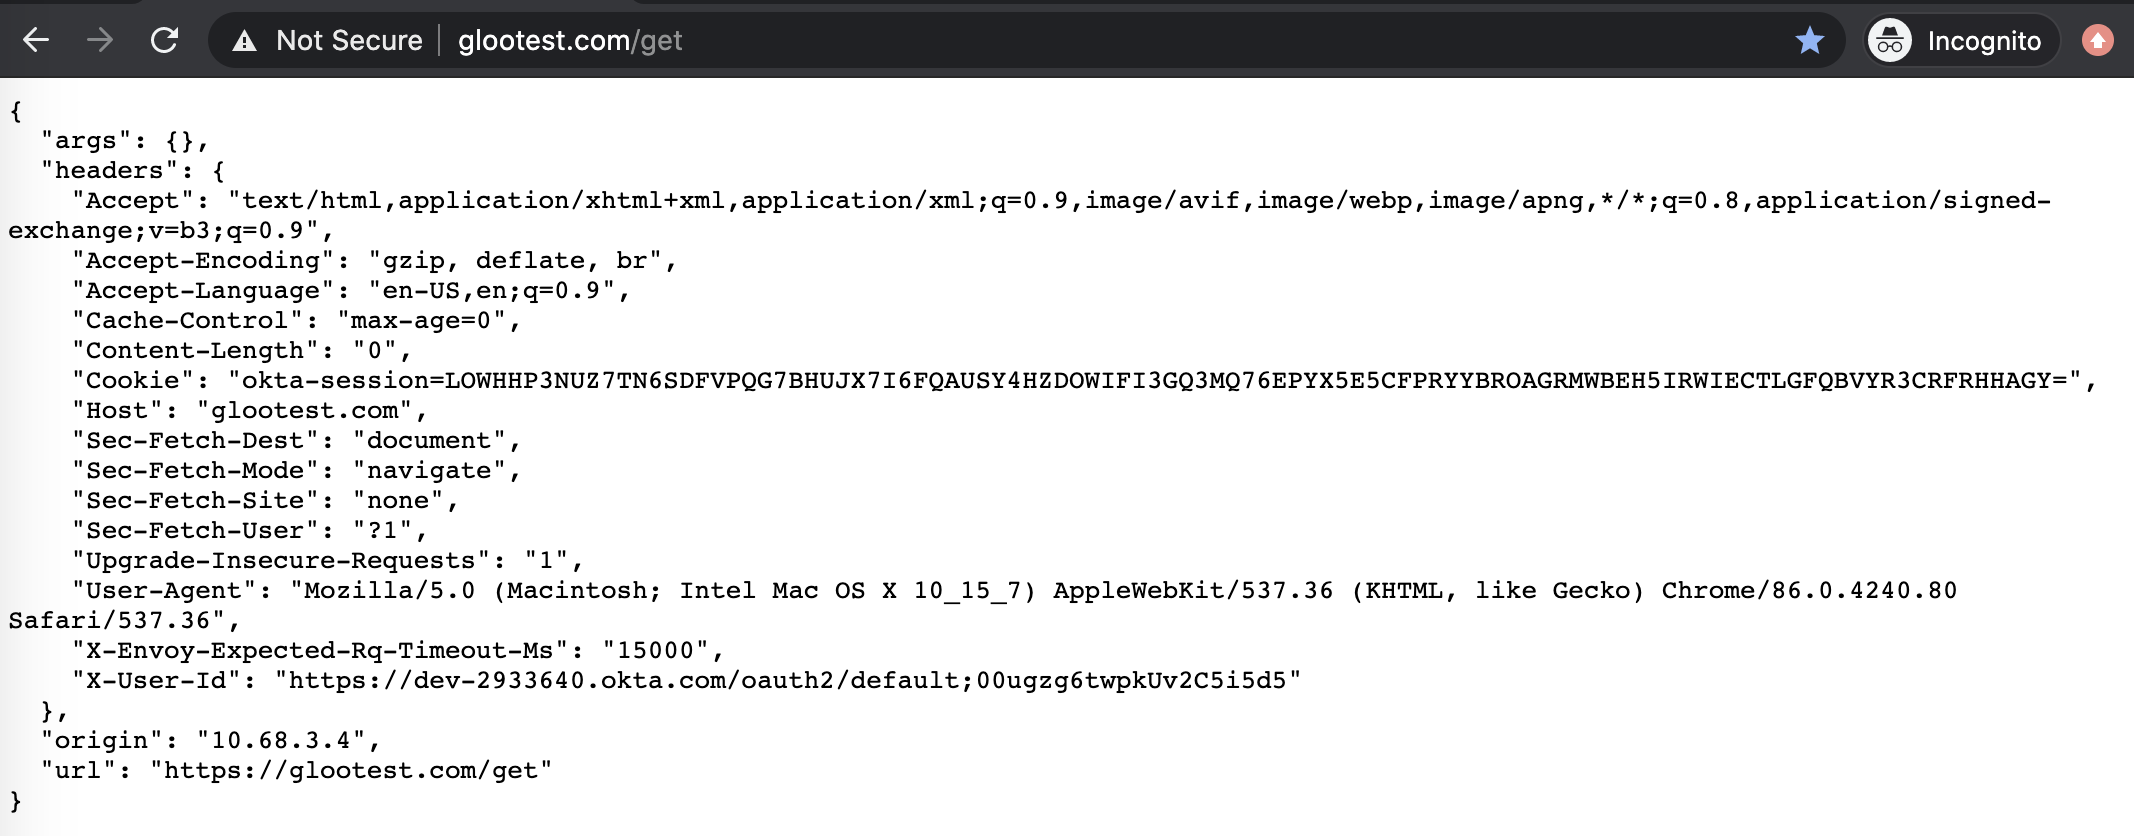
Refresh your web browser and note that the cookie now contains a single okta-session header as shown below. This session header is not the JWT itself, but a pointer to a Redis key that now securely holds the JWT.
Re-establish JWT header to drive RBAC decisions
Now we have secured our JWT in that our web browser no longer holds a cookie containing our security token. However, in doing this we have lost the ability to drive RBAC decisions based on claims inside the JWT.
We will restore that capability in this section by configuring Gloo to fetch the token from Redis into a request header, and then we will use that header to drive RBAC decisions as before.
First, we will extend our AuthConfig to have Gloo place the JWT in a request header.
apiVersion: enterprise.gloo.solo.io/v1
kind: AuthConfig
metadata:
  name: okta-oidc
  namespace: gloo-system
spec:
  configs:
  - oauth2:
      oidcAuthorizationCode:
        appUrl: https://glootest.com
        callbackPath: /callback
        clientId: <insert-your-app-client-id-here>
        clientSecretRef:
          name: okta-client-secret
          namespace: gloo-system
        issuerUrl: https://dev-2933640.okta.com/oauth2/default
        scopes:
        - email
        session:
          failOnFetchFailure: true
          redis:
            cookieName: okta-session
            options:
              host: redis.gloo-system.svc.cluster.local:6379
        headers:
          idTokenHeader: "jwt"
After applying that AuthConfig change, note that the Jwt header re-appears in the list of headers returned from httpbin.
Now we can restore our Virtual Service’s RBAC policies from the end of the previous session and confirm that they still work as before. But now we are doing in a more secure way that does not risk exceeding cookie size thresholds in the web browser.
apiVersion: gateway.solo.io/v1
kind: VirtualService
metadata:
  name: httpbin-okta-vs
  namespace: gloo-system
spec:
  sslConfig:
    secretRef:
      name: upstream-tls
      namespace: gloo-system
  virtualHost:
    domains:
    - 'glootest.com'
    routes:
    - matchers:
      - prefix: /
      routeAction:
        single:
          upstream:
            name: default-httpbin-8000
            namespace: gloo-system
    options:
      extauth:
        configRef:
          name: okta-oidc
          namespace: gloo-system
      headerManipulation:
        requestHeadersToRemove:
        - "cookie"
      jwt:
        providers:
          okta:
            issuer: https://dev-2933640.okta.com/oauth2/default
            tokenSource:
              headers:
              - header: Jwt
            claimsToHeaders:
            - claim: email
              header: x-solo-claim-email
            jwks:
              remote:
                url: https://dev-2933640.okta.com/oauth2/default/v1/keys
                upstreamRef:
                  name: okta-jwks
                  namespace: gloo-system
      rbac:
        policies:
          viewer:
            permissions:
              methods:
              - GET
              pathPrefix: /get
            principals:
            - jwtPrincipal:
                claims:
                  email: jimhbarton@gmail.com
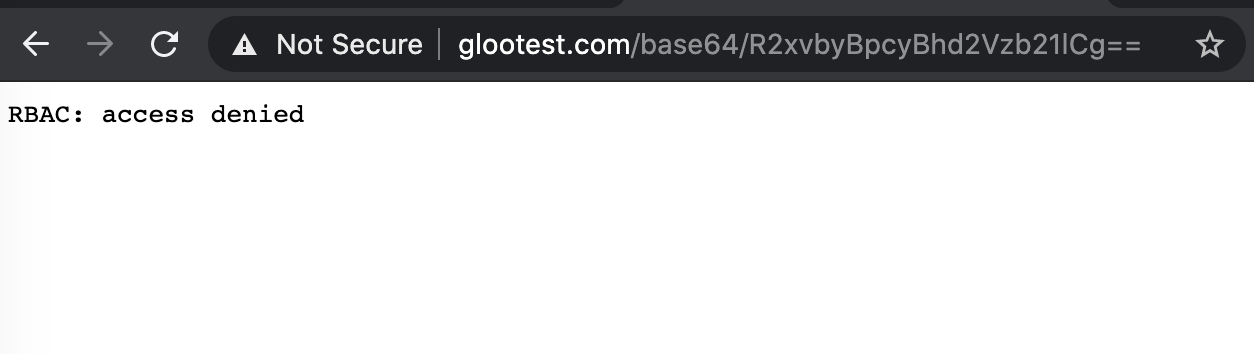
Now when you refresh the browser, you should see just the X-Solo-Claim-Email header, which was used by Gloo to authorize the request. Try a different endpoint, such as https://glootest.com/base64/R2xvbyBpcyBhd2Vzb21lCg==, and you will see the RBAC: access denied message.
Enable Logout Redirect to Remove Session Cookie
One final configuration option to consider is enabling Gloo to trigger removal of the Redis session token when the user’s application session ends. This is accomplished by configuring the Logout redirect URIs option on the Okta application to point to a URL that the Gloo AuthConfig is expecting. You specify this in the AuthConfig by providing a logoutPath: URI. One possibility is shown below.
apiVersion: enterprise.gloo.solo.io/v1
kind: AuthConfig
metadata:
  name: okta-oidc
  namespace: gloo-system
spec:
  configs:
  - oauth2:
      oidcAuthorizationCode:
        appUrl: https://glootest.com
        callbackPath: /callback
        clientId: <insert-your-app-client-id-here>
        clientSecretRef:
          name: okta-client-secret
          namespace: gloo-system
        issuerUrl: https://dev-2933640.okta.com/oauth2/default
        scopes:
        - email
        session:
          failOnFetchFailure: true
          redis:
            cookieName: okta-session
            options:
              host: redis.gloo-system.svc.cluster.local:6379
        headers:
          idTokenHeader: "jwt"
        logoutPath: /logout