Google Cloud Load Balancers
This document shows how to instantiate Google Cloud Load Balancers to complement Gloo Gateway.
Table of Contents
Introduction
You can use Gloo Gateway with a Google Cloud Platform (GCP) Load Balancer, to get get benefits such as failover across availability zones.
GCP provides these different types of Load Balancers:
-
Global or regional load balancing. Global load balancing means backend endpoints live in multiple regions. Regional load balancing means backend endpoints live in a single region.
-
External or Internal.
- External includes:
- HTTP(S) Load Balancing for HTTP or HTTPS traffic, TCP Proxy for TCP traffic for ports other than 80 and 8080, without SSL offload.
- SSL Proxy for SSL offload on ports other than 80 or 8080.
- Network Load Balancing for TCP/UDP traffic.
- Internal Load Balancing is a proxy-based (Envoy), regional Layer 7 load balancer that enables you to run and scale your services behind an internal IP address.
- External includes:
Google pushed load balancing out to the edge network on front-end servers, as opposed to using the traditional DNS-based approach. Thus, global load-balancing capacity can be behind a single Anycast virtual IPv4 or IPv6 address. This means you can deploy capacity in multiple regions without having to modify the DNS entries or add a new load balancer IP address for new regions.
Combining with Gloo Gateway
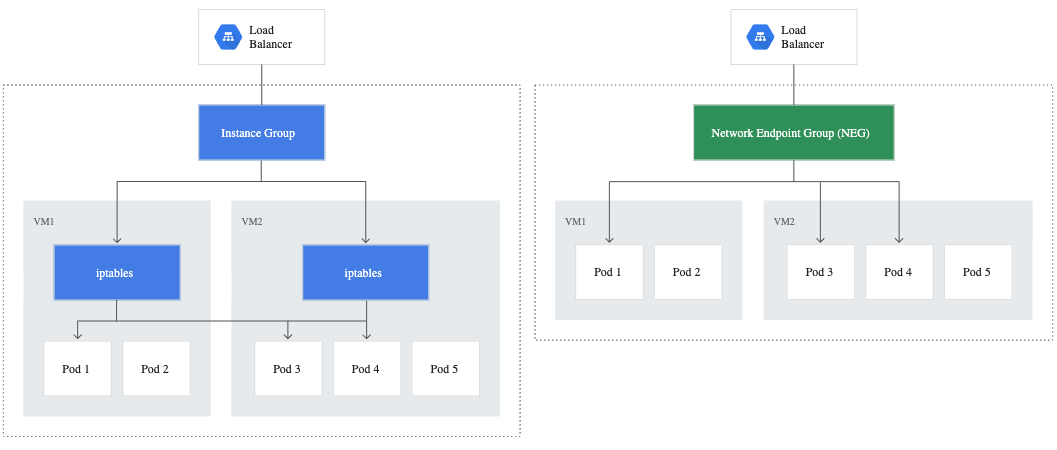
Standard load balancers still route the traffic to machine instances where iptables are used to route traffic to individual pods running on these machines. This introduces at least one additional network hop thereby introducing latency in the packet’s journey from load balancer to the pod.
Google introduced Cloud Native Load Balancing with a data model called Network Endpoint Group (NEG). Instead of routing to the machine and then relying on iptables to route to the pod, with NEGs the traffic goes straight to the pod.
This leads to decreased latency and an increase in throughput when compared to traffic routed with vanilla load balancers.
Prerequisites
To use container-native load balancing, you must create a cluster with alias IPs enabled. This cluster:
- Must run GKE version 1.16.4 or later.
- Must be a VPC-native cluster.
- Must have the HttpLoadBalancing add-on enabled.
Network Load Balancer
To connect a NLB, you do not need to configure a service with SSL enabled. However, in this article you will configure it to secure the communication.
Create a certificate:
openssl req -x509 -nodes -days 365 -newkey rsa:2048 \
   -keyout tls.key -out tls.crt -subj "/CN=*"
Then, the secret:
kubectl create secret tls upstream-tls --key tls.key \
   --cert tls.crt --namespace gloo-system
And the test application with its Virtual Service:
kubectl apply -f - << 'EOF'
apiVersion: v1
kind: ServiceAccount
metadata:
  name: httpbin
---
apiVersion: v1
kind: Service
metadata:
  name: httpbin
  labels:
    app: httpbin
spec:
  type: ClusterIP
  ports:
  - name: http
    port: 80
    targetPort: 80
  selector:
    app: httpbin
---
apiVersion: apps/v1
kind: Deployment
metadata:
  name: httpbin
spec:
  replicas: 1
  selector:
    matchLabels:
      app: httpbin
      version: v1
  template:
    metadata:
      labels:
        app: httpbin
        version: v1
    spec:
      serviceAccountName: httpbin
      containers:
      - image: docker.io/kennethreitz/httpbin
        imagePullPolicy: IfNotPresent
        name: httpbin
        ports:
        - containerPort: 80
---
apiVersion: gateway.solo.io/v1
kind: VirtualService
metadata:
  name: neg-demo
  namespace: gloo-system
spec:
# ---------------- SSL config ---------------------------
  sslConfig:
    secretRef:
      name: upstream-tls
      namespace: gloo-system
# -------------------------------------------------------
  virtualHost:
    domains:
      - 'my-gloo-gateway.com'  # Notice the hostname!!
    routes:
      - matchers:
          - prefix: /
        routeAction:
            single:
              upstream:
                name: default-httpbin-80
                namespace: gloo-system
EOF
Test that the demo application is reachable. You should see the host name:
kubectl -n gloo-system port-forward svc/gateway-proxy 8443:443

curl -k -s https://localhost:8443/get -H "Host: my-gloo-gateway.com"
Upgrade your Gloo Gateway installation with the following Helm values.yaml file. This example creates 3 replicas for the default gateway proxy and adds specific GCP annotations.
[...]
gloo:
  [...]
  gatewayProxies:
    [...]
    gatewayProxy:
      kind:
        deployment:
          replicas: 3 # You deploy three replicas of the proxy
      service:
        type: ClusterIP
        extraAnnotations:
          cloud.google.com/neg: '{ "exposed_ports":{ "443":{"name": "my-gloo-gateway-nlb"} } }'
[...]
While this example uses a ClusterIP service, all five types of Services support standalone NEGs. Google recommends the default type, ClusterIP.
With that configuration you can see one resource automatically created:
kubectl get svcneg -A
And you will see:
NAMESPACE     NAME                                       AGE
gloo-system   my-gloo-gateway-nlb                          1m
You can kubectl describe the resources to see the status.
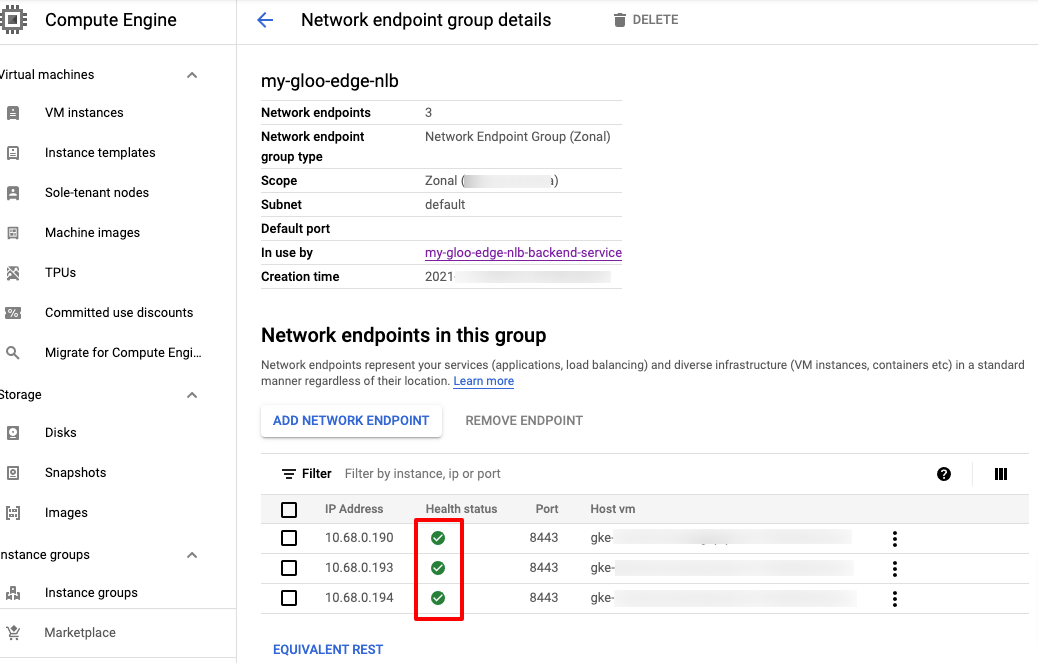
In the Google Cloud console, you will see the new NEG.

Since you have deployed three replicas, you can see there are 3 network endpoints.
Configuration in GCP for NLB
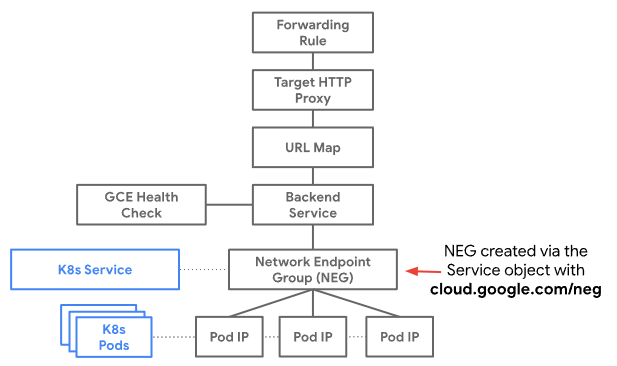
When you deploy a Kubernetes Service type LoadBalancer on GKE, automatically a Load Balancer is provisioned. However, in this article you will deploy the resources to connect a to NEG.
In the diagram you can see the set of resources which are required and you will create in the following steps.
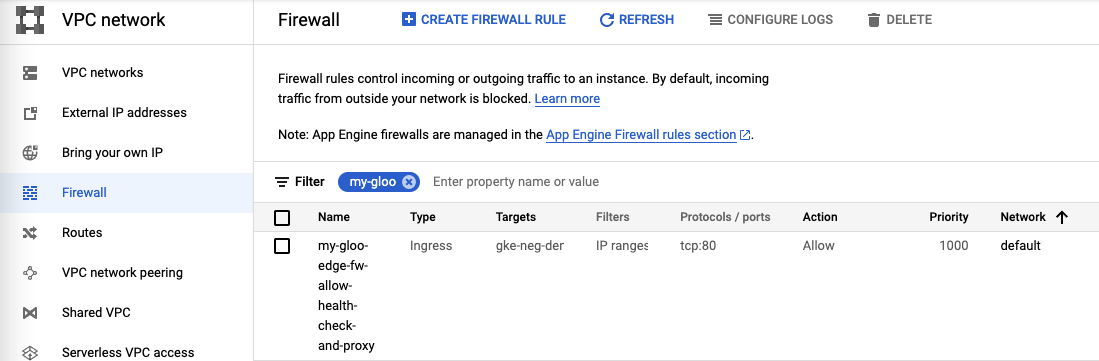
You need to configure a firewall rule to allow to allow communication between the Load Balancer and the pods in the cluster:
gcloud compute firewall-rules create my-gloo-gateway-nlb-fw-allow-health-check-and-proxy \
   --action=allow \
   --direction=ingress \
   --source-ranges=0.0.0.0/0 \
   --rules=tcp:8443 \ # This is the pods port
   --target-tags <my-target-tag>
Notice that you are allowing only port 8443 which is the port for gloo-gateway https connections.
If you did not create custom network tags for your nodes, GKE automatically generates tags for you. You can look up these generated tags by running the following command:
gcloud compute firewall-rules list --filter="name~gke-$CLUSTER_NAME-[0-9a-z]*" --format="value(targetTags[0])"
In the Google Console, you can find the resource at VPC Network -> Firewall. You can filter by the name.
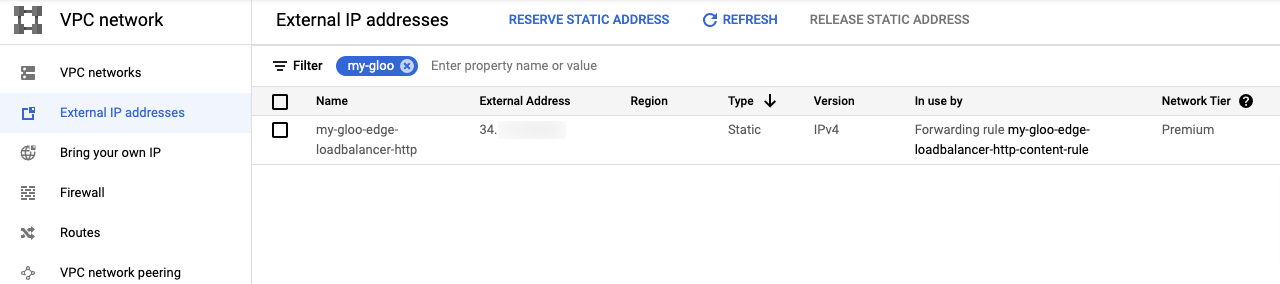
You need an address for the Load Balancer:
gcloud compute addresses create my-gloo-gateway-loadbalancer-address-nlb \
    --global
In the Google Console, you can find the resource at VPC Network -> External IP Addresses. You can filter by the name.
A health check:
gcloud compute health-checks create tcp my-gloo-gateway-nlb-health-check \
    --global \
    --port 8443 # This is the port for the pod. In the official documentation it might be wrong
Notice that you are checking port 8443. It is important that you have configured the firewall rules according to the configuration you have applied here.
In the Google Console, you can find the resource at Compute Engine -> Health checks. You can filter by the name.

A backend service:
gcloud compute backend-services create my-gloo-gateway-nlb-backend-service \
    --protocol=TCP \
    --health-checks my-gloo-gateway-nlb-health-check \
    --global
In the Google Console, you can find the resource at Network Services -> Load Balancing -> Backends tab. You can filter by the name.

A target proxy:
gcloud compute target-tcp-proxies create my-gloo-gateway-nlb-target-proxy \
    --backend-service=my-gloo-gateway-nlb-backend-service \
    --proxy-header PROXY_V1
Notice that there are other objects for HTTP and HTTPS called target-http-proxies and target-https-proxies.
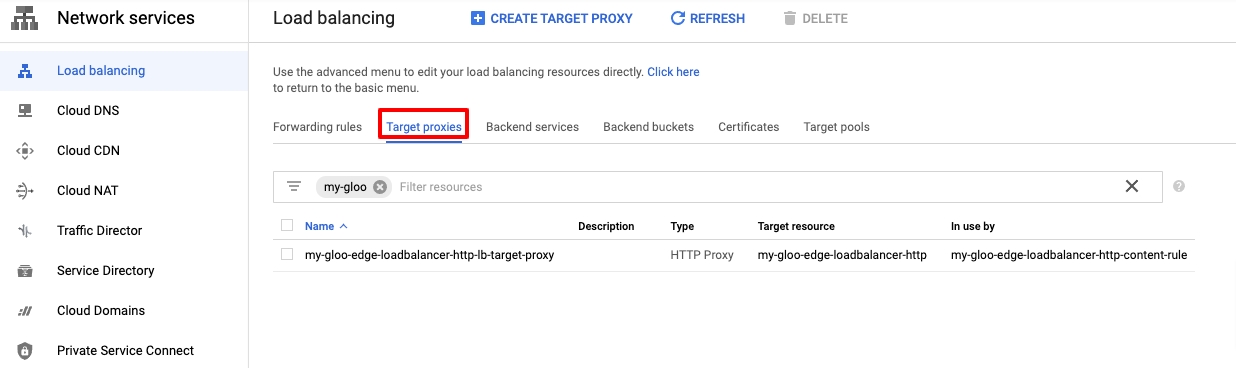
You can find the resource enabling the Advanced menu within the Network Services -> Load Balancing.
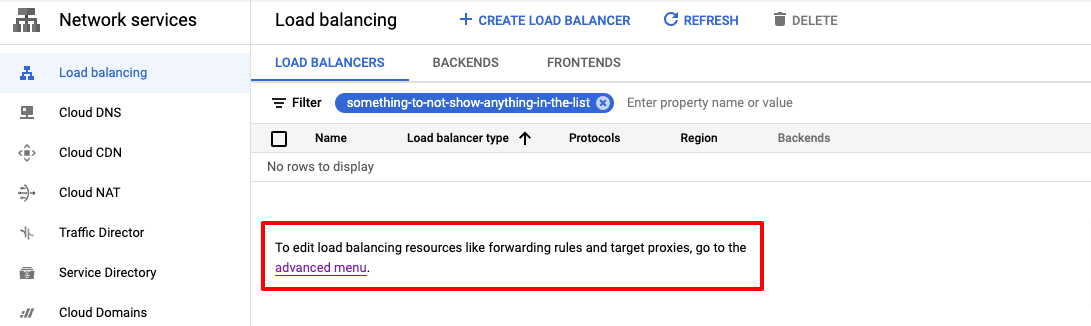
And then the Target Proxies tab.
A forwarding-rule:
gcloud compute forwarding-rules create my-gloo-gateway-nlb-content-rule \
    --address=my-gloo-gateway-loadbalancer-address-nlb \
    --global \
    --target-tcp-proxy my-gloo-gateway-nlb-target-proxy \
    --ports=443
In the Google Console, you can find the resource as part of the Advanced Menu at Network Services -> Load Balancing -> Frontends tab. You can filter by the name.

And you need to attach the NEG to the backend service:
gcloud compute backend-services add-backend my-gloo-gateway-nlb-backend-service \
    --network-endpoint-group=my-gloo-gateway-nlb \
    --balancing-mode CONNECTION \
    --max-connections-per-endpoint 5 \
    --network-endpoint-group-zone <my-cluster-zone> \
    --global
Where <my-cluster-zone> is the zone where the cluster has been deployed.
After adding the Backend Service to the NEG, you will see the Health Check becoming green:
Finally, let’s test the connectivity through the Load Balancer:
APP_IP=$(gcloud compute addresses describe my-gloo-gateway-loadbalancer-address-nlb --global --format=json | jq -r '.address')

curl -k https://${APP_IP}/get -H "Host: my-gloo-gateway.com"
The application should be accessible through the Load Balancer.
HTTPS Load Balancer
To connect a HTTPS Load Balancer, first, you will configure a Gloo Gateway Virtual Service.
kubectl apply -f - << 'EOF'
apiVersion: v1
kind: ServiceAccount
metadata:
  name: httpbin
---
apiVersion: v1
kind: Service
metadata:
  name: httpbin
  labels:
    app: httpbin
spec:
  type: ClusterIP
  ports:
  - name: http
    port: 80
    targetPort: 80
  selector:
    app: httpbin
---
apiVersion: apps/v1
kind: Deployment
metadata:
  name: httpbin
spec:
  replicas: 1
  selector:
    matchLabels:
      app: httpbin
      version: v1
  template:
    metadata:
      labels:
        app: httpbin
        version: v1
    spec:
      serviceAccountName: httpbin
      containers:
      - image: docker.io/kennethreitz/httpbin
        imagePullPolicy: IfNotPresent
        name: httpbin
        ports:
        - containerPort: 80
---
apiVersion: gateway.solo.io/v1
kind: VirtualService
metadata:
  name: neg-demo
  namespace: gloo-system
spec:
  virtualHost:
    domains:
      - 'my-gloo-gateway.com'  # Notice the hostname!!
    routes:
      - matchers:
          - prefix: /
        routeAction:
            single:
              upstream:
                name: default-httpbin-80
                namespace: gloo-system
EOF
Test that the demo application is reachable. You should see the host name:
kubectl -n gloo-system port-forward svc/gateway-proxy 8080:80

curl -k -s http://localhost:8080/get -H "Host: my-gloo-gateway.com"
Upgrade your Gloo Gateway installation with the following Helm values.yaml file. This example creates 3 replicas for the default gateway proxy and adds specific GCP annotations.
[...]
gloo:
  [...]
  gatewayProxies:
    [...]
    gatewayProxy:
      kind:
        deployment:
          replicas: 3 # You deploy three replicas of the proxy
      service:
        type: ClusterIP
        extraAnnotations:
          cloud.google.com/neg: '{ "exposed_ports":{ "80":{"name": "my-gloo-gateway-https"} } }'
[...]
While this example uses a ClusterIP service, all five types of Services support standalone NEGs. Google recommends the default type, ClusterIP.
With that configuration you can see one resource automatically created:
kubectl get svcneg -A
And you will see:
NAMESPACE     NAME                                       AGE
gloo-system   my-gloo-gateway-https                          1m
You can kubectl describe the resources to see the status.
And, in the google cloud console, you will see the new NEG.
Since you have deployed three replicas, you can see there are 3 network endpoints.
Configuration in GCP for HTTPS Load Balancer
When you deploy a Kubernetes Service type LoadBalancer on GKE, automatically a Load Balancer is provisioned. However, in this article you will deploy the resources to connect to a NEG.
In the diagram you can see the set of resources which are required and you will create in the following steps.
You need to configure a firewall rule to allow to allow communication between the Load Balancer and the pods in the cluster:
gcloud compute firewall-rules create my-gloo-gateway-https-fw-allow-health-check-and-proxy \
   --action=allow \
   --direction=ingress \
   --source-ranges=0.0.0.0/0 \
   --rules=tcp:8080 \ # This is the pods port
   --target-tags <my-target-tag>
Notice that you are allowing only port 8080 which is the port for gloo-gateway http connections.
If you did not create custom network tags for your nodes, GKE automatically generates tags for you. You can look up these generated tags by running the following command:
gcloud compute firewall-rules list --filter="name~gke-$CLUSTER_NAME-[0-9a-z]*" --format="value(targetTags[0])"
In the Google Console, you can find the resource at VPC Network -> Firewall. You can filter by the name.
You need an address for the Load Balancer:
gcloud compute addresses create my-gloo-gateway-loadbalancer-address-https \
    --global
In the Google Console, you can find the resource at VPC Network -> External IP Addresses. You can filter by the name.
A health check:
gcloud compute health-checks create tcp my-gloo-gateway-https-health-check \
    --global \
    --port 8080 # This is the port for the pod. In the official documentation it might be wrong
Notice that you are checking port 8080. It is important that you have configured the firewall rules according to the configuration you have applied here.
In the Google Console, you can find the resource at Compute Engine -> Health checks. You can filter by the name.
A backend service:
gcloud compute backend-services create my-gloo-gateway-https-backend-service \
    --protocol=HTTP \
    --health-checks my-gloo-gateway-https-health-check \
    --global
In the Google Console, you can find the resource at Network Services -> Load Balancing -> Backends tab. You can filter by the name.
A URL-map:
gcloud compute url-maps create my-gloo-gateway-https-url-map \
    --default-service my-gloo-gateway-https-backend-service \
    --global
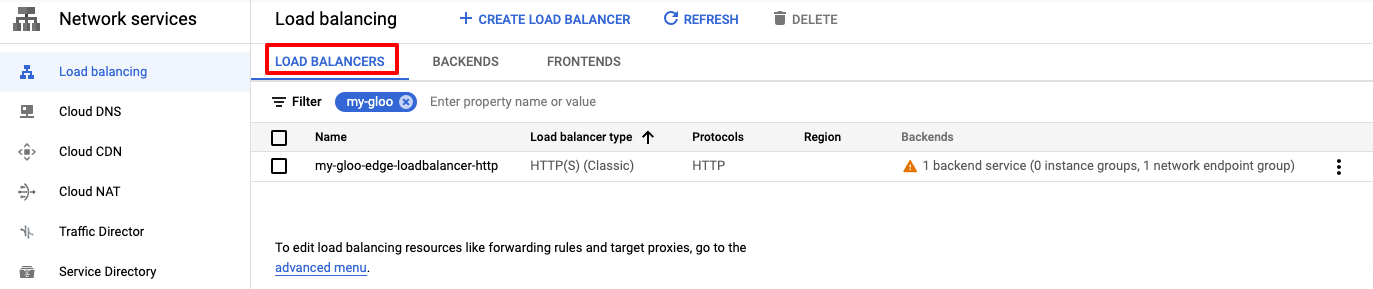
In the Google Console, you can find the resource at Network Services -> Load Balancing -> Load Balancers tab. You can filter by the name.
Create a self-signed certificate and a ssl-certificate:
openssl genrsa -out ca.key 2048
openssl req -x509 -new -nodes -key ca.key -days 100000 -out ca.crt -subj "/CN=*"
gcloud compute ssl-certificates create my-gloo-gateway-https-certificate \
    --certificate=ca.crt \
    --private-key=ca.key \
    --global
A target proxy:
gcloud compute target-https-proxies create my-gloo-gateway-https-target-proxy \
    --url-map=my-gloo-gateway-https-url-map \
    --ssl-certificates=my-gloo-gateway-https-certificate \
    --global
Notice that there are other objects for HTTP and TCP called target-http-proxies and target-tcp-proxies.
You can find the resource at Network Services -> Load Balancing -> Target Proxies tab. You can filter by the name.
A forwarding-rule:
gcloud compute forwarding-rules create my-gloo-gateway-https-content-rule \
    --address=my-gloo-gateway-loadbalancer-address-https \
    --global \
    --target-https-proxy my-gloo-gateway-https-target-proxy \
    --ports=443
In the Google Console, you can find the resource at Network Services -> Load Balancing -> Frontends tab. You can filter by the name.
And you need to attach the NEG to the backend service:
gcloud compute backend-services add-backend my-gloo-gateway-https-backend-service \
    --network-endpoint-group=my-gloo-gateway-https \
    --balancing-mode RATE \
    --max-rate-per-endpoint 5 \
    --network-endpoint-group-zone <my-cluster-zone> \
    --global
Where <my-cluster-zone> is the zone where the cluster has been deployed.
Finally, let’s test the connectivity through the Load Balancer:
APP_IP=$(gcloud compute addresses describe my-gloo-gateway-loadbalancer-address-https --global --format=json | jq -r '.address')

curl -k "https://${APP_IP2}/get" -H "Host: my-gloo-gateway.com"
The application should be accessible through the Load Balancer.
Preserve Client IP Address
- To preserve the Client IP Address, update your gateway component (
gateway-proxy-sslif you installed the system with default values) in your Gloo Gateway configuration to include the settings.
[...]
gloo:
  [...]
  gatewayProxies:
    [...]
    gatewayProxy:
      gatewaySettings:
        useProxyProto: false
        # Comment out this section about the default gateway-proxy, because you are using the SSL proxy instead.
        #customHttpGateway:
        #  options:
        #    httpConnectionManagerSettings:
        #      skipXffAppend: false
        #      useRemoteAddress: true
        #      xffNumTrustedHops: 2
        customHttpsGateway: # Include this section to configure the default gateway-proxy-ssl.
          options:
            httpConnectionManagerSettings:
              skipXffAppend: false
              useRemoteAddress: true
              xffNumTrustedHops: 2
Notice the xffNumTrustedHops: 2. GCP will append additional IPs to xff. Those are <global forwarding rule external IP> and <proxy running in GCP>.
The number of hops is required in order to obtain your own actual client IP.
- Try to reach the application through a TLS connection.
APP_IP=$(gcloud compute addresses describe my-gloo-gateway-loadbalancer-address-https --global --format=json | jq -r '.address')

curl -k "https://${APP_IP2}/get" -H "Host: my-gloo-gateway.com"
- In the response, notice that the
X-Envoy-External-Addressattribute is your own, preserved IP address.
{
  "args": {},
  "headers": {
    "Accept": "*/*",
    "Host": "?.?.?.?",
    "User-Agent": "curl/7.71.1",
    "X-Cloud-Trace-Context": "41592735775f098300927fcb246??????/162040?????????",
    "X-Envoy-Expected-Rq-Timeout-Ms": "15000",
    "X-Envoy-External-Address": "xxx.xxx.xxx.xxx"
  },
  "origin": "xxx.xxx.xxx.xxx, y.y.y.y, z.z.z.z",
  "url": "https://?.?.?.?/get"
}