API Products with Custom Route Tables
Use a Custom Route Table to supply non-standard routing config for a version of a Portal API Product.
When you use Gloo Portal with Gloo Edge Enterprise, Gloo Portal generates Route Tables deterministically for each API Product version, as described in the Routing overview. However, you cannot natively configure routing behavior via the API Product resource.
In order to configure routing for API Product versions in non-standard ways, create a Custom Route Table that handles all of the routes required by the API Product for each version. For example, you might want to create routing rules based on matching headers for blue-green testing of different versions of your API Product.
Pre-requisites
- Install Gloo Edge Enterprise version 1.8.0 or later in a Kubernetes cluster.
- Install Gloo Portal version 1.4.0-beta1 or later in the same cluster.
- Follow the Create an API Product to set up an Environment with an API Product.
- Optional: In order to demo this feature in the Portal UI, also follow the Create a Portal guide to set up a Portal, and the Users and Groups guide to set up a user with access to the Environment.
Create a RouteTable
You will need to define your custom routing configuration in a RouteTable custom resource. See the “Delegating with Route Tables” guide in Gloo Edge's docs for more information about Route Tables and their use.
The Route Table will need to have routes to handle all operations in the API Product Version, so it will be useful to start by copying the generated Route Table.
-
Write the configuration of the generated Route Table to a new file.
kubectl get routetables.gateway.solo.io dev.petstore-product.v1 -oyaml > custom-route-table.yaml -
Open the file, remove all metadata other than
nameandnamespace, and give the Route Table a differentname. -
To demonstrate the ability to add custom routing, add a route that includes query param matching. We'll add a route that adds the
Content-Language: Englishheader response header when there is a request that includesenglishas a value for thetagsquery param. We will leave all existing routes to ensure that all operations are still handled.The file should look like the following:
apiVersion: gateway.solo.io/v1
kind: RouteTable
metadata:
  name: custom-route-table
  namespace: default
spec:
  routes:
  - name: findPetsWithParamMatch
    matchers:
    - exact: /api/pets
      methods:
      - GET
      - OPTIONS
      queryParameters:
      - name: tags
        value: .*[Ee]nglish.*
        regex: true
    routeAction:
      multi:
        destinations:
        - destination:
            upstream:
              name: default-petstore-8080
              namespace: gloo-portal
          weight: 1
          options:
            headerManipulation:
              responseHeadersToAdd:
              - header:
                  key: Content-Language
                  value: English
    - exact: /api/pets
      methods:
      - GET
      - OPTIONS
    name: petstore-product.default.petstore-api-spec.default.findPets
...
The RouteTable generated by Portal contains a transformation for each Route which adds API Product and Environment names to dynamic metadata. If you are relying on these fields to be in dynamic metadata, ensure that such a transformation is included on relevant routes in your custom RouteTable.Using DirectResponseActions in CustomRouteTables is not recommended. The VirtualServices generated by Portal for Environments contain CORS settings, to support Portal UI functionality. However Gloo Edge does not support DirectResponseActions with CORS. If a DirectResponseAction is used, the API will function as expected, but the Portal UI might not function correctly. -
Create the custom Route Table in your cluster.
kubectl apply -f custom-route-table.yaml
Add the Route Table to the API Product
-
In the
v1version of thepetstore-productAPI Product, add the Route Table in acustomRouteTablesection.cat << EOF | kubectl apply -f - apiVersion: portal.gloo.solo.io/v1beta1 kind: APIProduct metadata: name: petstore-product namespace: default labels: app: petstore spec: displayInfo: description: Petstore Product title: Petstore Product versions: - name: v1 apis: - apiDoc: name: petstore-schema namespace: default customRouteTable: name: custom-route-table namespace: default gatewayConfig: route: inlineRoute: backends: - upstream: name: default-petstore-8080 namespace: gloo-system tags: stable: {} EOF -
Verify that the API Product's Status is
Succeededand contains thecustomRouteTablereference:kubectl get -n default apiproducts petstore-product -oyamlExample output:
apiVersion: portal.gloo.solo.io/v1beta1
kind: APIProduct
metadata:
...
  name: petstore-product
  namespace: default
...
spec:
...
status:
...
  state: Succeeded
  versionInfo:
    test-version:
      apiType: OPEN_API
      customRouteTable:
        name: custom-route-table
        namespace: default
Try it out
-
We can call the
/api/petsendpoint as we did in the Getting Started guide, but this time in verbose mode. We should get the following response:curl "http://${INGRESS_HOST}:${INGRESS_PORT}/api/pets" -v -H "Host: api.example.com"Output:
* Trying 127.0.0.1... * TCP_NODELAY set * Connected to 127.0.0.1 (127.0.0.1) port 32000 (#0) > GET /api/pets HTTP/1.1 > Host: api.example.com > User-Agent: curl/7.64.1 > Accept: */* > < HTTP/1.1 200 OK < content-type: text/html < date: Wed, 10 May 2023 20:31:41 GMT < content-length: 86 < x-envoy-upstream-service-time: 1 < server: envoy < [{"id":1,"name":"Dog","status":"available"},{"id":2,"name":"Cat","status":"pending"}] * Connection #0 to host 127.0.0.1 left intact * Closing connection 0 -
Now we can call the
/api/petsendpoint, using query parameter matching on the route we added to the Route Table. We should get theContent-Languageheader on the response:curl "http://${INGRESS_HOST}:${INGRESS_PORT}/api/pets?tags=english" -v -H "Host: api.example.com"Output:
*   Trying 127.0.0.1...
* TCP_NODELAY set
* Connected to 127.0.0.1 (127.0.0.1) port 32000 (#0)
> GET /api/pets HTTP/1.1
> Host: api.example.com
> User-Agent: curl/7.64.1
> Accept: */*
> x-custom-header: foo
>
< HTTP/1.1 200 OK
< content-type: text/html
< date: Wed, 10 May 2023 20:31:51 GMT
< content-length: 86
< x-envoy-upstream-service-time: 0
< content-language: English
< server: envoy
<
[{"id":1,"name":"Dog","status":"available"},{"id":2,"name":"Cat","status":"pending"}]
* Connection #0 to host 127.0.0.1 left intact
* Closing connection 0
Try it out in Portal UI
-
Navigate to the Petstore Product page and authenticate using an API Key. If you have just completed the Users and Groups guide you should already be there.
-
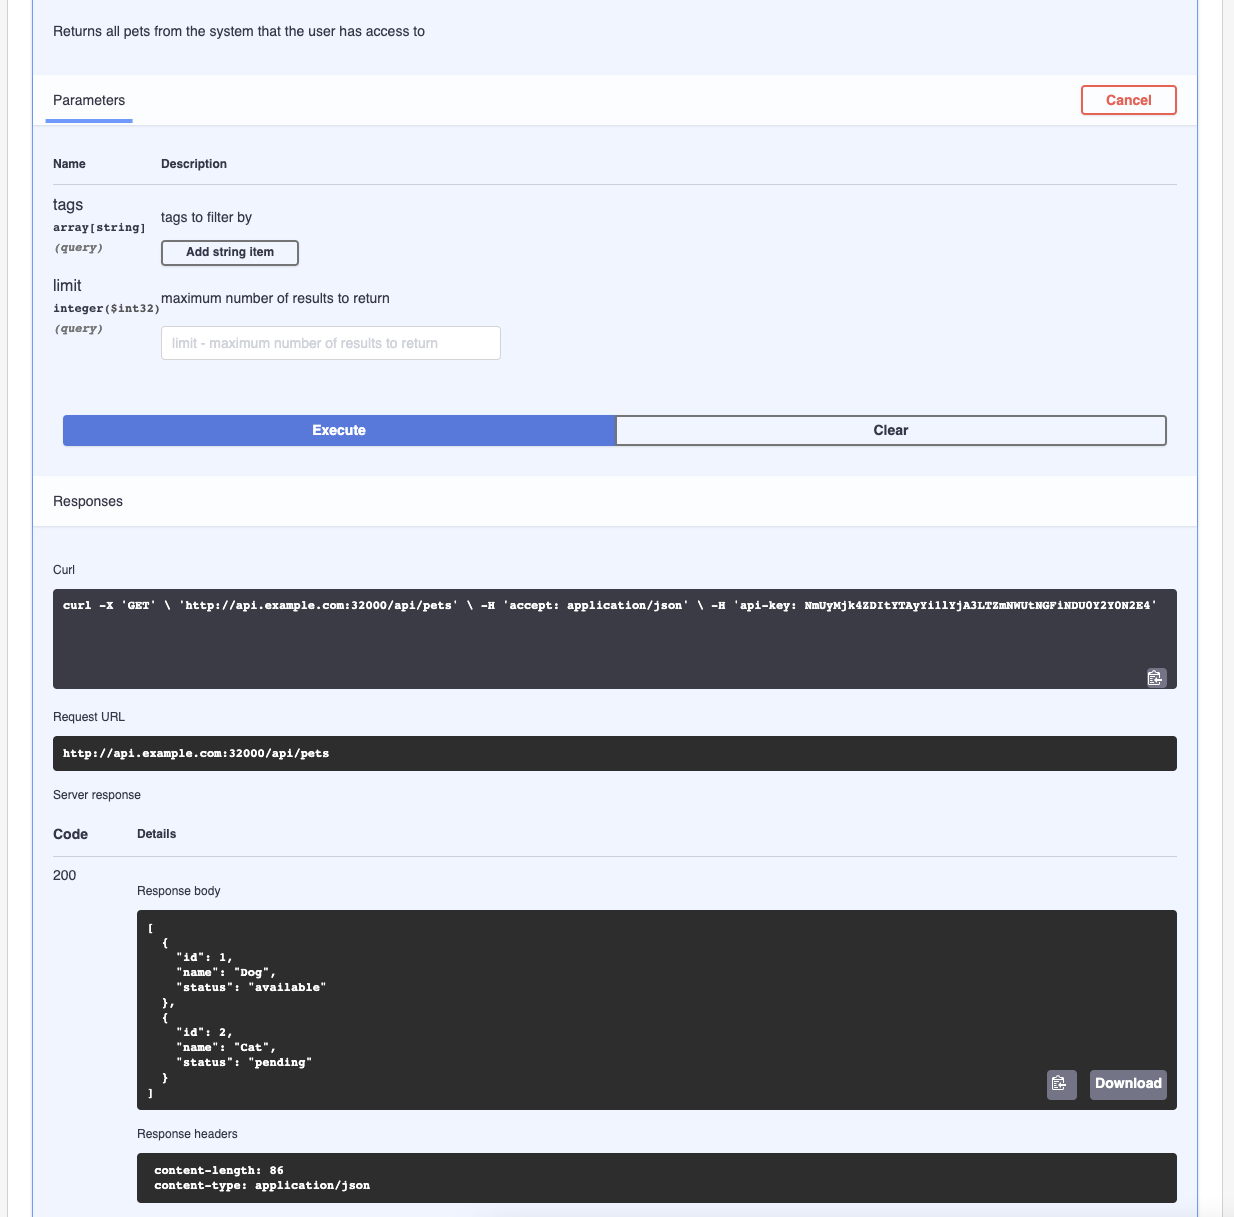
Expand the GET /api/pets command, click Try it out, and then click Execute to see the response we'd expect from the generated Route Table:
-
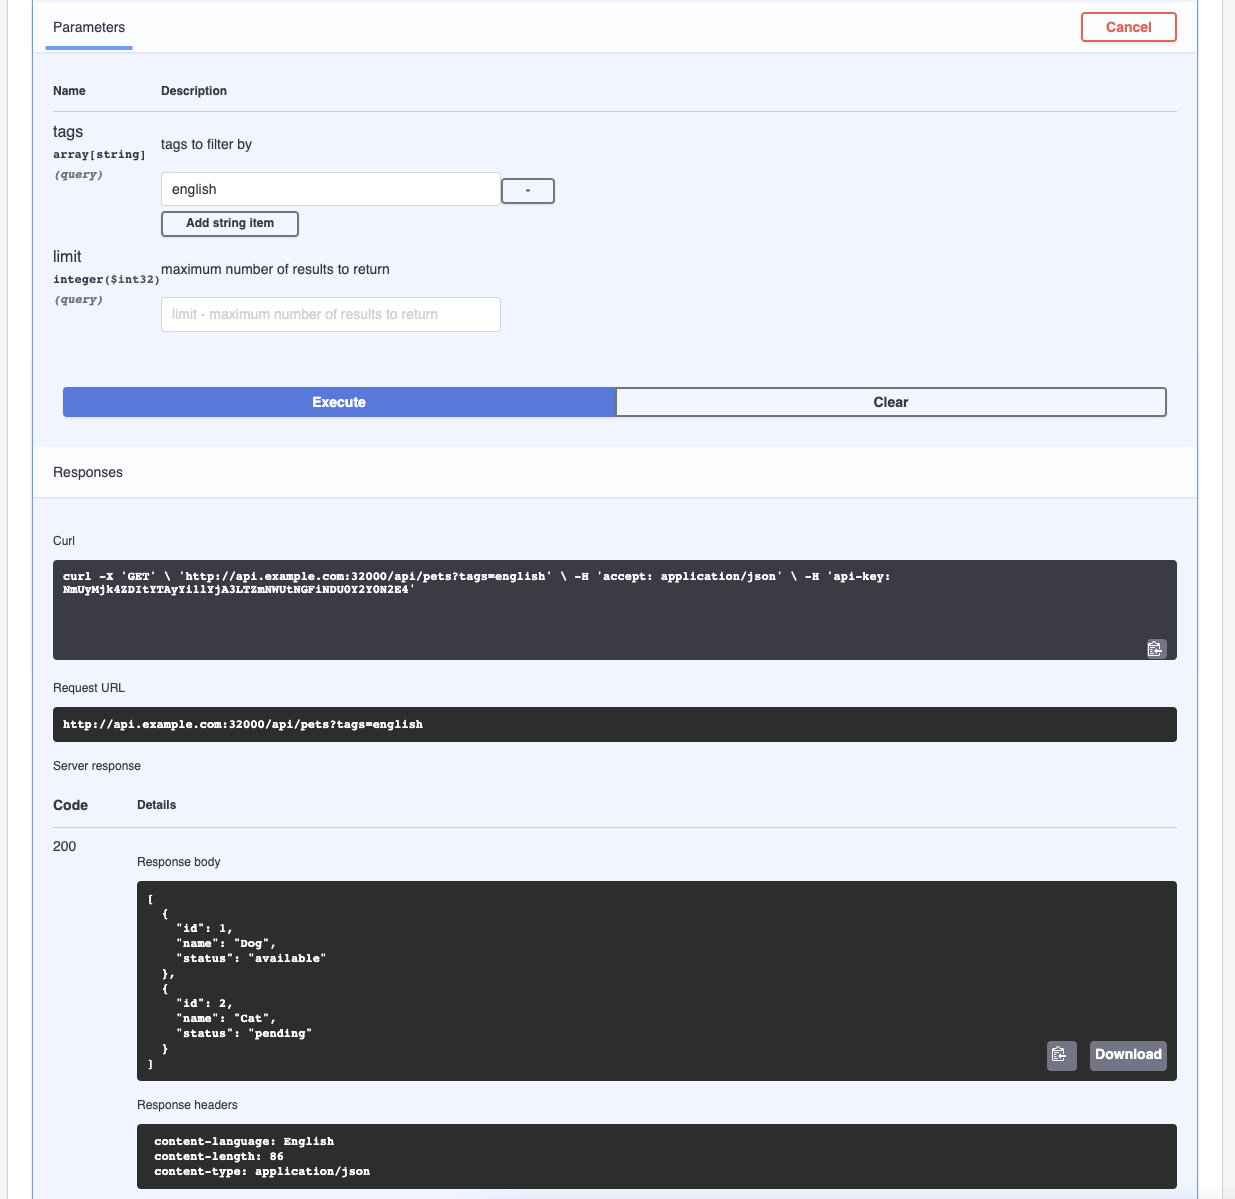
Click Add string item for the
tagsquery param, and type “english”. Then click Execute to see the response, including theContent-Languageresponse header, as specified in our CustomRouteTable: