Install Istio with AKS Extension
If you use Azure Kubernetes Service (AKS) clusters, you can install Istio in Ambient mode by using an AKS Extension provided by Solo.io.
About the Extension
The AKS Container extension reduces the effort required to deploy Istio in Ambient mode on your AKS cluster. Microsoft Azure validates the extension to ensure seamless compatibility with AKS, giving you confidence in using a secure and stable release. The extension does not require any additional settings or flags, providing a sidecar-less service mesh architecture out of the box.
Your organization might prefer using the extension to comply with internal compliance policies or budgetary requirements.
For more information, refer to the Azure documentation.
The AKS Container extension installs the open source distribution of Istio, not the enterprise-level Solo distribution. For multicluster management and other advanced capabilities, you can install Gloo Mesh Enterprise with the Solo distribution of Istio instead.
Before you begin
Create or use existing AKS clusters. Keep in mind the following points:
- The cluster must be able to run Istio, such as meeting the performance, and application requirements.
- The cluster must run on a supported Kubernetes version. You can enable Istio extension on an AKS cluster that runs the corresponding supported version of Kubernetes.
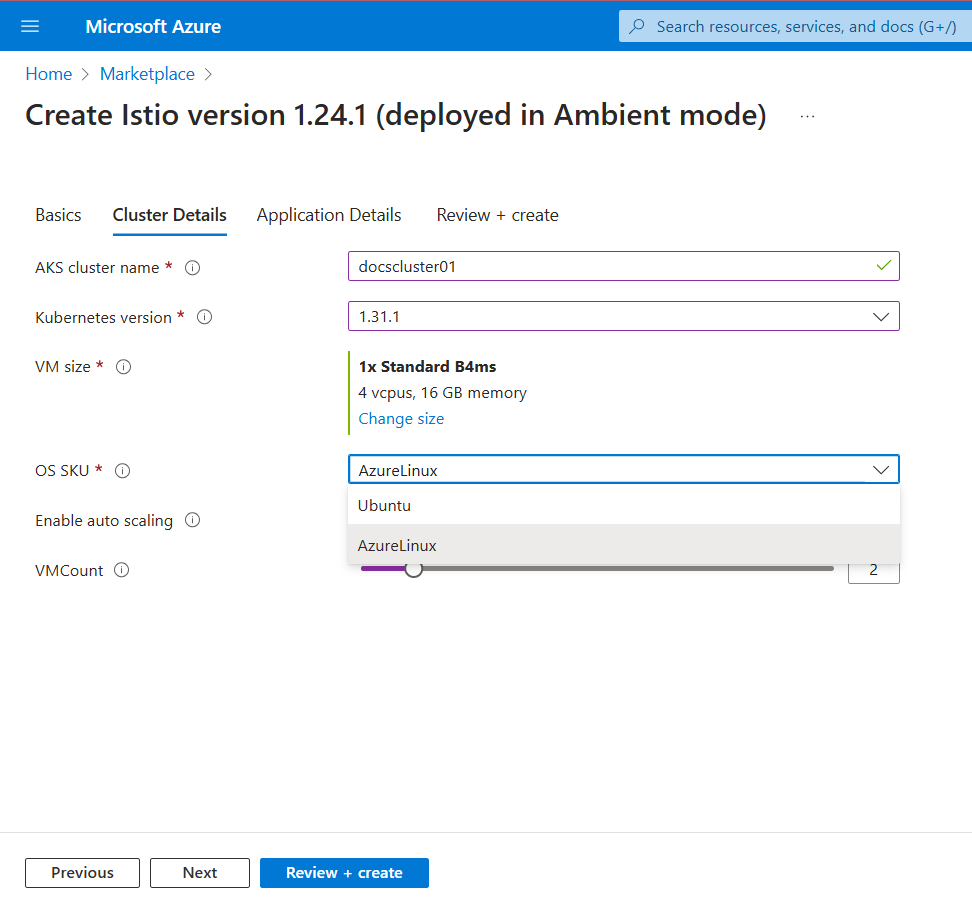
- AKS Clusters that run on Azure Linux nodes are validated and supported.
- The cluster name must be alphanumeric with no special characters except a hyphen (-), lowercase, and begin with a letter (not a number).
- If you plan to use Gloo Mesh, you typically install Istio in data plane clusters that run your workloads. You don’t need to install Istio in the cluster that you plan to use for the Gloo Mesh management plane.
Install any CLI tools that you might need to work with your cluster, such as the following:
az, the Azure command line tool.kubectl, the Kubernetes command line tool. Download thekubectlversion that is within one minor version of the Kubernetes clusters you plan to use.istioctl, the Istio command line tool. Download theistioctlversion that matches the Istio version that you plan to install.
Install the AKS Extension
Install the AKS Extension by using the Azure Portal. For complete AKS Extension instructions, see the Azure documentation.
Open the Azure Portal.
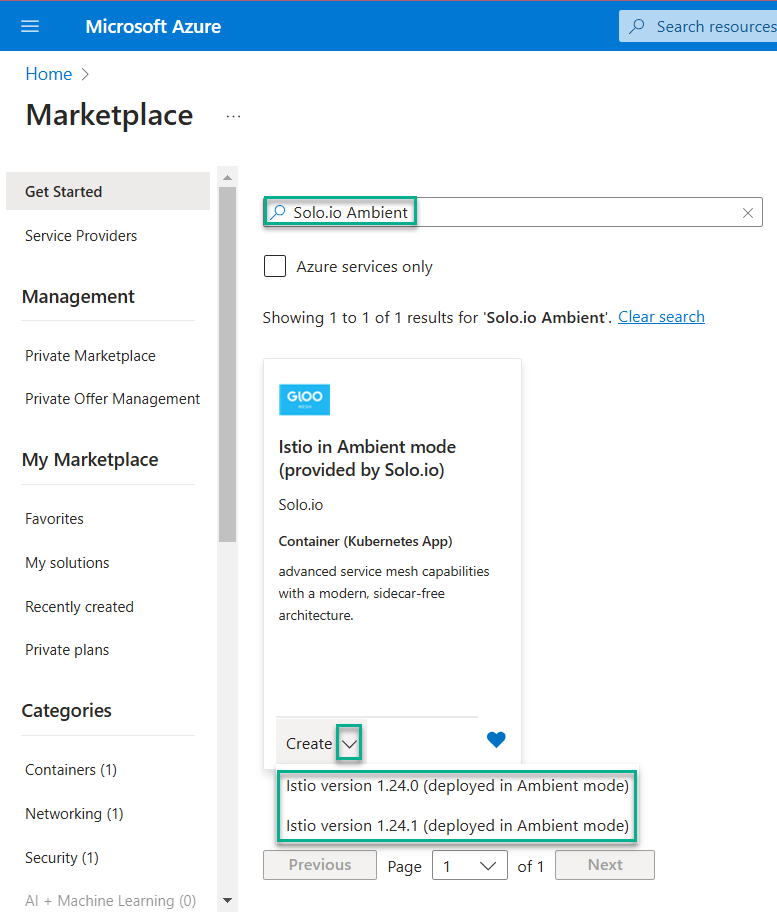
Find the Solo.io extension from the Azure home page or Marketplace.
Click Istio in Ambient mode (provided by Solo.io), and then click Create.
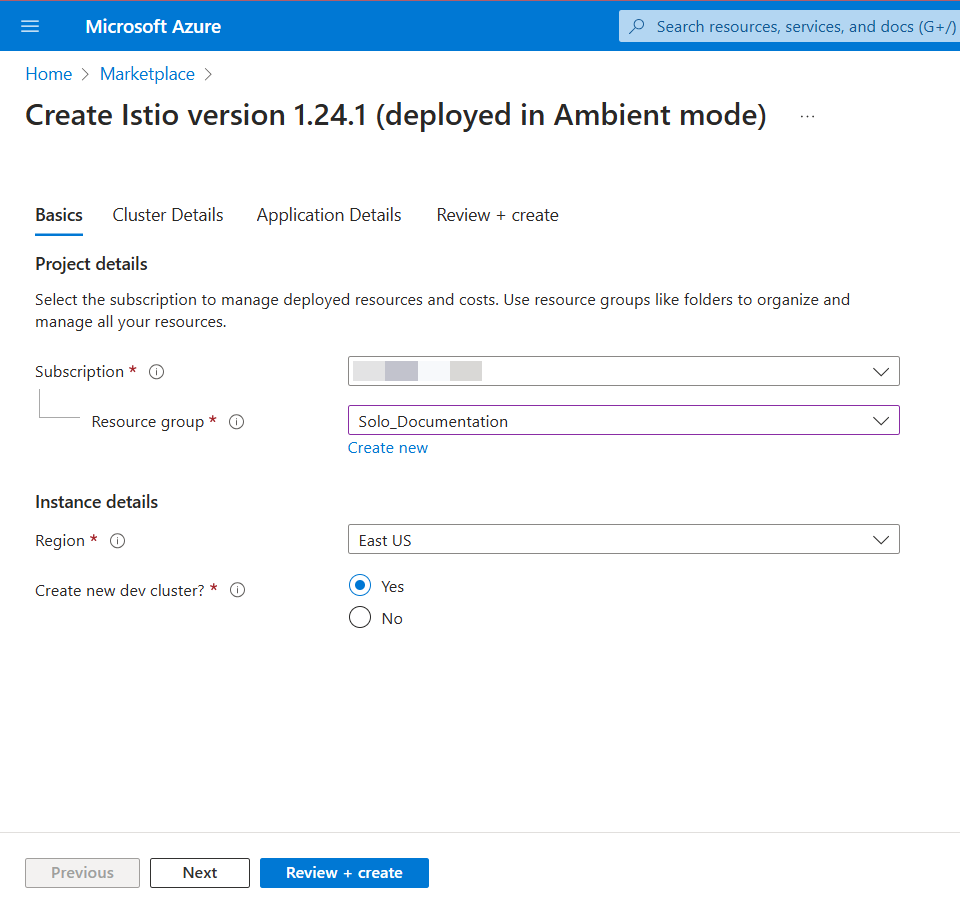
From the Basics tab, configure the details for an existing or new cluster.
From the Application Details tab, enter a unique name for the extension. Note that the unique name fulfills an Azure requirement, but is not used by the Solo.io extension (for example, the extension name does not set the name of the Kubernetes deployment of Istio in your cluster).
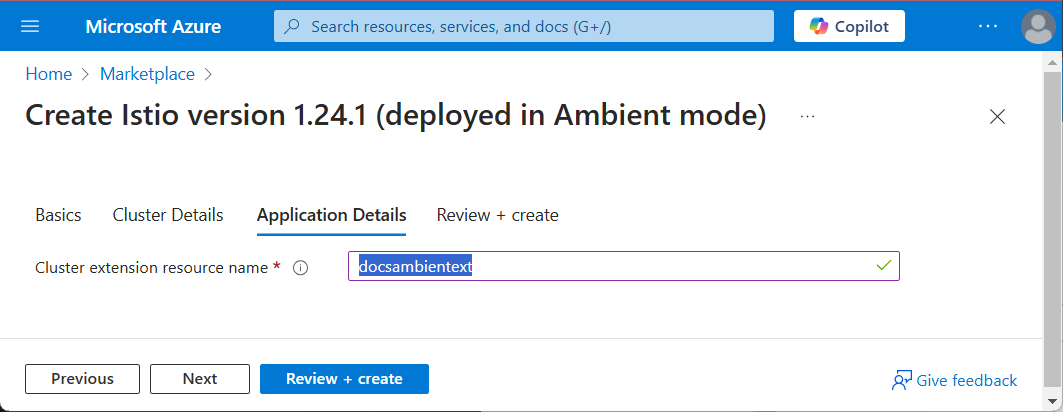
Figure: Application Details page of AKS Extension 
Figure: Application Details page of AKS Extension Click Next or Review + create. Azure begins a validation process.
Review the details, such as the automation template, terms, and extension information that you previously configured. Then, click Create.
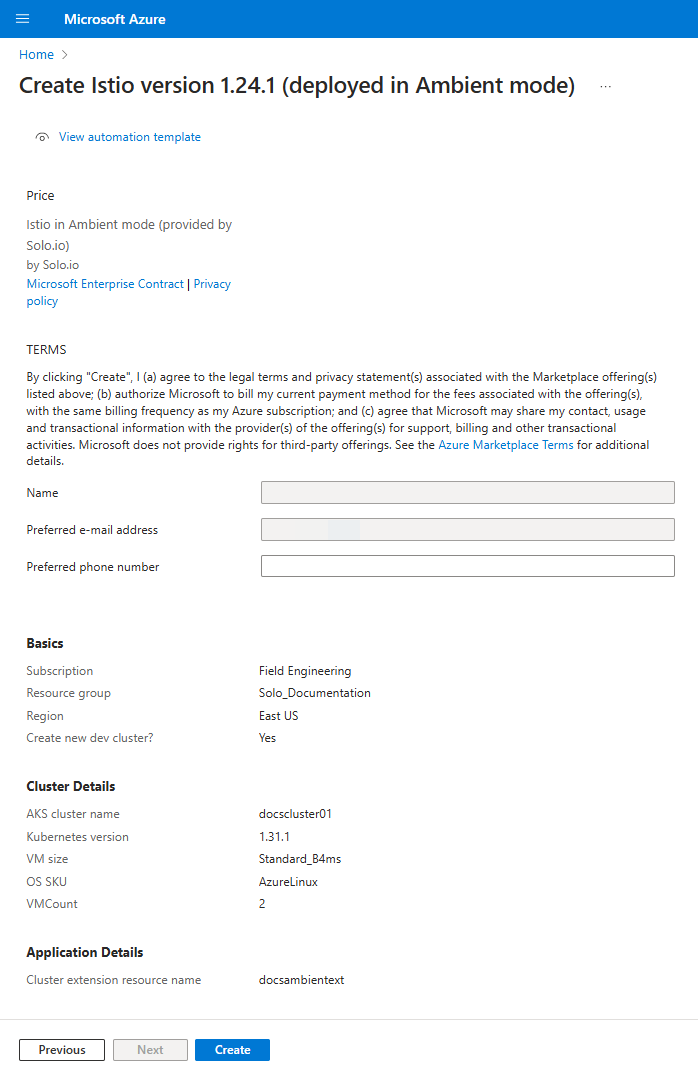
Figure: Review + create page of AKS Extension 
Figure: Review + create page of AKS Extension Wait as Azure deploys the extension to your AKS cluster (and creates the cluster if you chose to create a new cluster). Azure takes you to the deployment monitoring page. The process takes around 10 minutes.
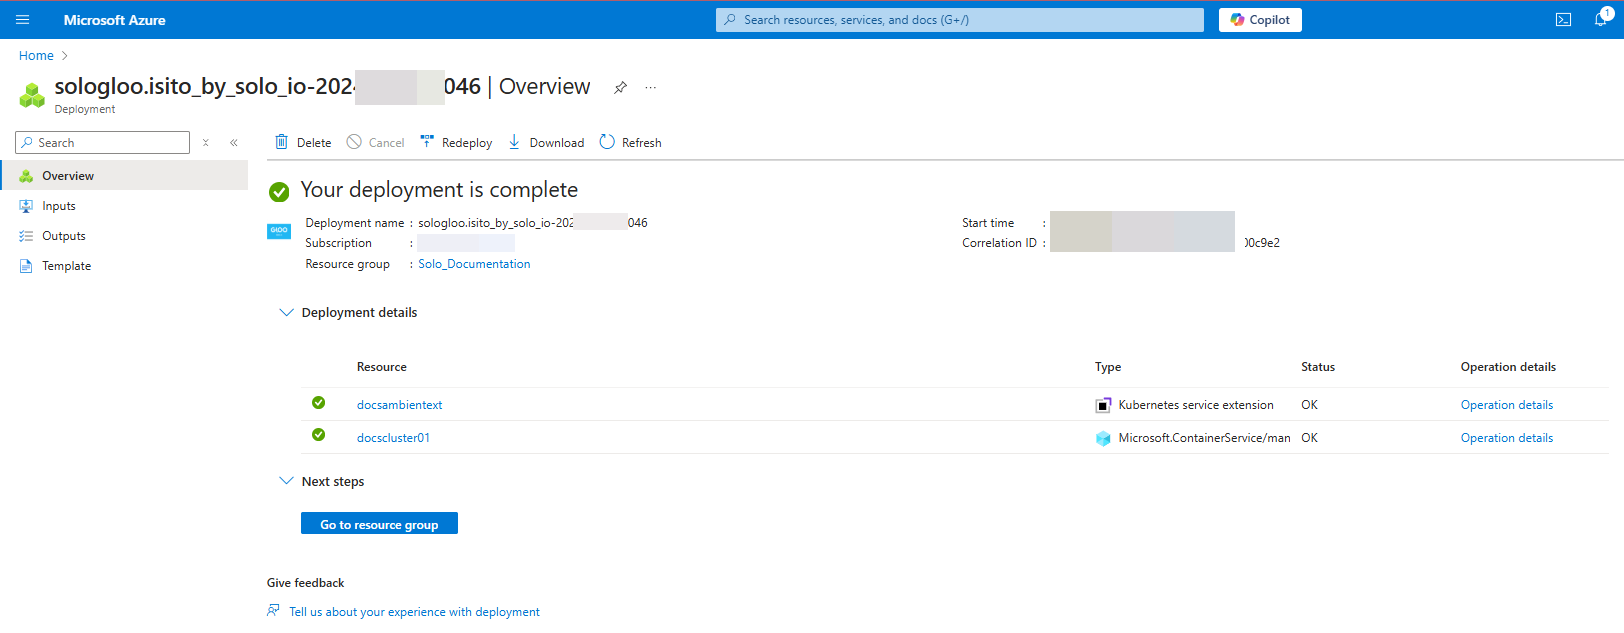
Figure: Monitor the deployment progress 
Figure: Monitor the deployment progress
Verify your installation
After the AKS deployment is completed, verify that Istio is working.
Verify that the istiod pod has a status of Running.
kubectl get pods -n istio-systemExample output:
  NAME                      READY   STATUS    RESTARTS   AGE
istio-cni-node-c6744      1/1     Running   0          12m
istio-cni-node-xrncb      1/1     Running   0          12m
istiod-678bfd9897-76tth   1/1     Running   0          12m
ztunnel-khprc             1/1     Running   0          12m
ztunnel-v9mg7             1/1     Running   0          12m
Verify that istiod uses the
solo-iodistribution of Istio.kubectl describe pod -n istio-system -l app=istiod | grep -i image:Example output: Note
solo-ioin the image repository.Image: arcmktplaceprod.azurecr.io/sologloo/com.nonmicrosoft.istio/images/pilot@sha256:c8ac4894f2e667eb439d1c960a47ac7fbc80aad3f0adb98f5fd9330d9c515696
Next steps
Now that Istio is installed in your cluster, review the following next steps you can take.
- Service mesh management: Follow the community Istio docs to manage your service mesh. For example, you might try out the following guides:
- Test Istio by deploying the sample Bookinfo app.
- Install an Istio ingress gateway to control external traffic.
- Learn more and contribute around Ambient mode: Visit the Ambient Mesh community site to learn more about the Istio deployment model that the AKS extension uses.
- Multicluster enterprise features: Install Gloo Mesh Enterprise and the Solo distribution of Istio instead. If you use the add-on to install Istio, you must repeat the installation in each workload cluster. Then, you create Istio gateways for ingress and east-west traffic, such as described in the manual Istio deployment guide.
Please share your experience about the Solo.io Istio Distribution add-on for Amazon AKS by filling out this feedback form.
Uninstall the extension
You can uninstall the Istio Ambient extension provided by Solo.io by using the Azure Portal. Keep in mind that this action removes the Istio service mesh from your cluster.
For more information about removing an AKS Extension, see the Azure documentation.
Open the Azure Portal.
Go to the Resource group and then select the AKS cluster where you recently installed the application.

Figure: Select your AKS cluster 
Figure: Select your AKS cluster From the service menu, expand Settings and click Extensions + applications
From the list of extensions, select the Solo.io Istio extension
From the action menu, click Uninstall.
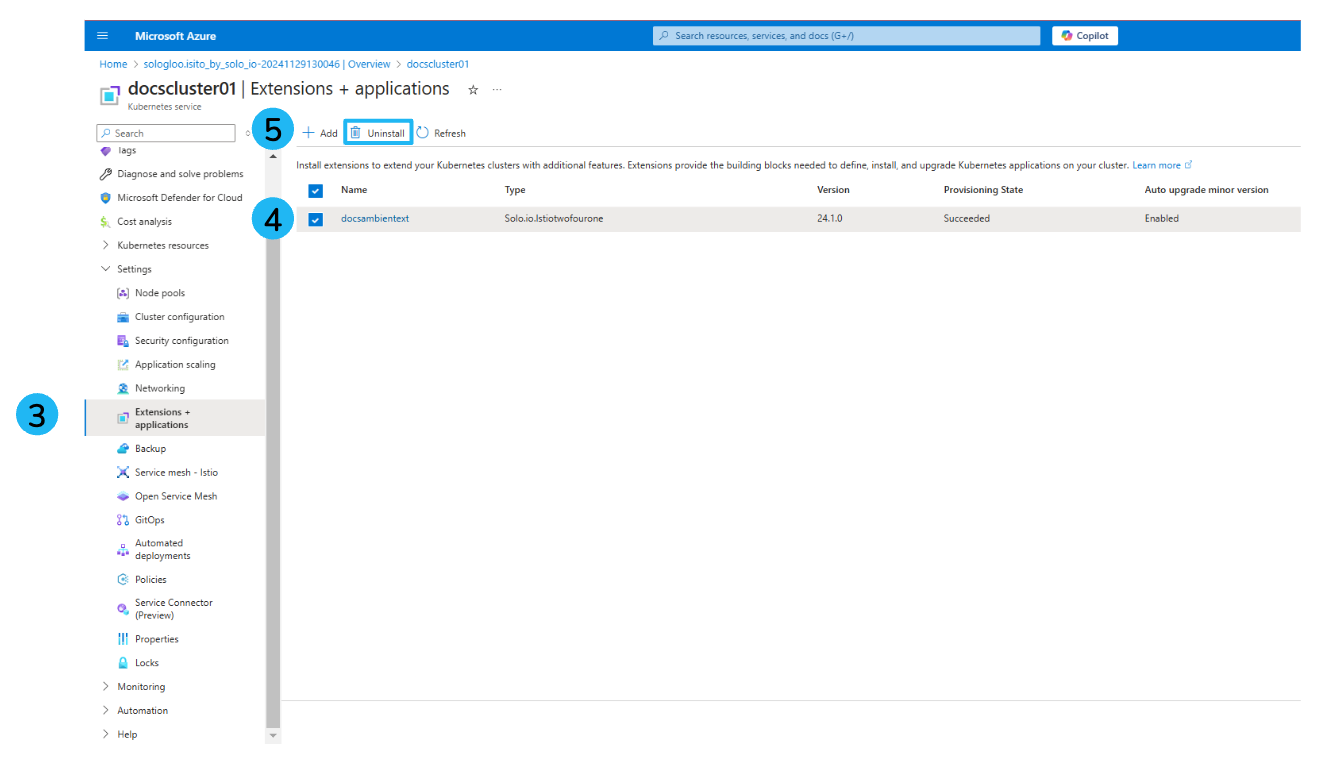
Figure: Uninstall the extension 
Figure: Uninstall the extension In your cluster, clean up the istio-system namespace.
kubectl delete namespace istio-system

