Set up multitenancy with workspaces
Configure one or more workspaces for your team’s resources.
Gloo introduces a new concept for Kubernetes-based multitenancy, the Workspace custom resource. A workspace consists of one or more Kubernetes namespaces that are in one or more clusters. Think of a workspace as the boundary of your team’s resources. To get started, you can create a workspace for each of your teams. Your teams might start with their apps in a couple Kubernetes namespaces in a single cluster. As your teams scale across namespaces and clusters, their workspaces scale with them. For more information, see the Workspaces concept.
To build your workspace setup, you create several resources, including workspaces and workspace settings for each team, as well as global workspace settings that apply across teams. This detailed approach helps you prepare more complex setups such as for multiple tenants in production environments.
Before you begin
Install Gloo Mesh Gateway in your management cluster and register workload clusters. Note that you do not need to create a workspace as part of this setup as this guide walks you through how to configure the workspace.
If you are new to workspaces, review the following resources to understand more about the concepts.
- Workspaces concept, including how workspaces function as resource boundaries and a person-driven setup flow.
- API reference
- Set the names of your clusters from your infrastructure provider.
export MGMT_CLUSTER=<management_cluster_name> export REMOTE_CLUSTER=<remote_cluster_name> - Save the kubeconfig contexts for your clusters. Run
kubectl config get-contexts, look for your cluster in theCLUSTERcolumn, and get the context name in theNAMEcolumn. Note: Do not use context names with underscores. The generated certificate that connects workload clusters to the management cluster uses the context name as a SAN specification, and underscores in SAN are not FQDN compliant. You can rename a context by runningkubectl config rename-context "<oldcontext>" <newcontext>.export MGMT_CONTEXT=<management-cluster-context> export REMOTE_CONTEXT=<remote-cluster-context>
Create workspaces
As a platform administrator, you can create a workspace for each of your teams.
Make sure to include all your workloads that you want to manage network traffic for in a workspace, including the ingress gateway proxies. You can organize your workloads into however many workspaces that you want by creating separate workspaces for different cluster and namespace combinations.
Pick a name for the workspace. This name might be the same as your team’s name, such as
web-team, and must be unique.In the management cluster, create a namespace for each workspace. Later, each team can create all their Gloo custom resources in this namespace. This way, each team’s resources are kept in their own workspaces, but all of the Gloo configuration is kept centrally located in the management cluster. For example, you might create the following namespaces for three teams:
ops-team,web-team, andbackend-apis-team.kubectl create namespace --context $MGMT_CONTEXT ops-team kubectl create namespace --context $MGMT_CONTEXT web-team kubectl create namespace --context $MGMT_CONTEXT backend-apis-teamDecide which clusters you want the workspace to include. A workspace can have many clusters. Also, the same cluster might belong to several workspaces. Instead of selecting individual clusters by name, use labels. Labels allow you to treat clusters “like cattle.” Gloo adds or removes clusters with the same label to your workspace. Workspace labels must match the
KubernetesClusterlabels on the management cluster. You can check those labels with the following command.kubectl get kubernetescluster -n gloo-mesh --context $MGMT_CONTEXT -o=jsonpath="{.items[*]['metadata.name', 'metadata.labels']}"Decide which Kubernetes namespaces across clusters you want the workspace to include. Unlike a cluster, a namespace can belong to only one workspace. To list existing namespaces, you can use the following command.
kubectl get ns --context $MGMT_CONTEXT && kubectl get ns --context $REMOTE_CONTEXTCome up with a label for your workspace. Later, other workspaces can use this label to import or export to your workspace. You might want to set up a naming convention for all of your workspaces. For example, you might use
gloo.solo.io/globalfor workspaces that are available to any other workspace.Create the workspace with the information that you just gathered. Note that you must create the workspace resource in the
gloo-meshnamespace of the management cluster. For an example of three workspaces for the Ops, Web, and Backend API teams, see Example workspace YAML configuration.Modify any workspaces that might have conflicting namespaces, such as the default workspace, because namespaces can belong to only one workspace. For more information about how workspace conflicts can impact your setup, review the concept docs.
Review existing workspaces to note which namespaces are already part of a workspace. For example, when you install Gloo Mesh Gateway in a single cluster, a default workspace and workspace settings are created automatically for you. However, because this default workspace is used for demonstration purposes, it does not isolate any resources, and instead allows all Kubernetes and Gloo resources in the workspace.
kubectl get workspaces -n gloo-mesh --context $MGMT_CONTEXT -o=jsonpath="{.items[*]['metadata.name', 'spec.workloadClusters']}"The following example output shows the default workspace called
cluster1that selects all clusters ("name":"*") and namespaces ("namespaces":[{"name":"*"}]) in your Gloo setup.cluster1 [{"name":"*","namespaces":[{"name":"*"}]}]Modify the default workspace and any other workspaces with conflicting namespaces. For example, you might modify the default workspace so that it selects only the
gloo-meshnamespace, instead of all namespaces.kubectl edit workspace $MGMT_CLUSTER --context $MGMT_CONTEXTapiVersion: admin.gloo.solo.io/v2 kind: Workspace metadata: name: gloo namespace: gloo-mesh spec: workloadClusters: - name: '*' namespaces: - name: 'gloo-mesh'
Optionally, you can configure global workspace settings. These settings apply by default to each workspace in your Gloo environment. Later, the app owner for each workspace can override the defaults in their own workspace settings. For more information, see Workspace configuration.
You must create the global workspace settings resource in thegloo-meshnamespace of the management cluster, and name the resourceglobal. If you have only one global workspace, then you can have only one workspace settings. When you have multiple workspaces, you can create a workspace settings calledglobalto apply settings across all workspaces. Keep in mind that you still need to create a separate workspace settings per workspace to configure additional workspace-specific details, such as import and export rules.The following example enables service isolation so that services are secured by default. However, federation is disabled because it can impact performance if every service in the workspace is federated across namespaces.
  kubectl apply --context $MGMT_CONTEXT -n gloo-mesh -f- <<EOF
apiVersion: admin.gloo.solo.io/v2
kind: WorkspaceSettings
metadata:
 name: global
 namespace: gloo-mesh
spec:
 options:
   serviceIsolation:
     enabled: true
   federation:
     enabled: false
EOF
Give the app owner for the team the workspace details, or viewer permission for the resource in the management cluster.
Configure workspace settings
As an app owner for your team, you configure the workspace that your platform administrator set up for you by creating a WorkspaceSettings resource. For more information, see Workspace settings configuration.
Each workspace must have only one of its own workspace settings resource. You still need one workspace settings per workspace even if your platform admin set up global settings.
Get access from your platform admin to the namespace and cluster in the workspace where you want to create the workspace settings.
- In most cases, you use a namespace with your team name, such as
ops-teamin the management cluster. More complex setups: Some teams might have a more complex setup where you create Gloo custom resources in the workload clusters. Check with your platform admin to see which clusters and namespaces are included in your workspace. Or, if you have access to the management cluster, run the following command.
kubectl get workspaces -n gloo-mesh --context $MGMT_CONTEXT -o=jsonpath='{.items[*].spec.workloadClusters}'- In most cases, you use a namespace with your team name, such as
Decide which workspaces you want to export your resources to. Get their labels from the platform admin or the other team’s app owners.
Decide which workspaces you want to import resources from. Get their labels from the platform admin or the other team’s app owners.
Decide if you want to restrict importing or exporting to certain resources, such as Kubernetes services.
Decide if you want to set up service isolation for your workspace. When service isolation is enabled, only services within the same workspace and services that are imported to the workspace can communicate with each other by default. Communication to services outside the workspace is blocked. However, to build a zero-trust architecture, you might want to disable service isolation and instead set up more fine-grained access control with access policies and trim proxy config policies. For more information, see Service isolation.
Decide if you want to set up federation for multicluster routing across your workspace. At the workspace level, federation creates ungrouped Istio service entries in each cluster so that services are accessible across clusters. For single clusters or to improve performance at scale in large environments, disable federation and use virtual destinations instead. For more information, see Federation.
Create the workspace settings with the information that you just gathered, in the cluster and namespace that you want. The following example creates workspace settings for three workspaces for the Ops, Web, and Backend API teams. For more information, see Example workspace YAML configuration.
Good job! Now that you created your workspace and workspace settings, verify your workspace setup.
Verify your workspace setup
To verify your workspace setup, you can try to import and export Gloo resources. To do so, you need access to at least two different workspaces that are set up to import and export to each other. You might have this access yourself, or work with another team’s app owner to verify.
In your workspace settings, make sure that you export to and import the other workspace, such as in the following example.
kubectl get workspacesettings default -n ${WS_NAMESPACE} --context ${REMOTE_CONTEXT} -o=jsonpath='{.spec}'Example output:
{"exportTo":[{"selector":{"team":"backend"}}, "imports":[{"selector":{"team":"frontend"}}]]}Repeat the previous step for the other workspace. Make sure to use the right
${WS_NAMESPACE}and${REMOTE_CONTEXT}values for that workspace.Create a Gloo resource to export. Make sure that your workspace settings export the resource, and that the workspace settings of the other workspace import the resource, such as via a label. The following example is for a virtual destination.
  kubectl apply --context ${REMOTE_CONTEXT} -n ${WS_NAMESPACE} -f - << EOF
apiVersion: networking.gloo.solo.io/v2
kind: VirtualDestination
metadata:
  name: istio-ingressgateway
  namespace: ${WS_NAMESPACE}
spec:
  hosts:
  - reviews.global
  ports:
  - name: http
    number: 9080
    protocol: HTTP
  services:
  - labels:
      app: reviews
EOF
Open the Gloo UI. The Gloo UI is served from the
gloo-mesh-uiservice on port 8090. You can connect by using themeshctlorkubectlCLIs.Check your workspace import and export settings.
- From the Dashboard page, expand your workspaces to see an overview of the import and export settings, such as in the following figure.
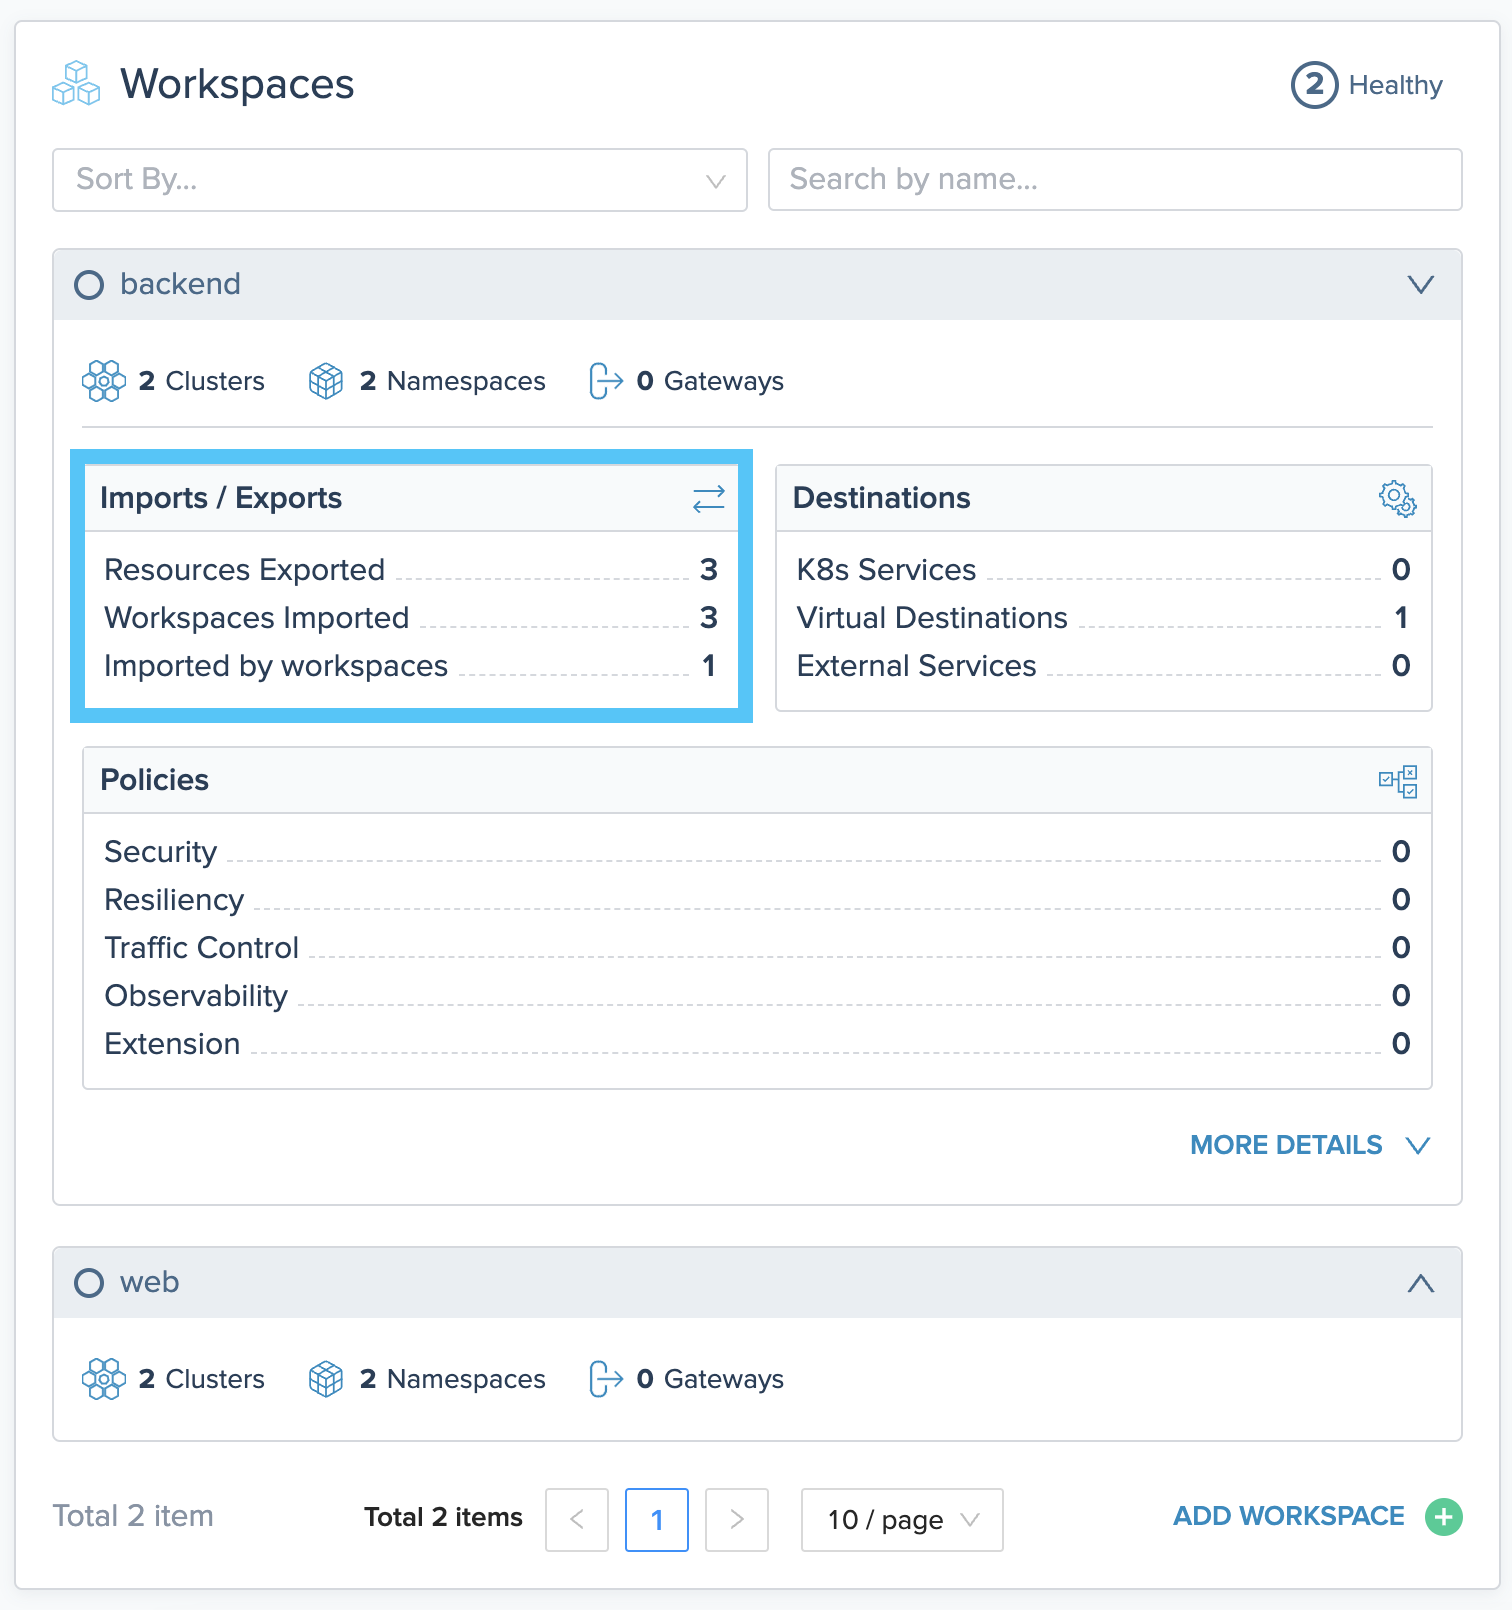
Figure of workspaces overview in the Gloo UI. Note the **Imports / Exports** section. - Click MORE DETAILS and review the Workspace Dependencies and the tabbed section of Destination, Routing, and Policies.
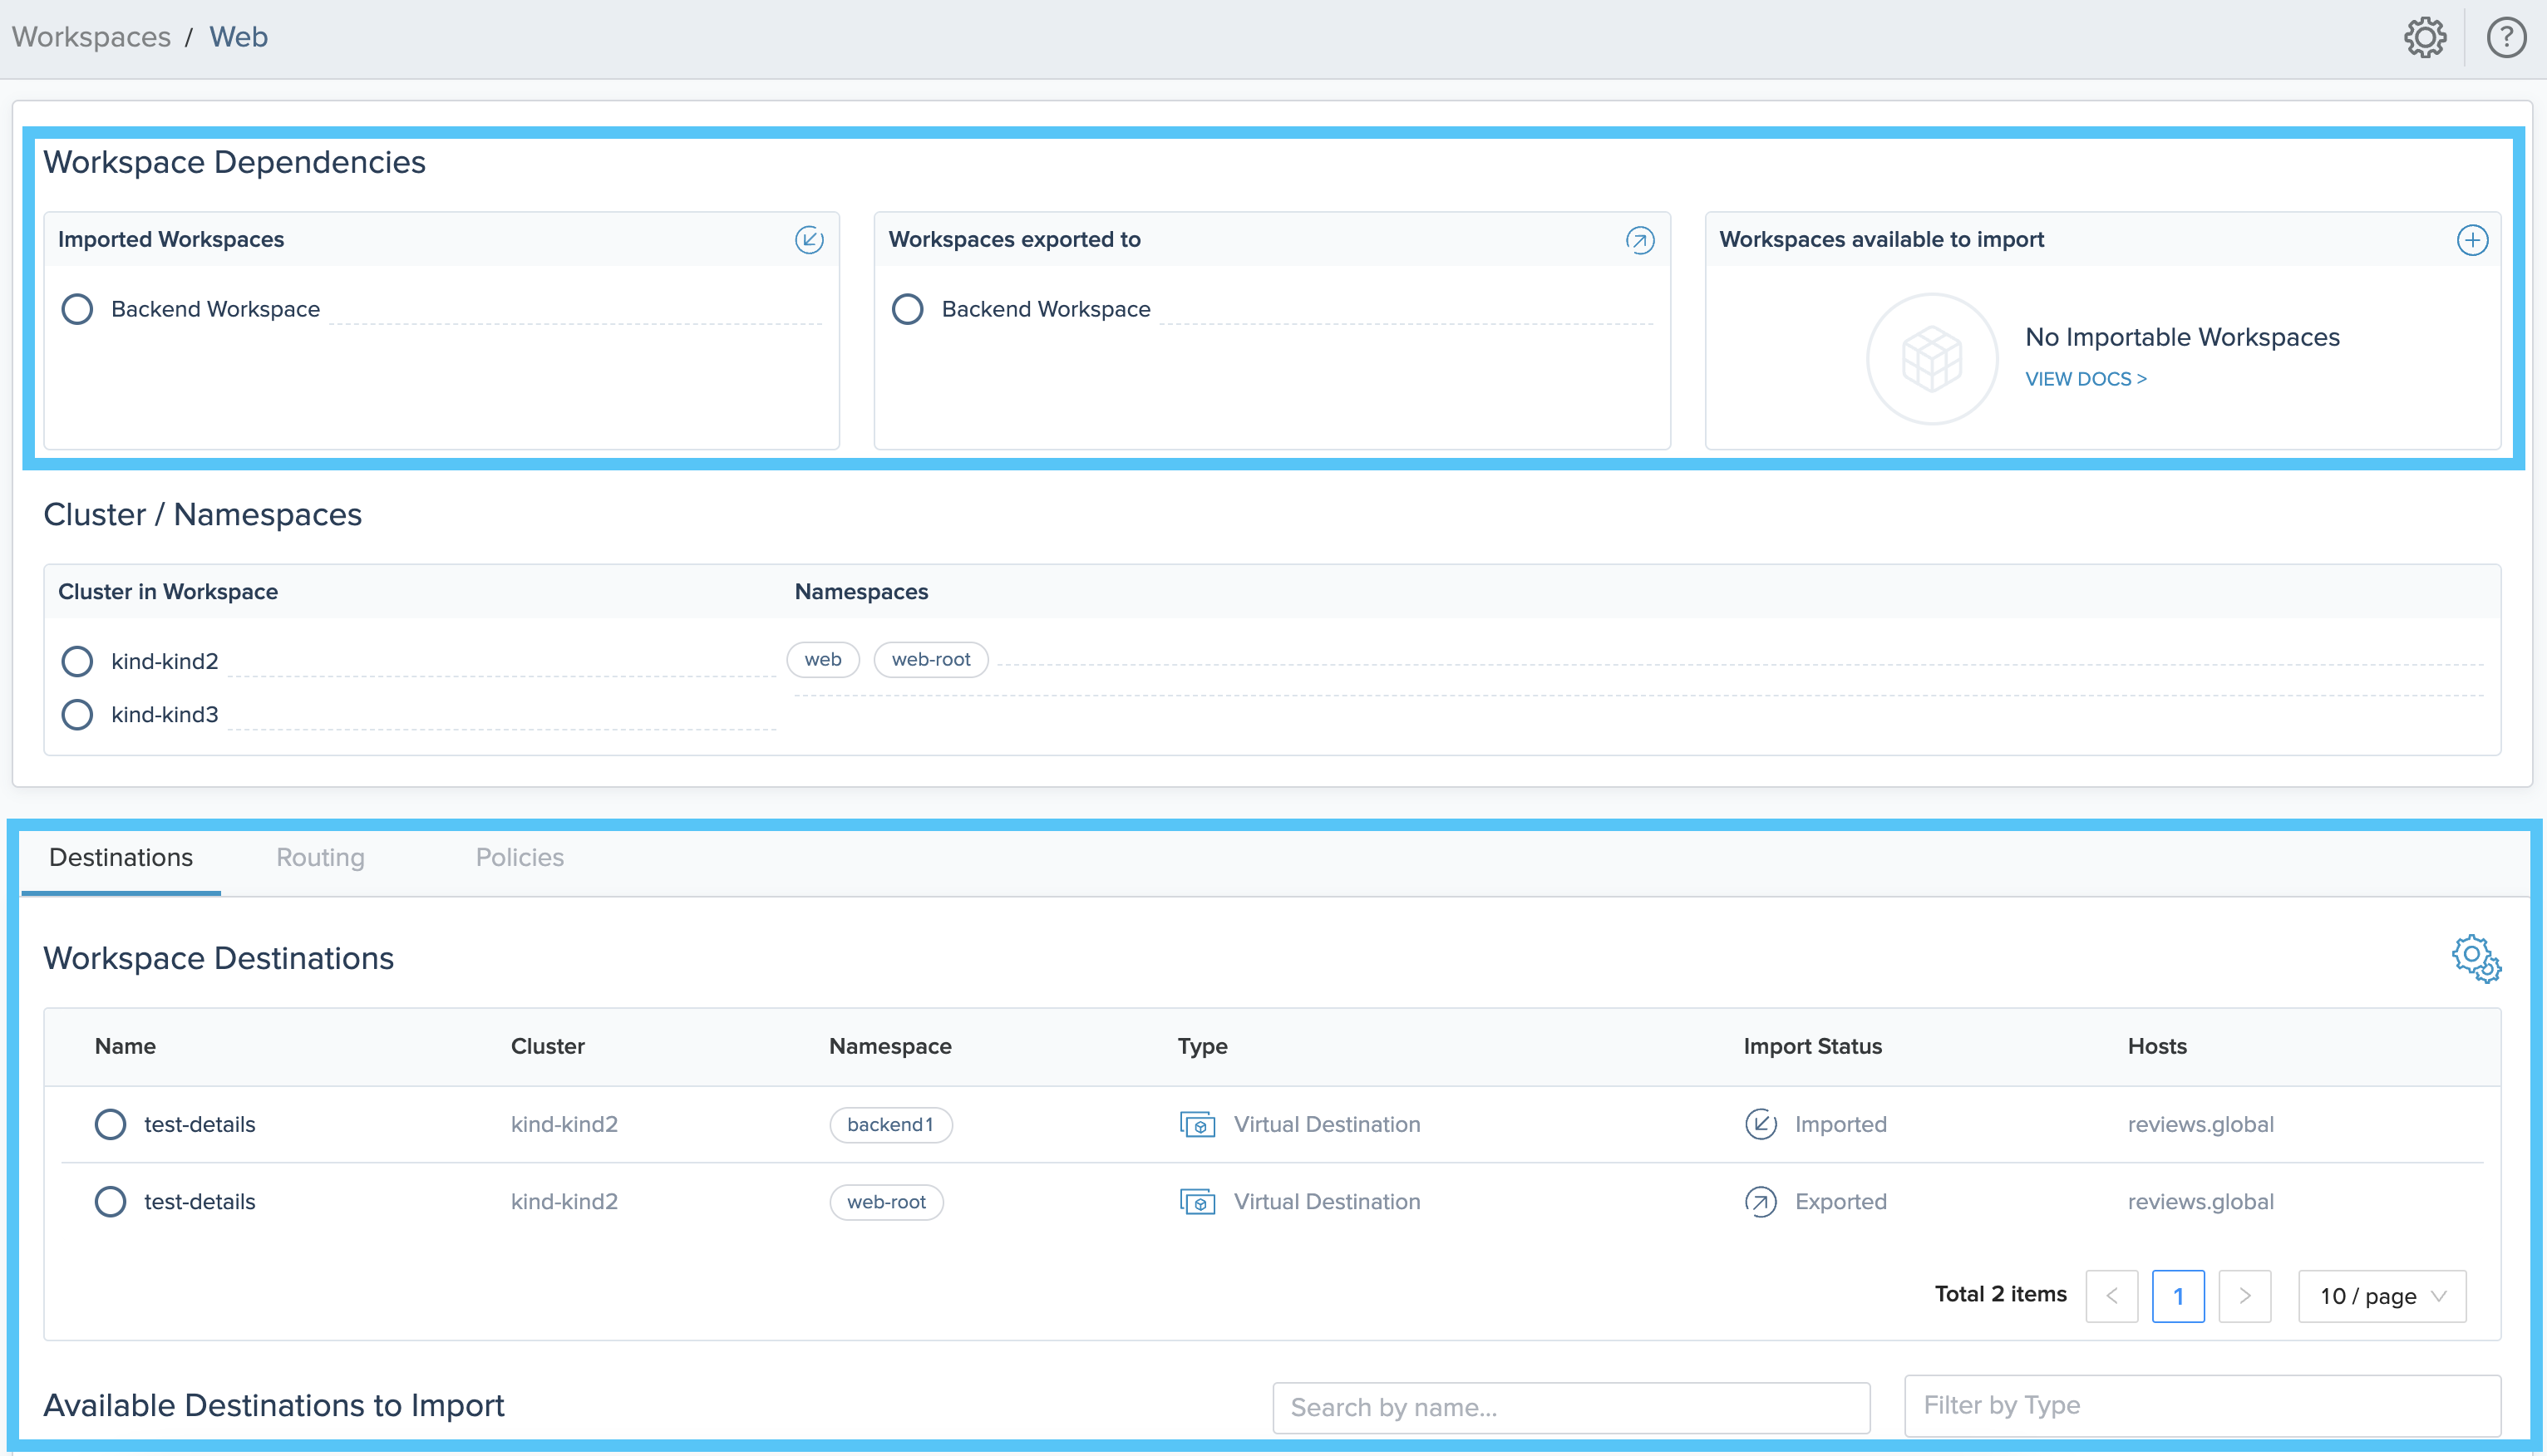
Figure of workspaces detail in the Gloo UI. Note that you can review available resources to import.
- From the Dashboard page, expand your workspaces to see an overview of the import and export settings, such as in the following figure.
Next steps
Now that you set up your workspaces, your teams can deploy their apps. Tell them the clusters and namespaces that are part of their workspaces. They can create their Kubernetes deployments and services.
As part of your team setup, you might want to set up role-based access control (RBAC) for your Kubernetes and Gloo resources.
Then, you can create Gloo resources to control incoming traffic for your workloads. For example, you might set up the following resources.
- Listeners with virtual gateways for ingress traffic.
- Request routing with route tables.
- Gloo policies, such as traffic management, security, and resiliency policies, that can be reused across routes and destinations.