Overview
Set up authentication and authorization (AuthN/AuthZ) for the Gloo UI by using OpenID Connect (OIDC) and Kubernetes role-based access control (RBAC).
The Gloo API server has its own external auth service built in that you can use to manage external auth for the Gloo UI.
About authentication
The Gloo UI runs as a deployment in the management cluster. By default, anyone with access to the management cluster can view the UI.
To control who can view the Gloo UI, you can set up OIDC authentication. The Gloo UI supports OIDC authentication from common identity providers (IdPs) such as Google, Okta, and Auth0.
The overall process is described in the following diagram.

- Users access the Gloo UI login page via an HTTP request.
- Gloo retrieves the OIDC information from the dashboard settings to find the issuer URL that must be used to be authenticated with the identity provider.
- The users are redirected to the IdP, such as
https://accounts.google.comwhere they enter the user credentials to log in. - The IdP verifies the credentials. If the credentials are valid, the IdP returns an
access_tokenandid_token. - The Gloo UI uses the tokens to create a browser
'session'. You can optionally persist this session in a Redis deployment in your management cluster.
As long as these tokens exist, the users are authenticated. When these tokens are cleared, the users must log in again. For more information about ID and access tokens, see this Auth0 blog.
After authenticating, users can view all your resources in the Gloo UI. To further restrict access to your resource, set up authorization.
About authorization
With authentication, you control who can access the Gloo UI. By adding authorization, you can further control what resources within the UI users can view. Gloo uses the Kubernetes RBAC resources within your clusters to determine which resources the users can view. For more information, see RBAC for resources in the UI.
Review the following diagram and description.

- The same authentication process is followed as described in the previous section.
- The Gloo API server extracts the username from the OIDC token, based on the dashboard settings.
- Then, Gloo verifies the RBAC permissions for this user. In order for the username that you retrieve from the token to match the user that is defined in the RBAC cluster roles and cluster role bindings, Gloo uses the user mapping AuthN OIDC section of the dashboard settings. For example, if the user mapping has a user claim type of email and a prefix of
oidc, then the username in the cluster role binding must be in the expected format ofoidc:username@email.com. - Using the RBAC information, Gloo returns only the resources that the user can access in the UI.
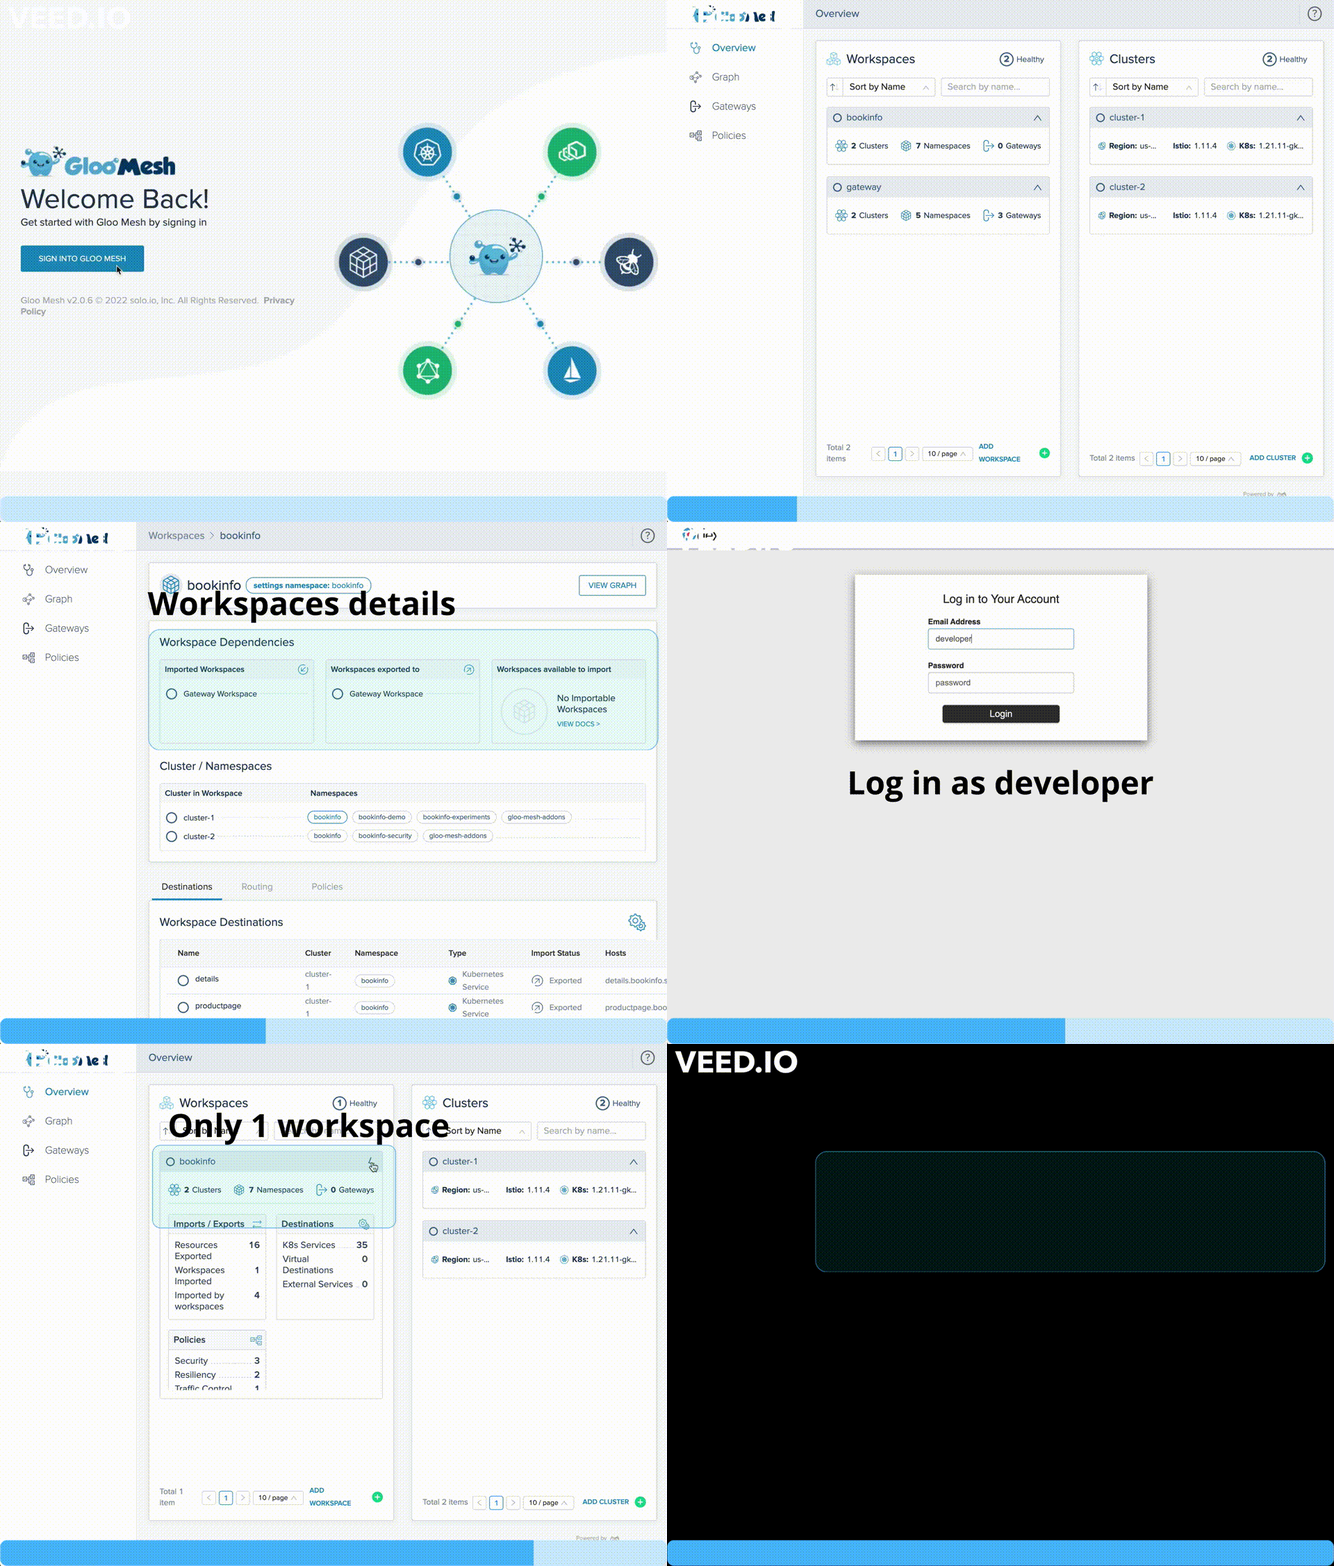
To set up both authentication and authorization, the Dashboard custom resource for authentication and your Kubernetes clusters must share the same identity source. The same identity source means the same OIDC IdP with the same user and group claims.
The following clip shows two different user views of the Gloo UI.
