End user guide
Explore how your end users can use the developer portal to discover, access, and use your API products.
The end user guide varies depending on the type of frontend application that you deployed for the developer portal. This guide includes steps for the sample React app and Solo’s Backstage frontend plugin. If you created or modified your own frontend app, adjust the guide accordingly.
Before you begin
Before giving your end users the developer portal, make sure that you completed all the setup tasks, including the following.
- Install and make sure that the portal is healthy, including the portal, external auth, rate limiting, and Redis components.
- Create your API products.
- Prepare usage plans for your API products, including external auth and rate limiting policies.
- Configure the developer portal, including to expose the portal server securely.
- Create a frontend for your developer.
Discover your API products
End users can discover API products in your developer portal that they have access to.
- To launch the developer portal, your end users enter the hostname that you exposed the portal on, such as
developer.example.com, in their web browser. - By default, end users can review the home page. They can see any APIs that you did not require authentication for via external auth policies. If you followed the steps in Configure the developer portal, the tracks and petstore API products are included in the portal. However, only the tracks API is publicly available and can be seen when selecting APIs from the menu bar. The petstore API is set to private and can only be seen after the user logs in to the developer portal.
- To review private APIs and perform other actions, such as to create an API key, the end users click Login. They are redirected to the OIDC provider that you configured.
- After successfully logging in, the end users can see the public and private APIs that they have access to.
- Users can select an API product to see the OpenAPI specification for that API in Swagger or Redoc format. They can review details, such as the API schema, required request parameters, response body information, or supported HTTP response codes.
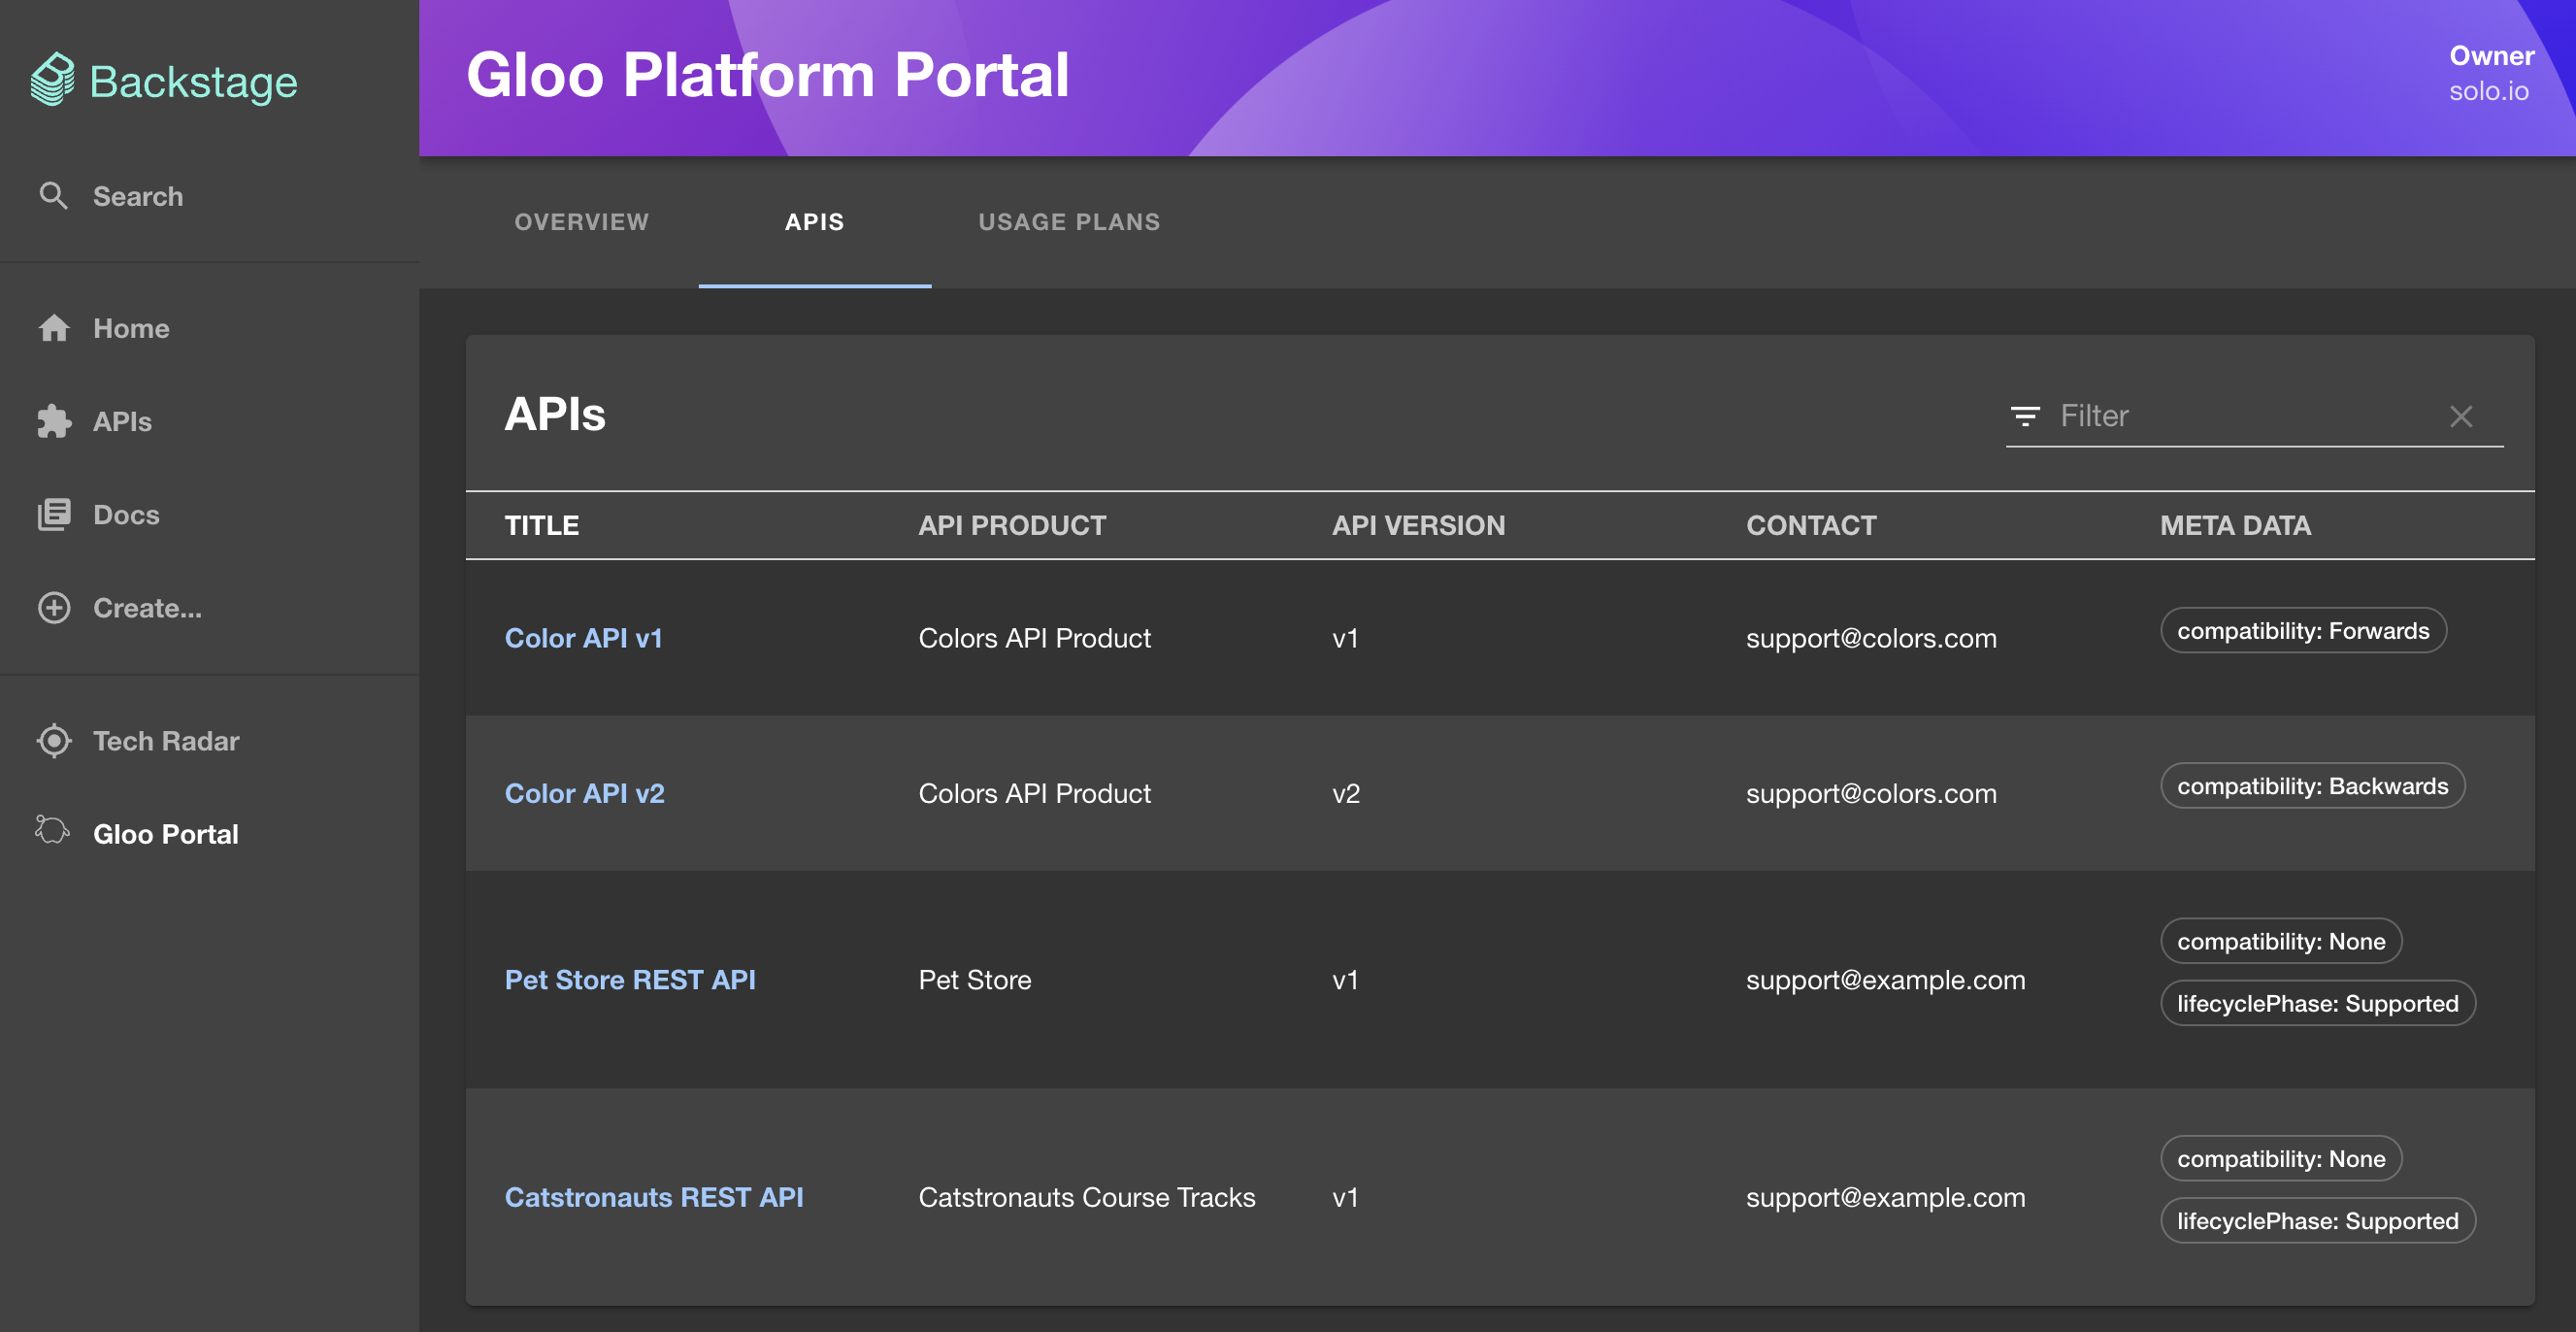
Figure: Backstage portal APIs 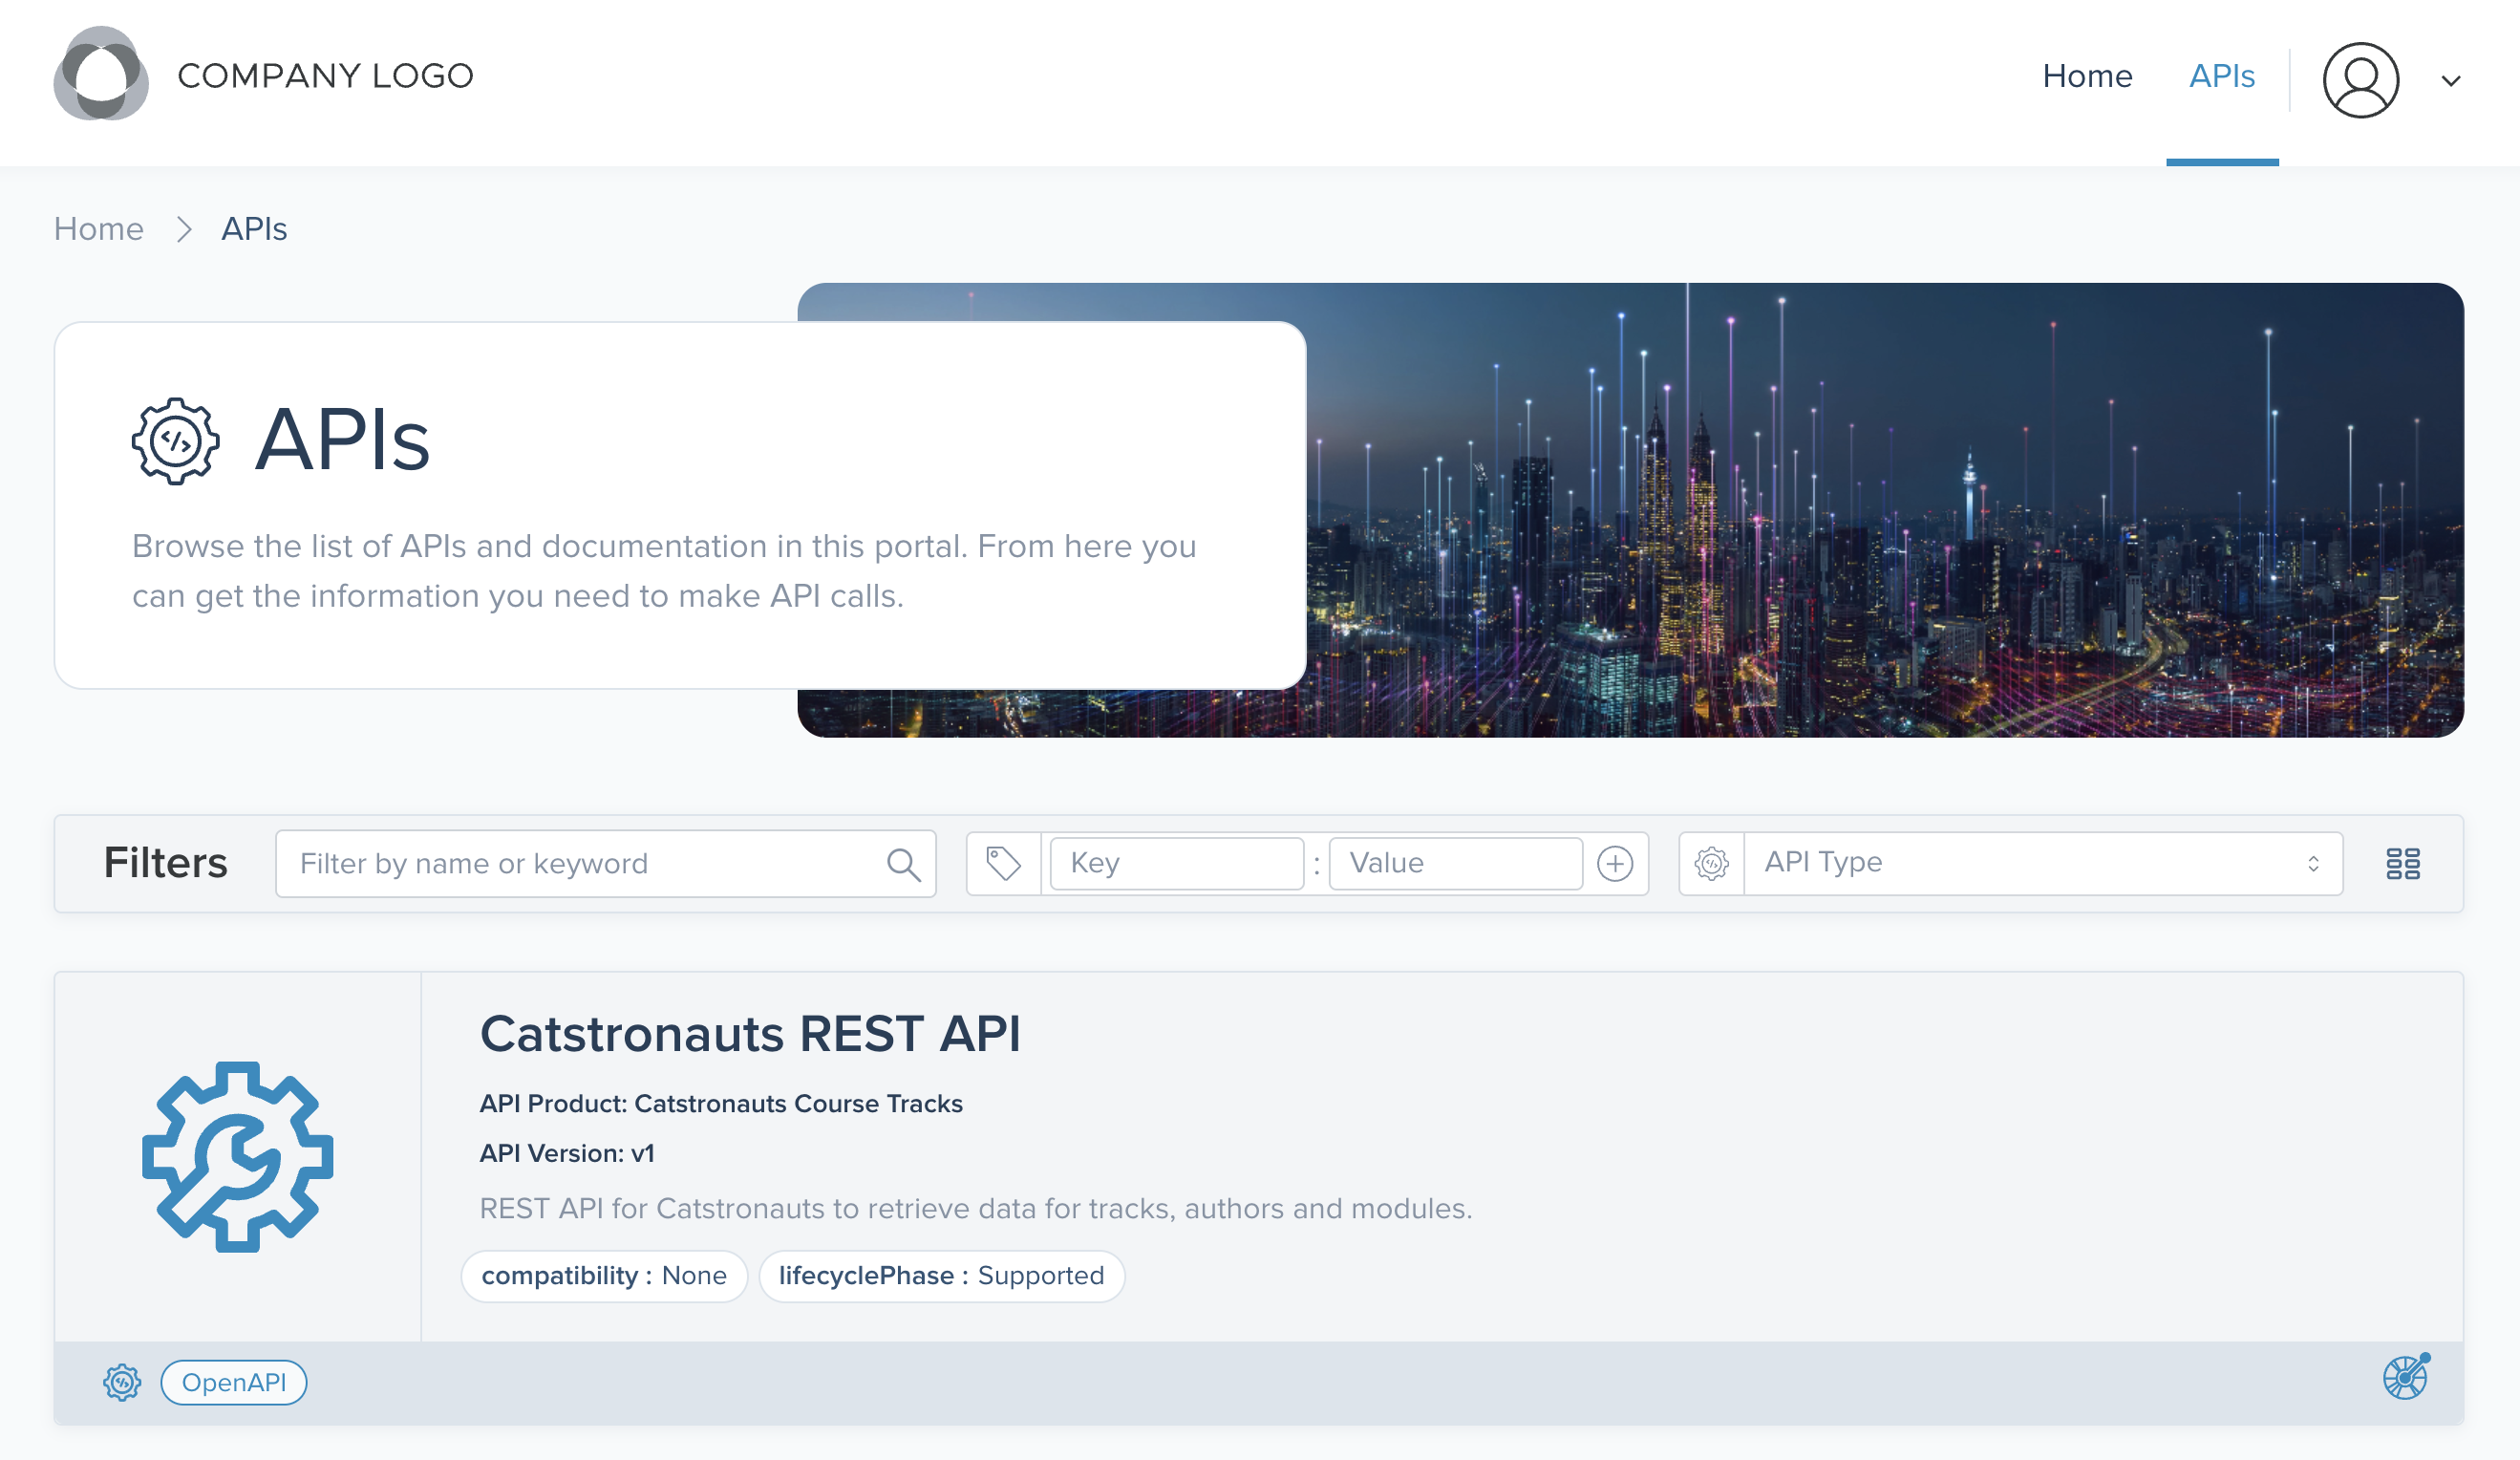
Figure: Sample React app portal APIs
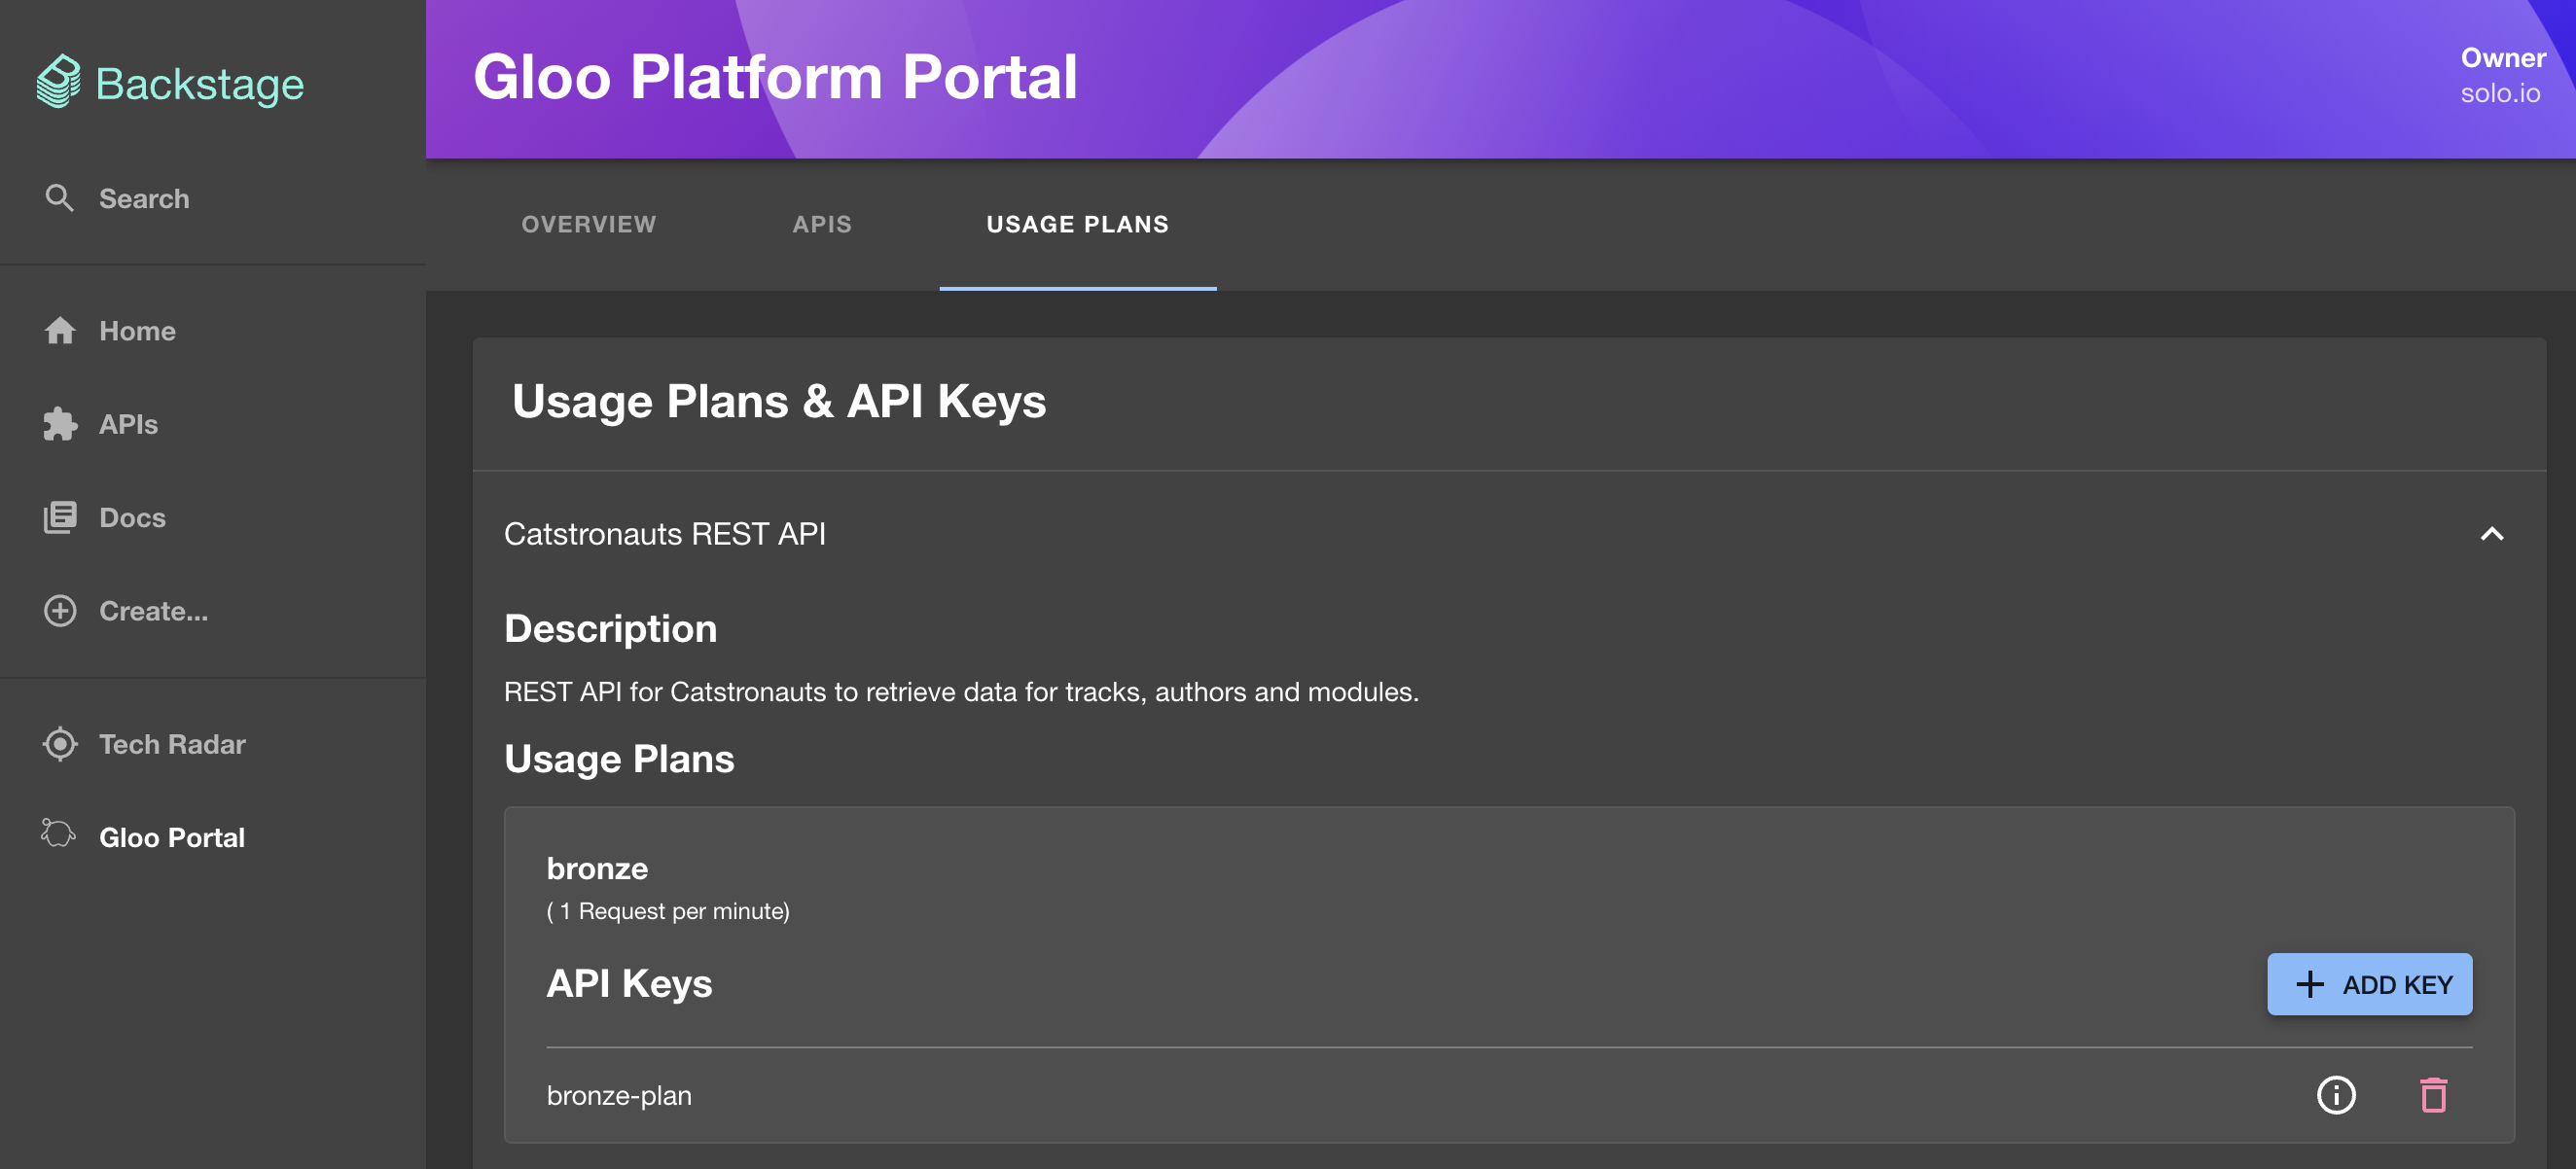
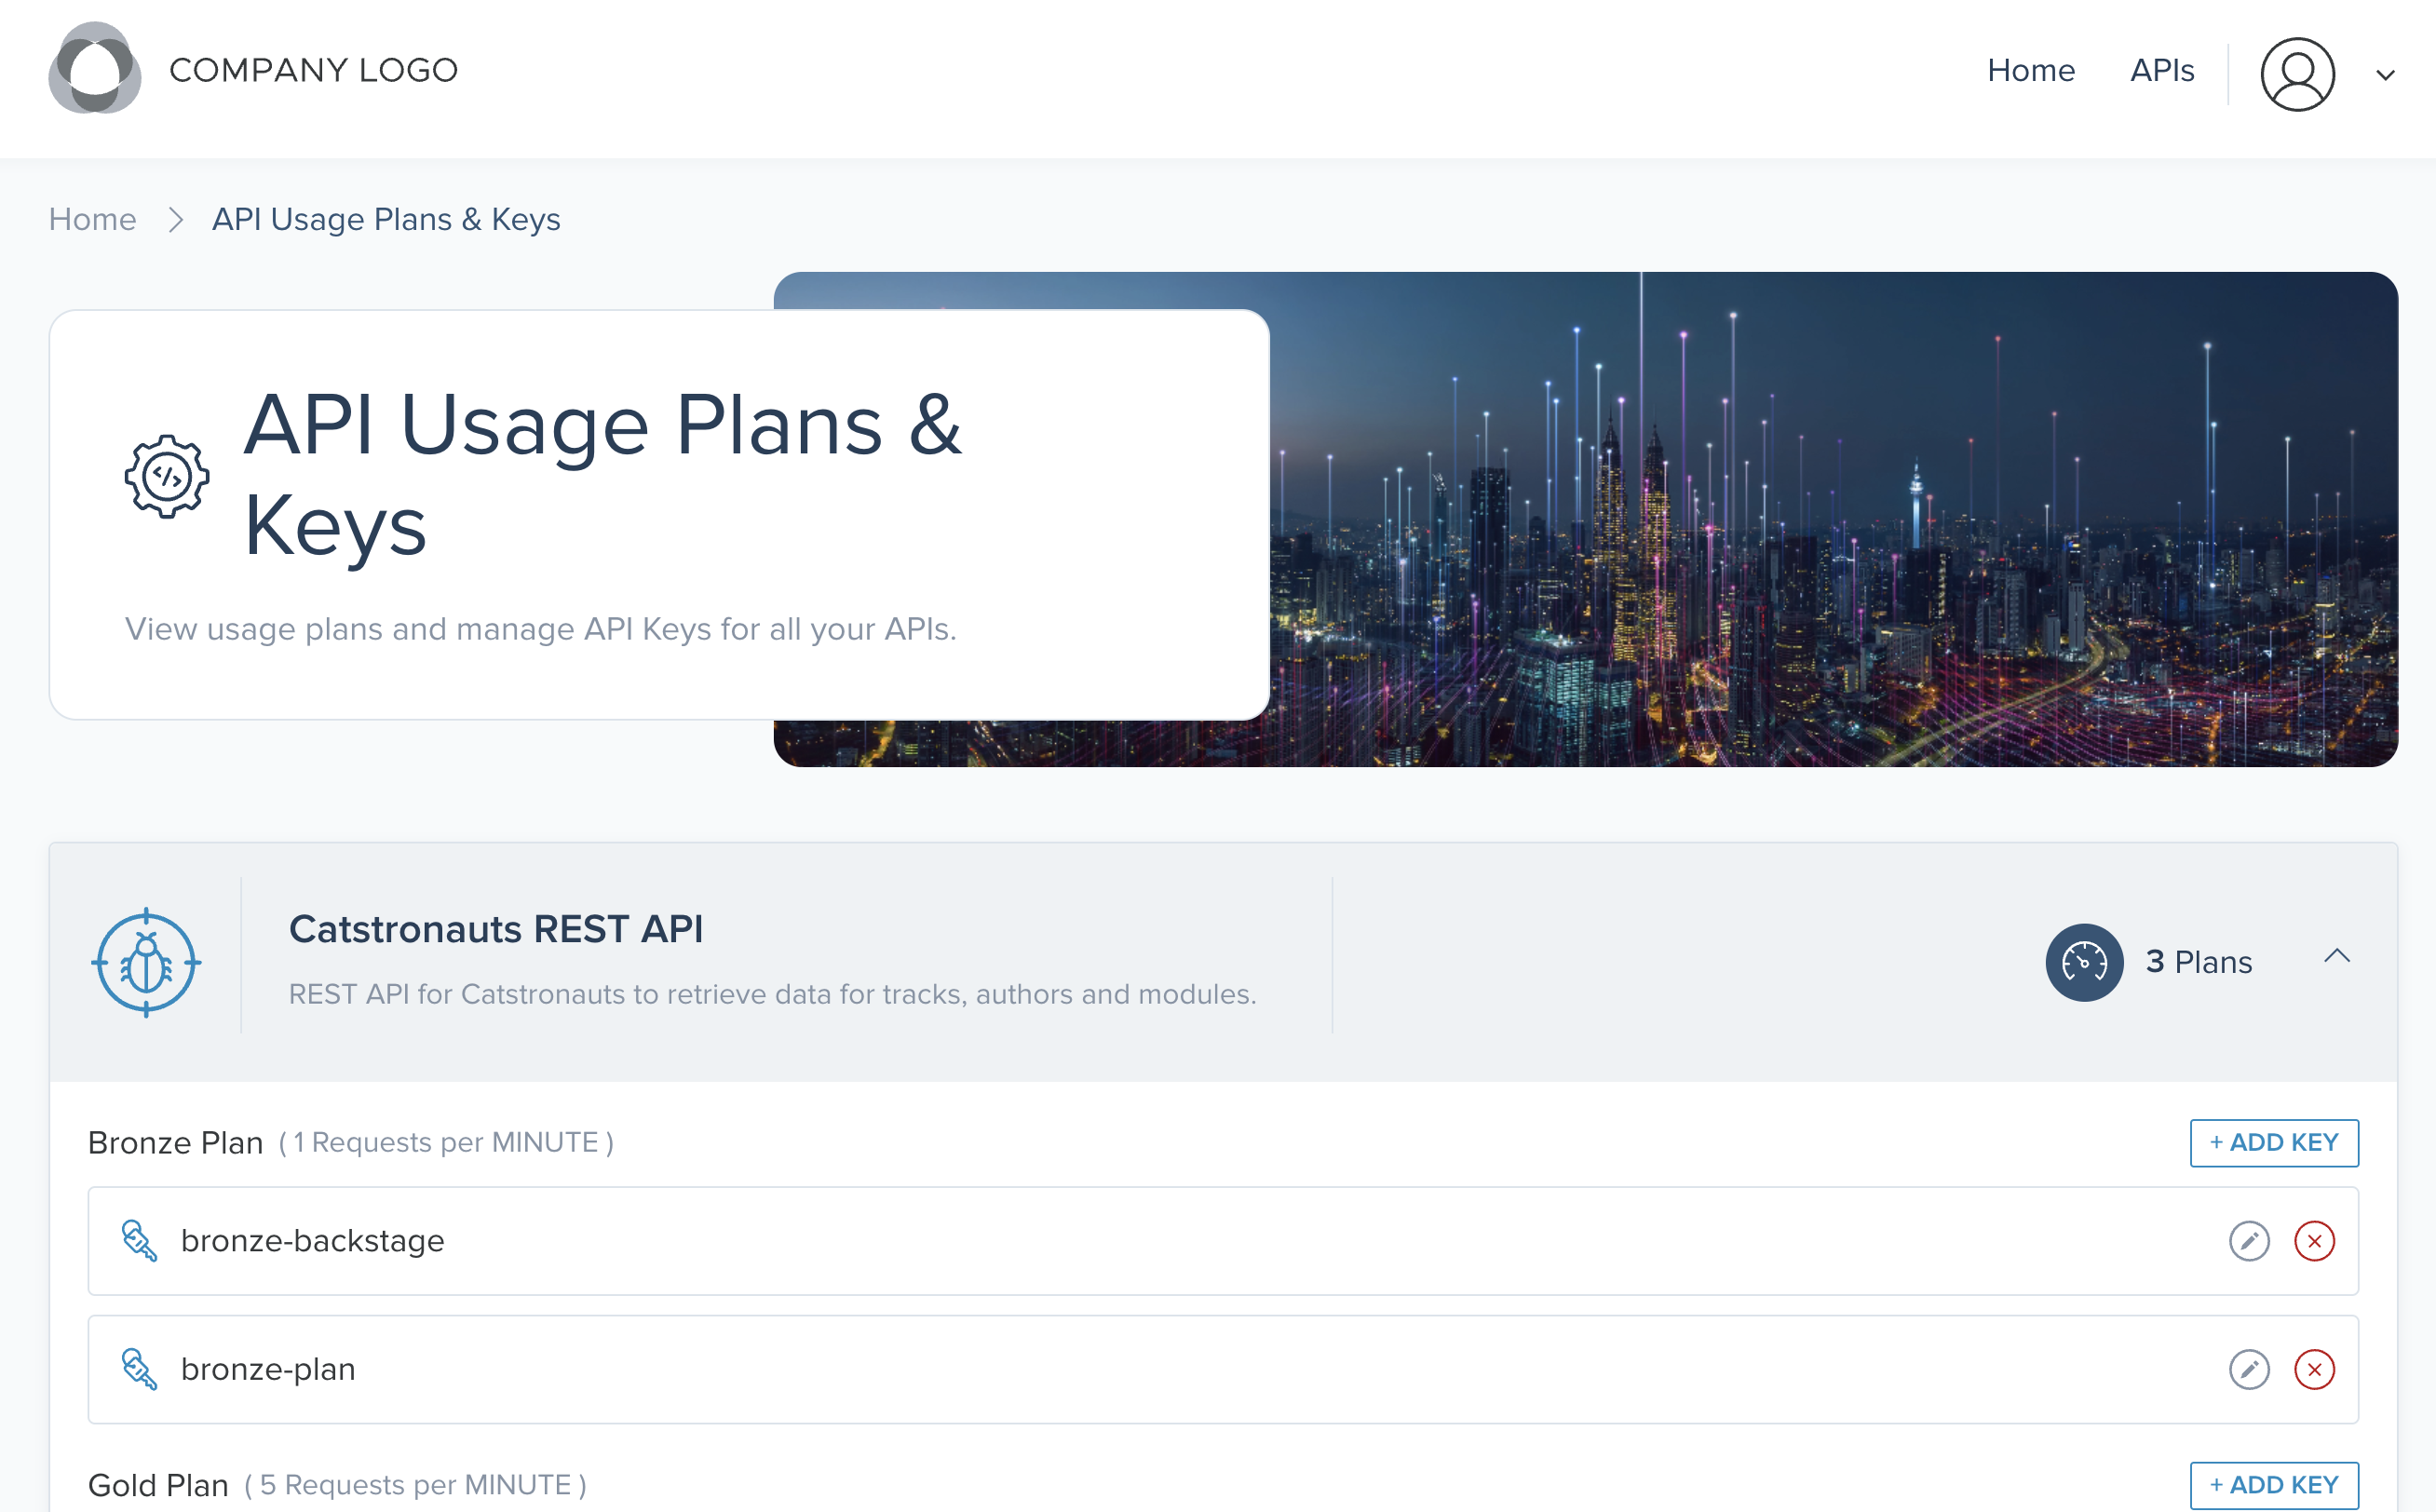
View usage plans
End users can view the usage plans in the developer portal that you set up for your API products.
- To view usage plans, users must click Login to log in to the OIDC provider that you configured.
- After successfully logging in, click the Usage Plans tab.
- Expand the API product to view or create API keys.
- To view usage plans, users must click Login to log in to the OIDC provider that you configured.
- After successfully logging in, the Login button disappears and the username of the user that is logged in to the developer portal is displayed.
- End users can click the username and then select API keys to view the public and private API products that they have access to.
- Users select an API product and can view the usage plans that were configured for that API product.
Create an API key to use the API products
To interact with APIs that require API key authentication, end users can use the developer portal to create an API key.
- Follow steps 1 - 3 in View usage plans.
- Select the API product to create an API key for.
- Click Add Key.
- In the pop-up window, enter a name for the API key and then click Generate key.
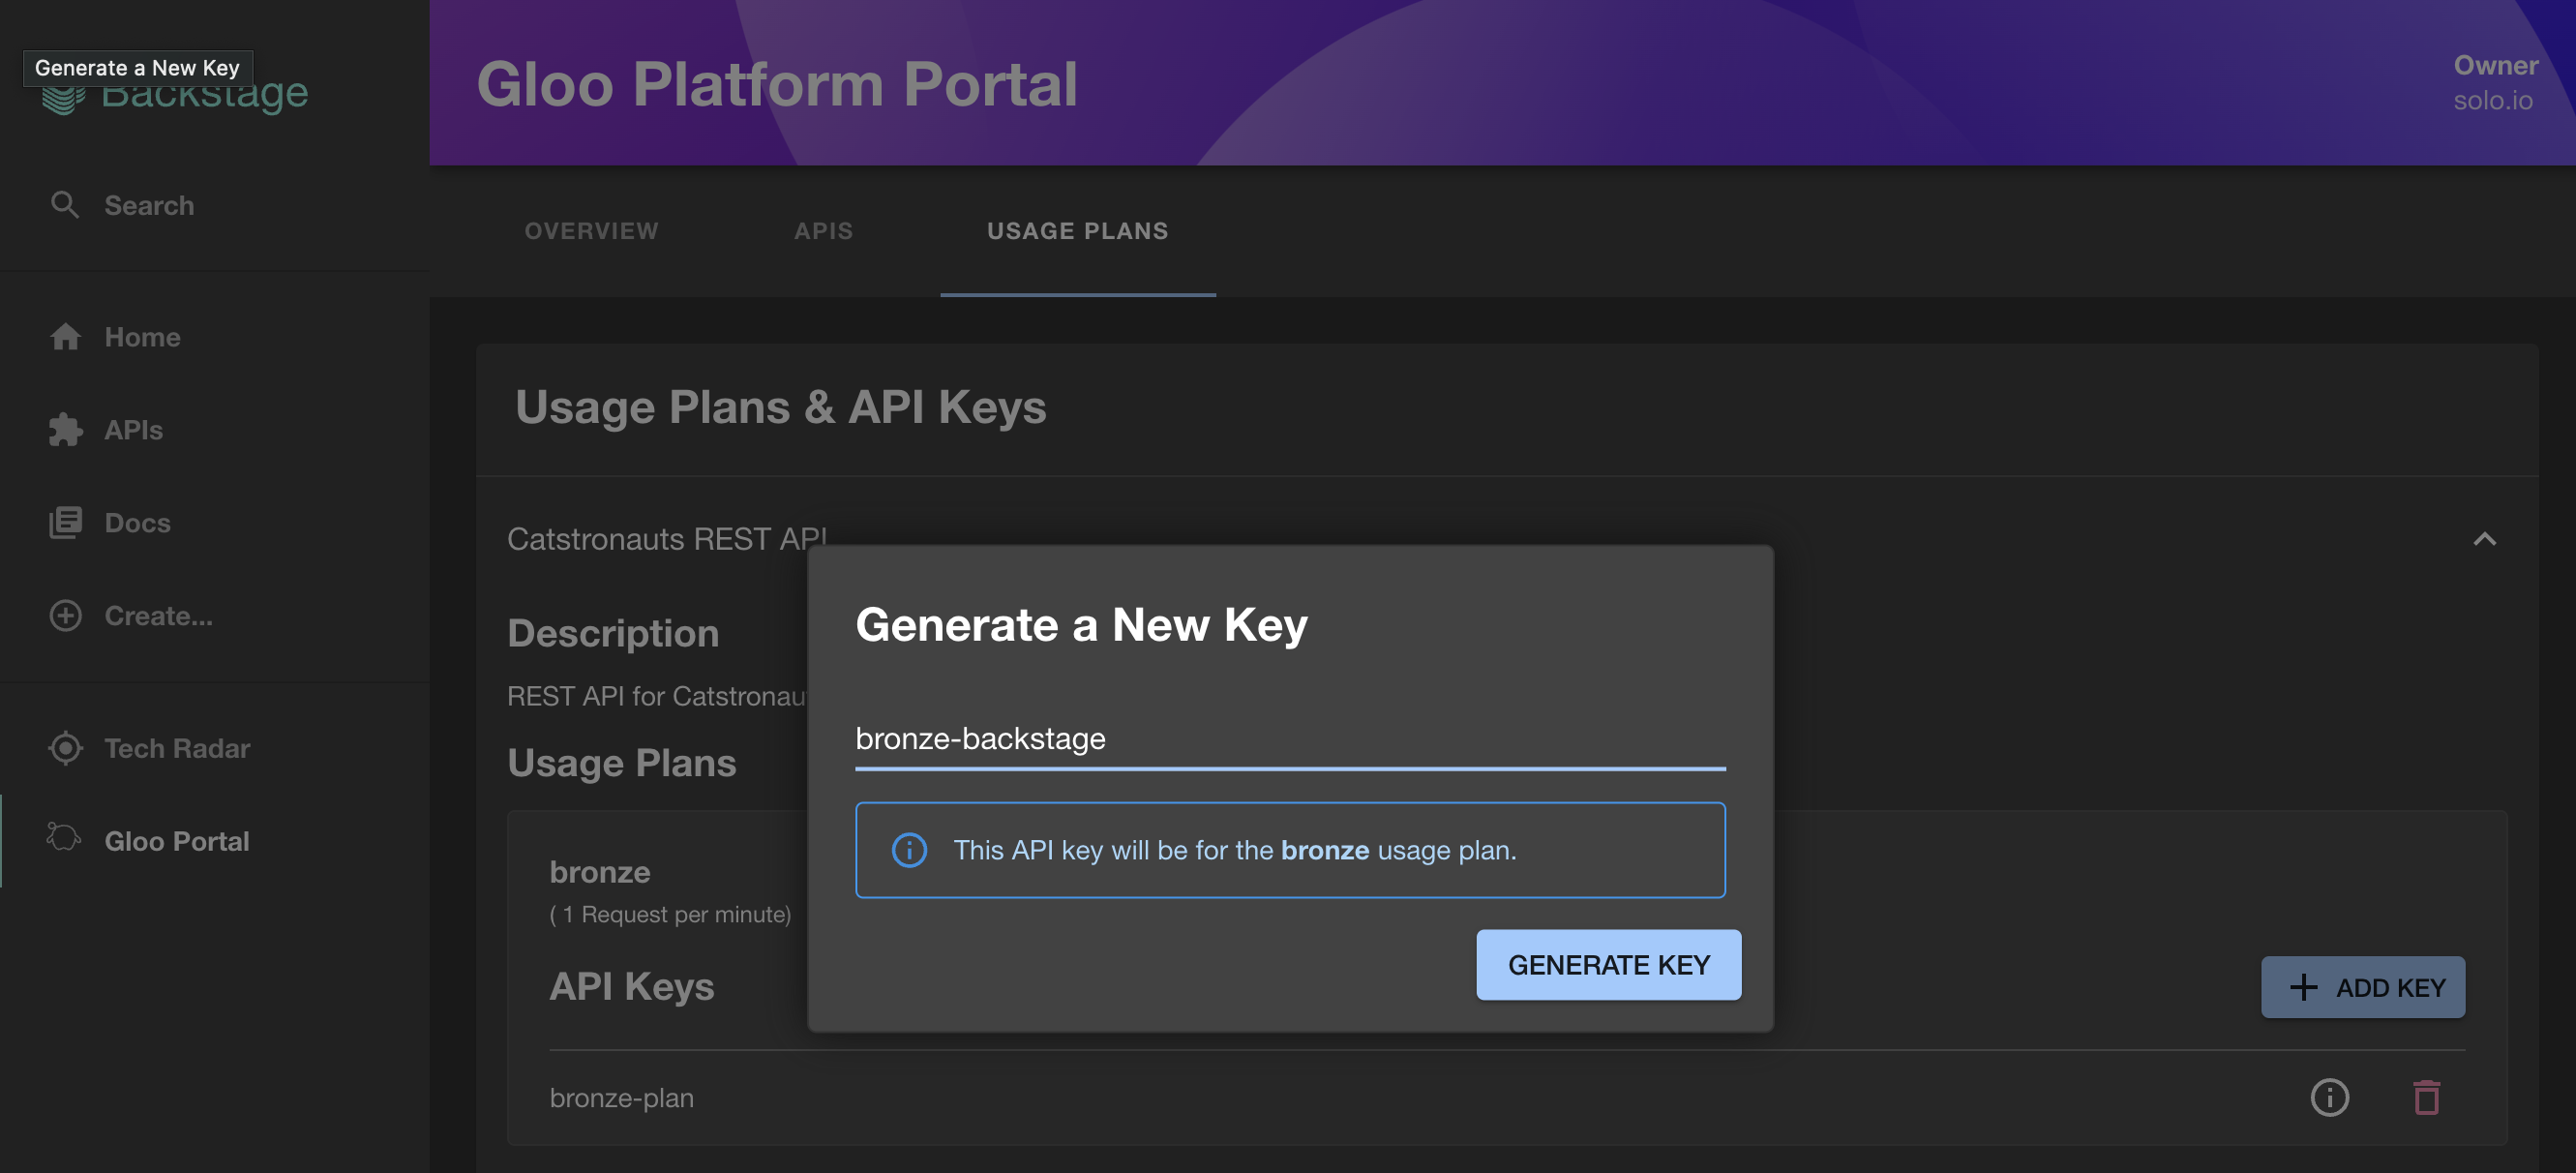
Figure: Backstage portal generate API key 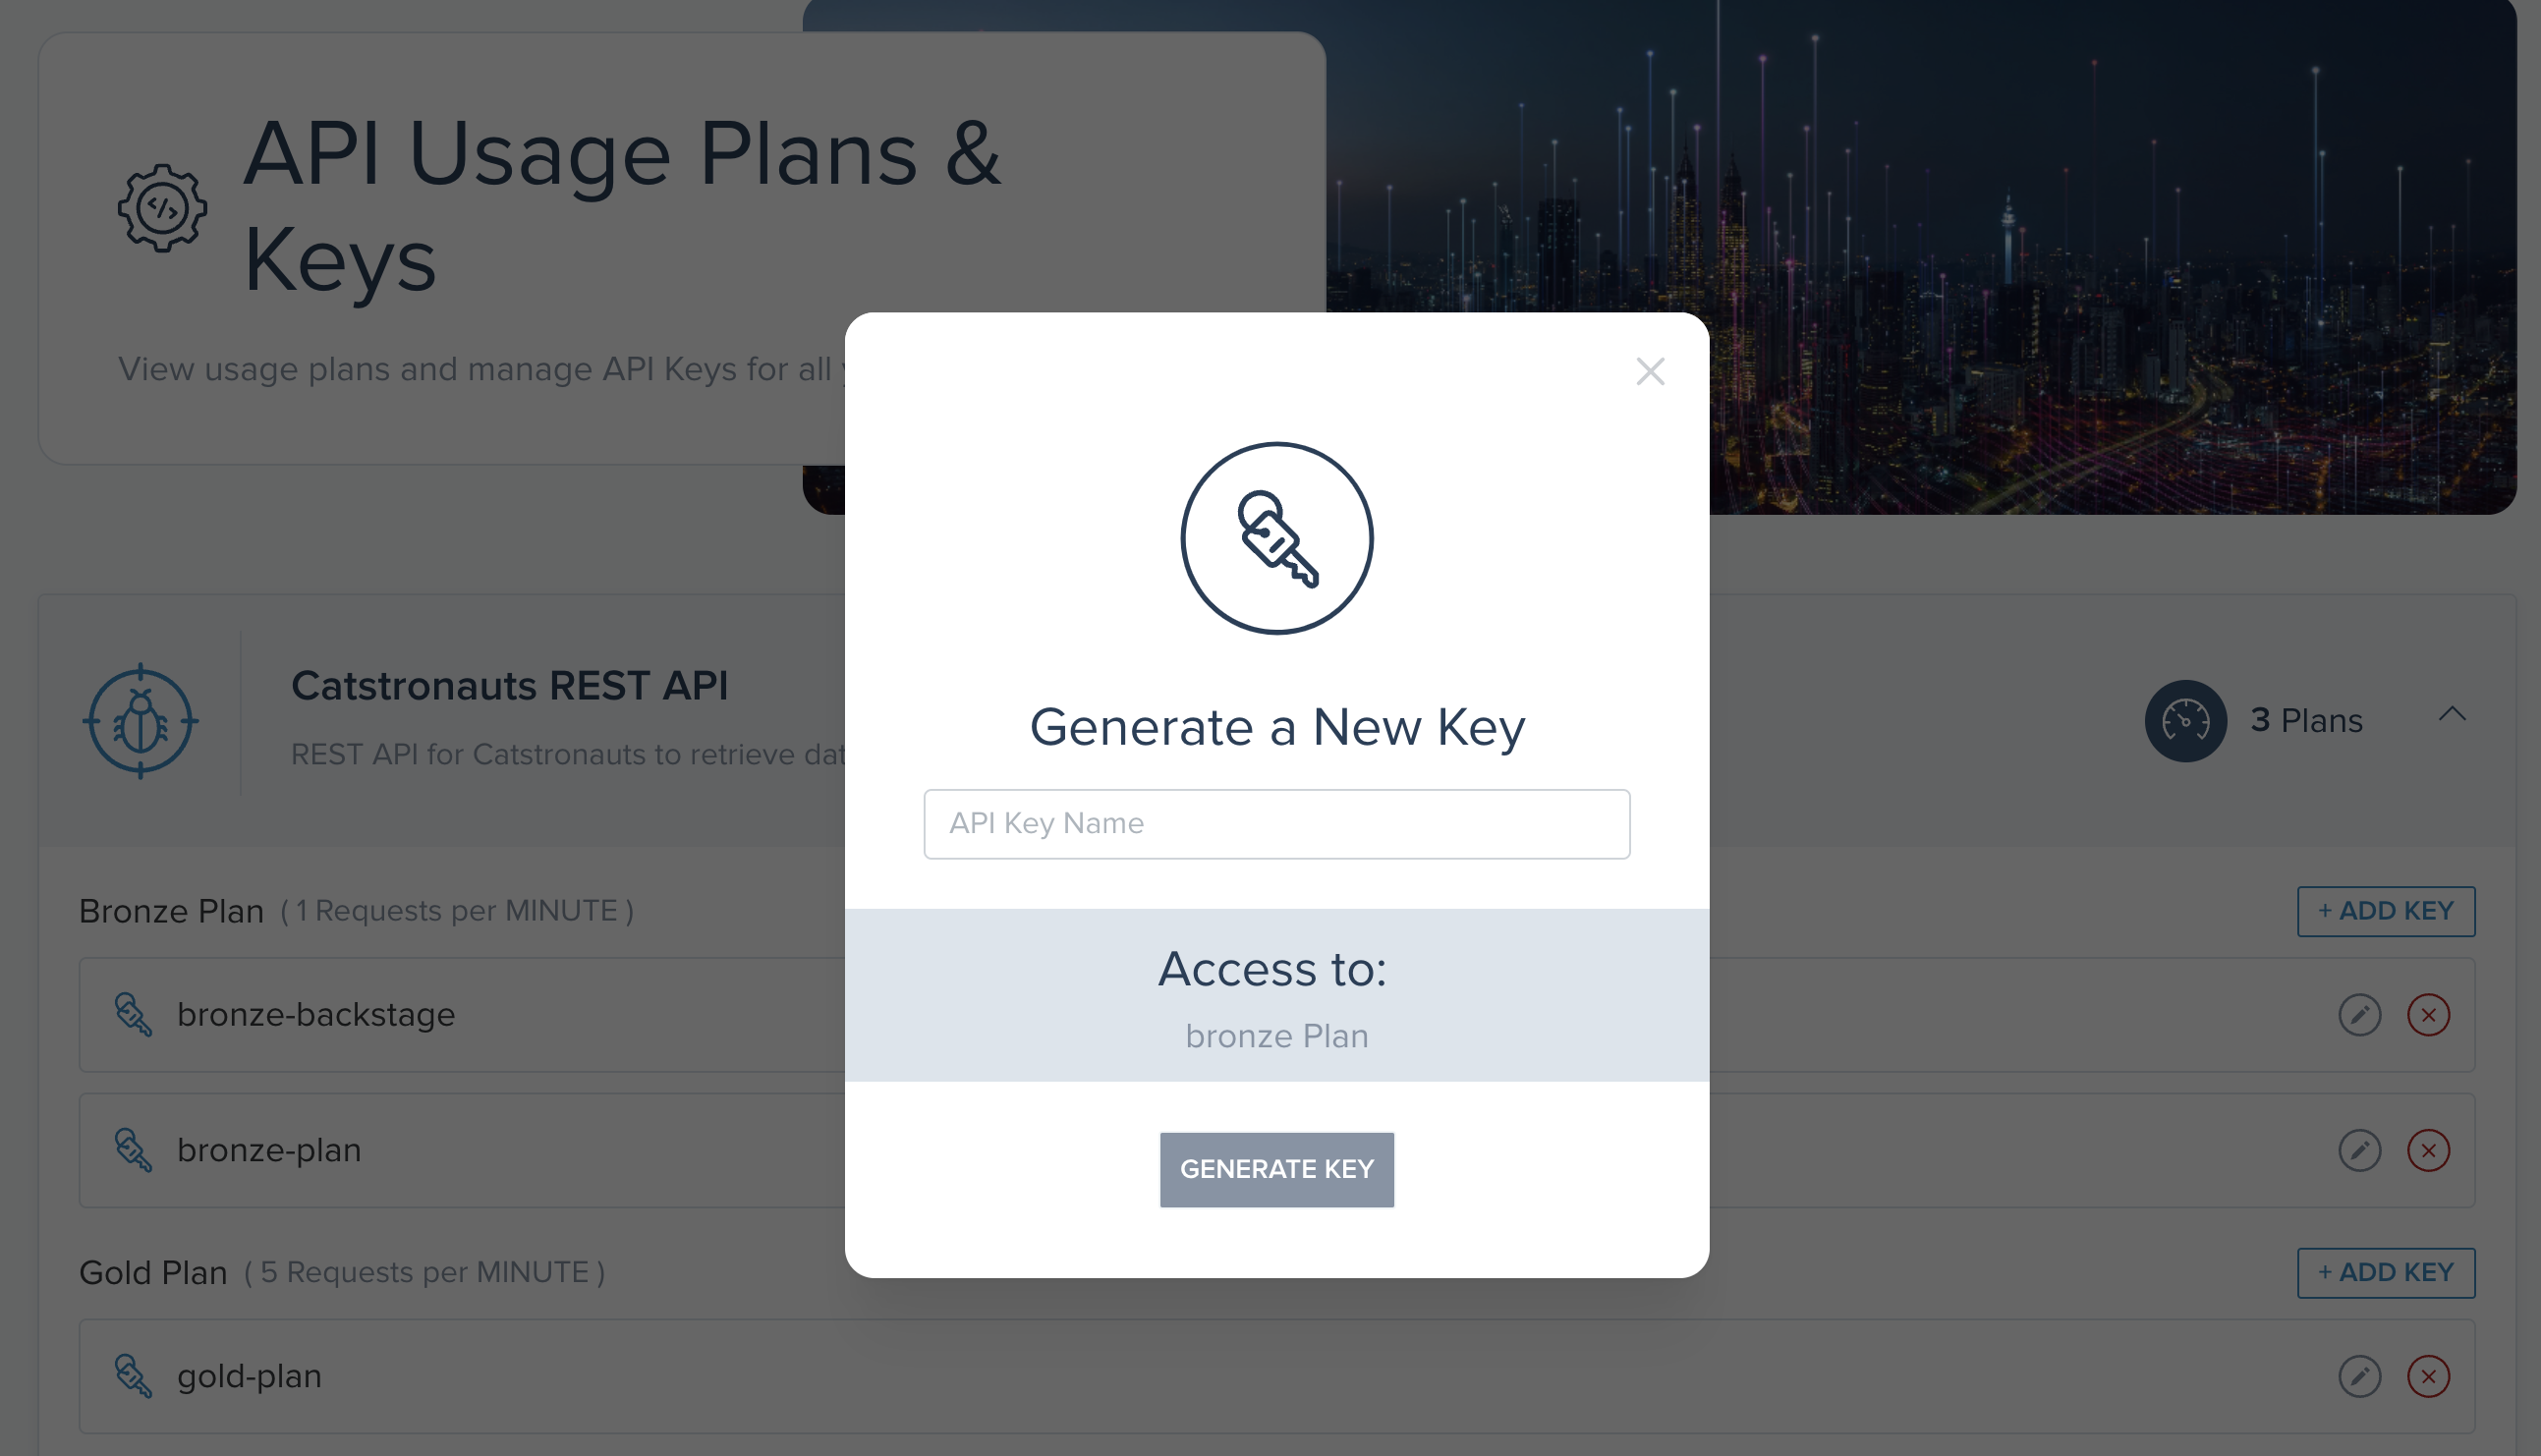
Figure: Sample React app portal generate API key - Copy and store the generated API key value in a secure place. Keep in mind that you cannot review the API key value anymore after you close the pop-up window.
Great job! You just created an API key for a usage plan for your API products. To verify that the API key works, try out an API.
Try out an API
To access an API with the API key, users can review the API docs for a product and send a request to an API via the Swagger try-it-out feature.
- Click the APIs tab.
- Select the API product that you want to try out.
- Toggle the Swagger View.
- Click Authorize.
- Paste your API key value into the
Valuefield, and then click Authorize.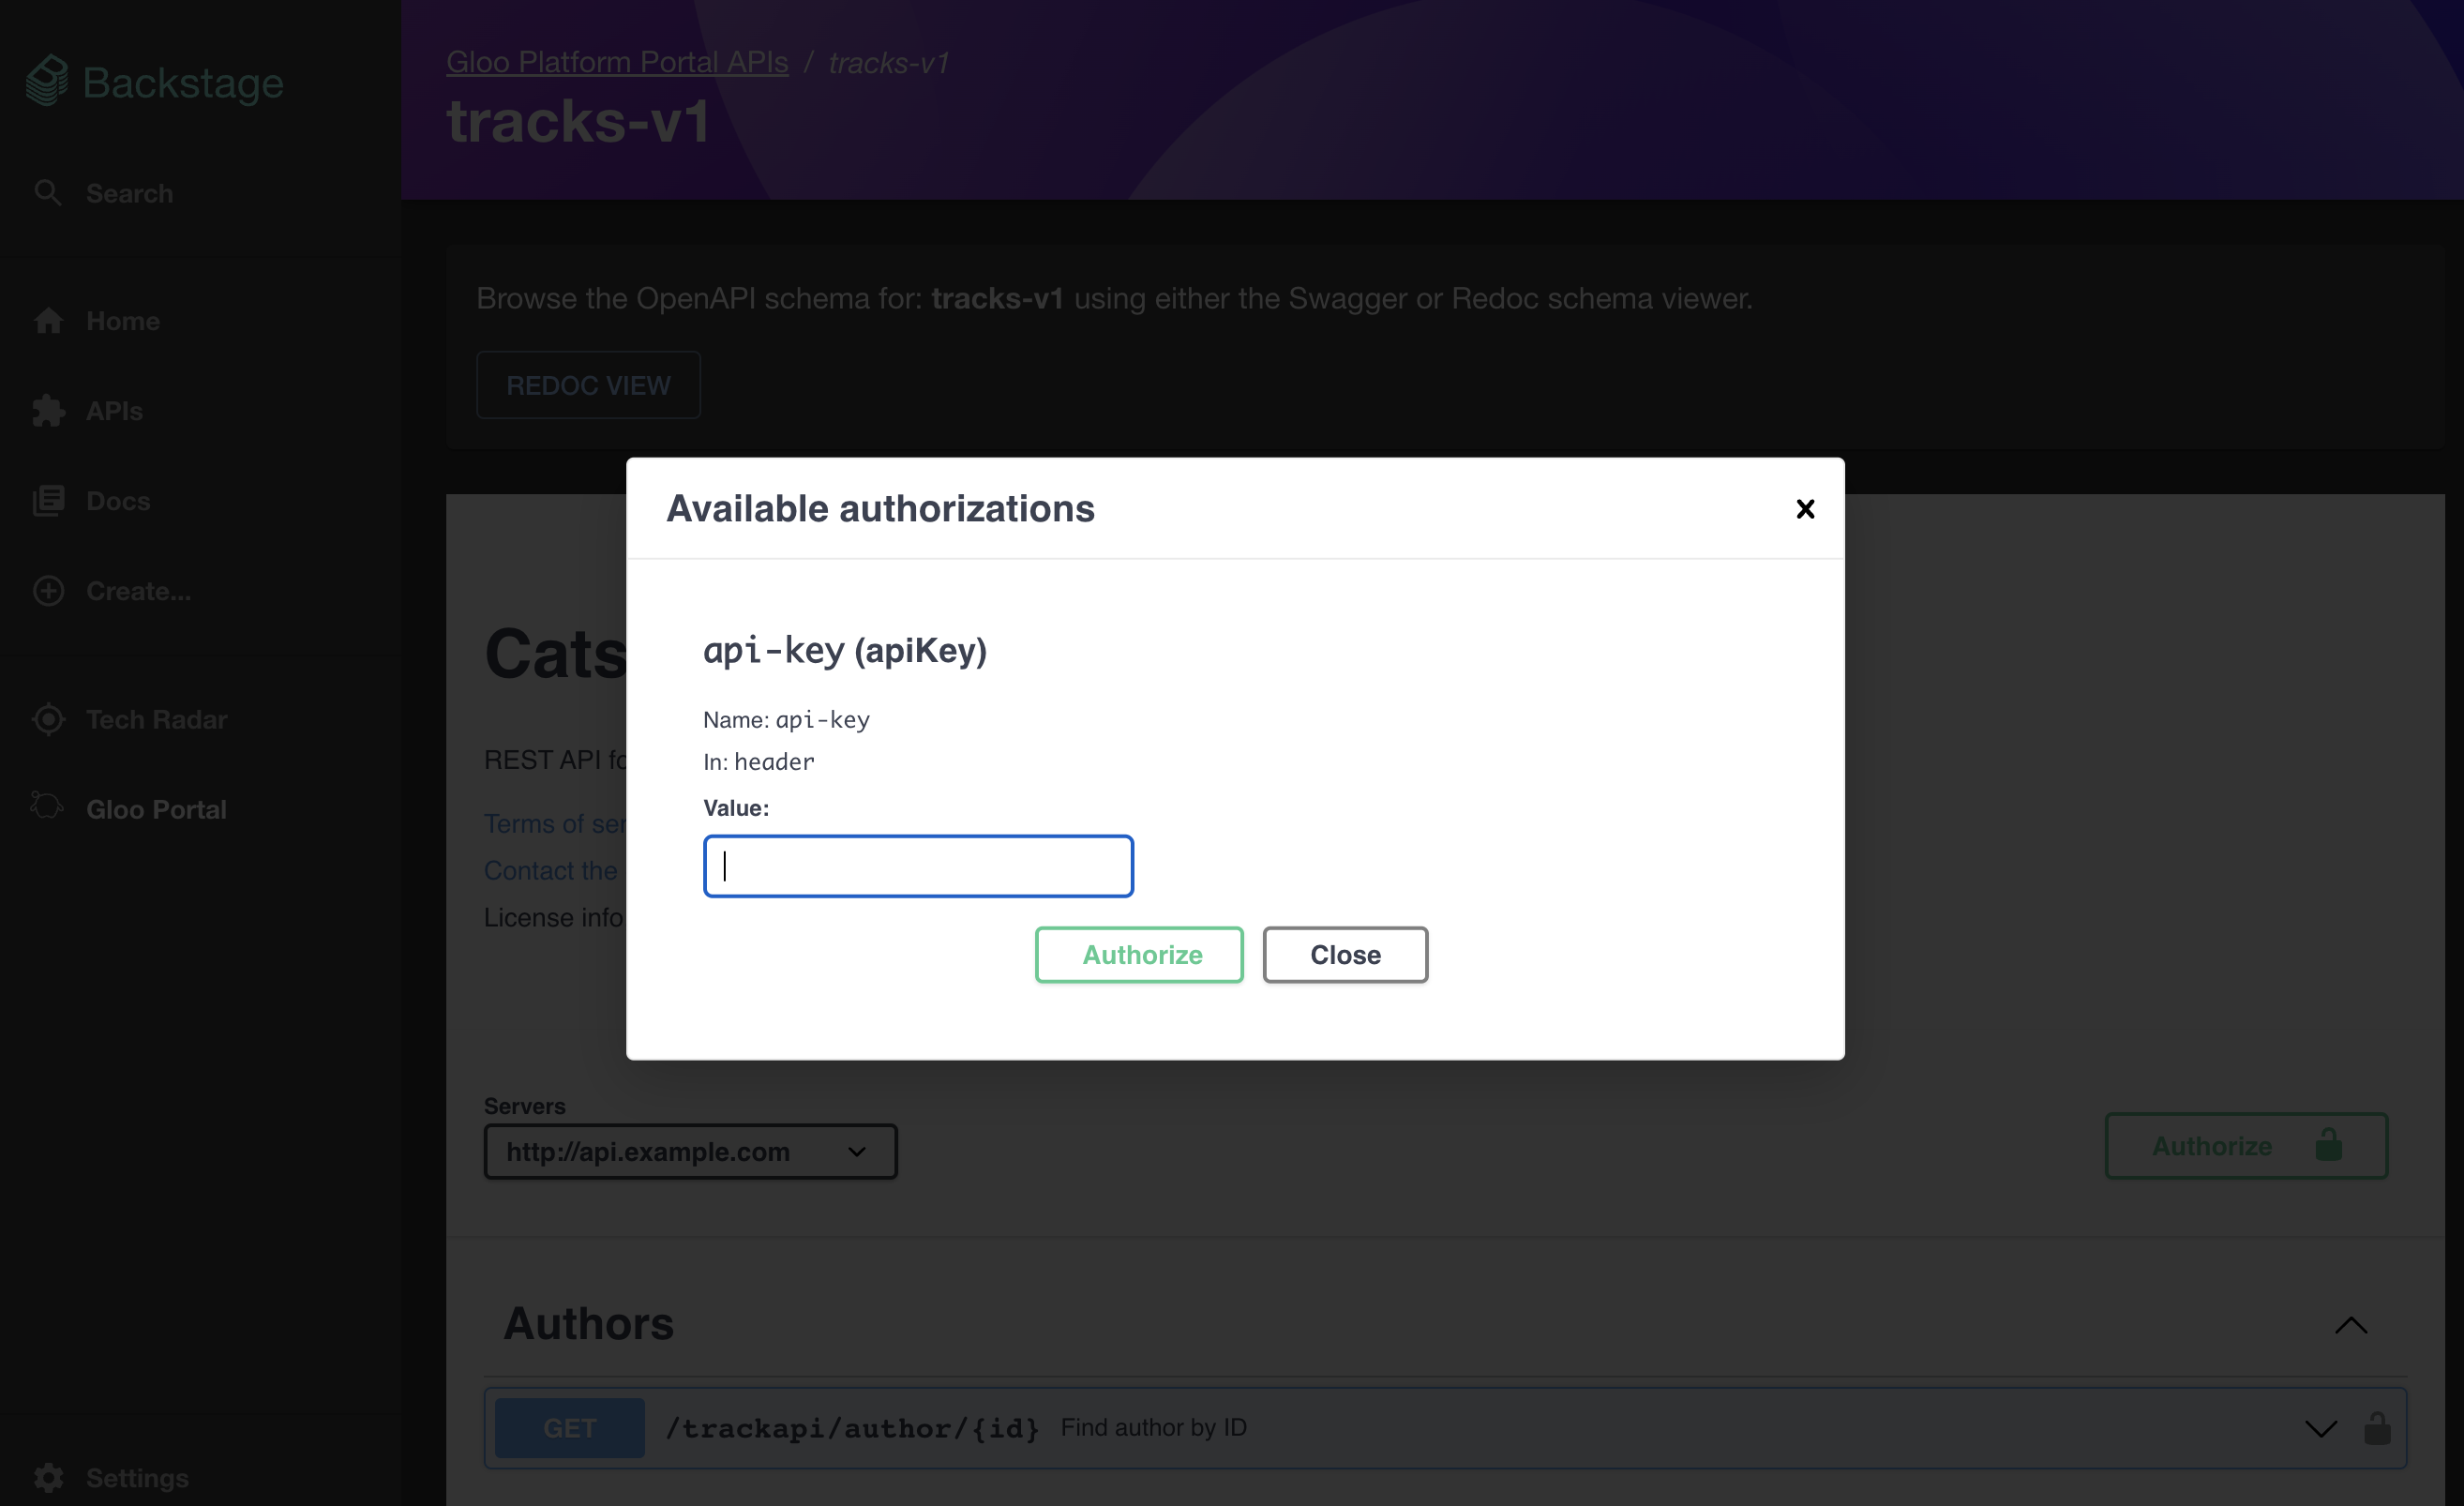
Figure: Backstage portal swagger try-it-out authorize 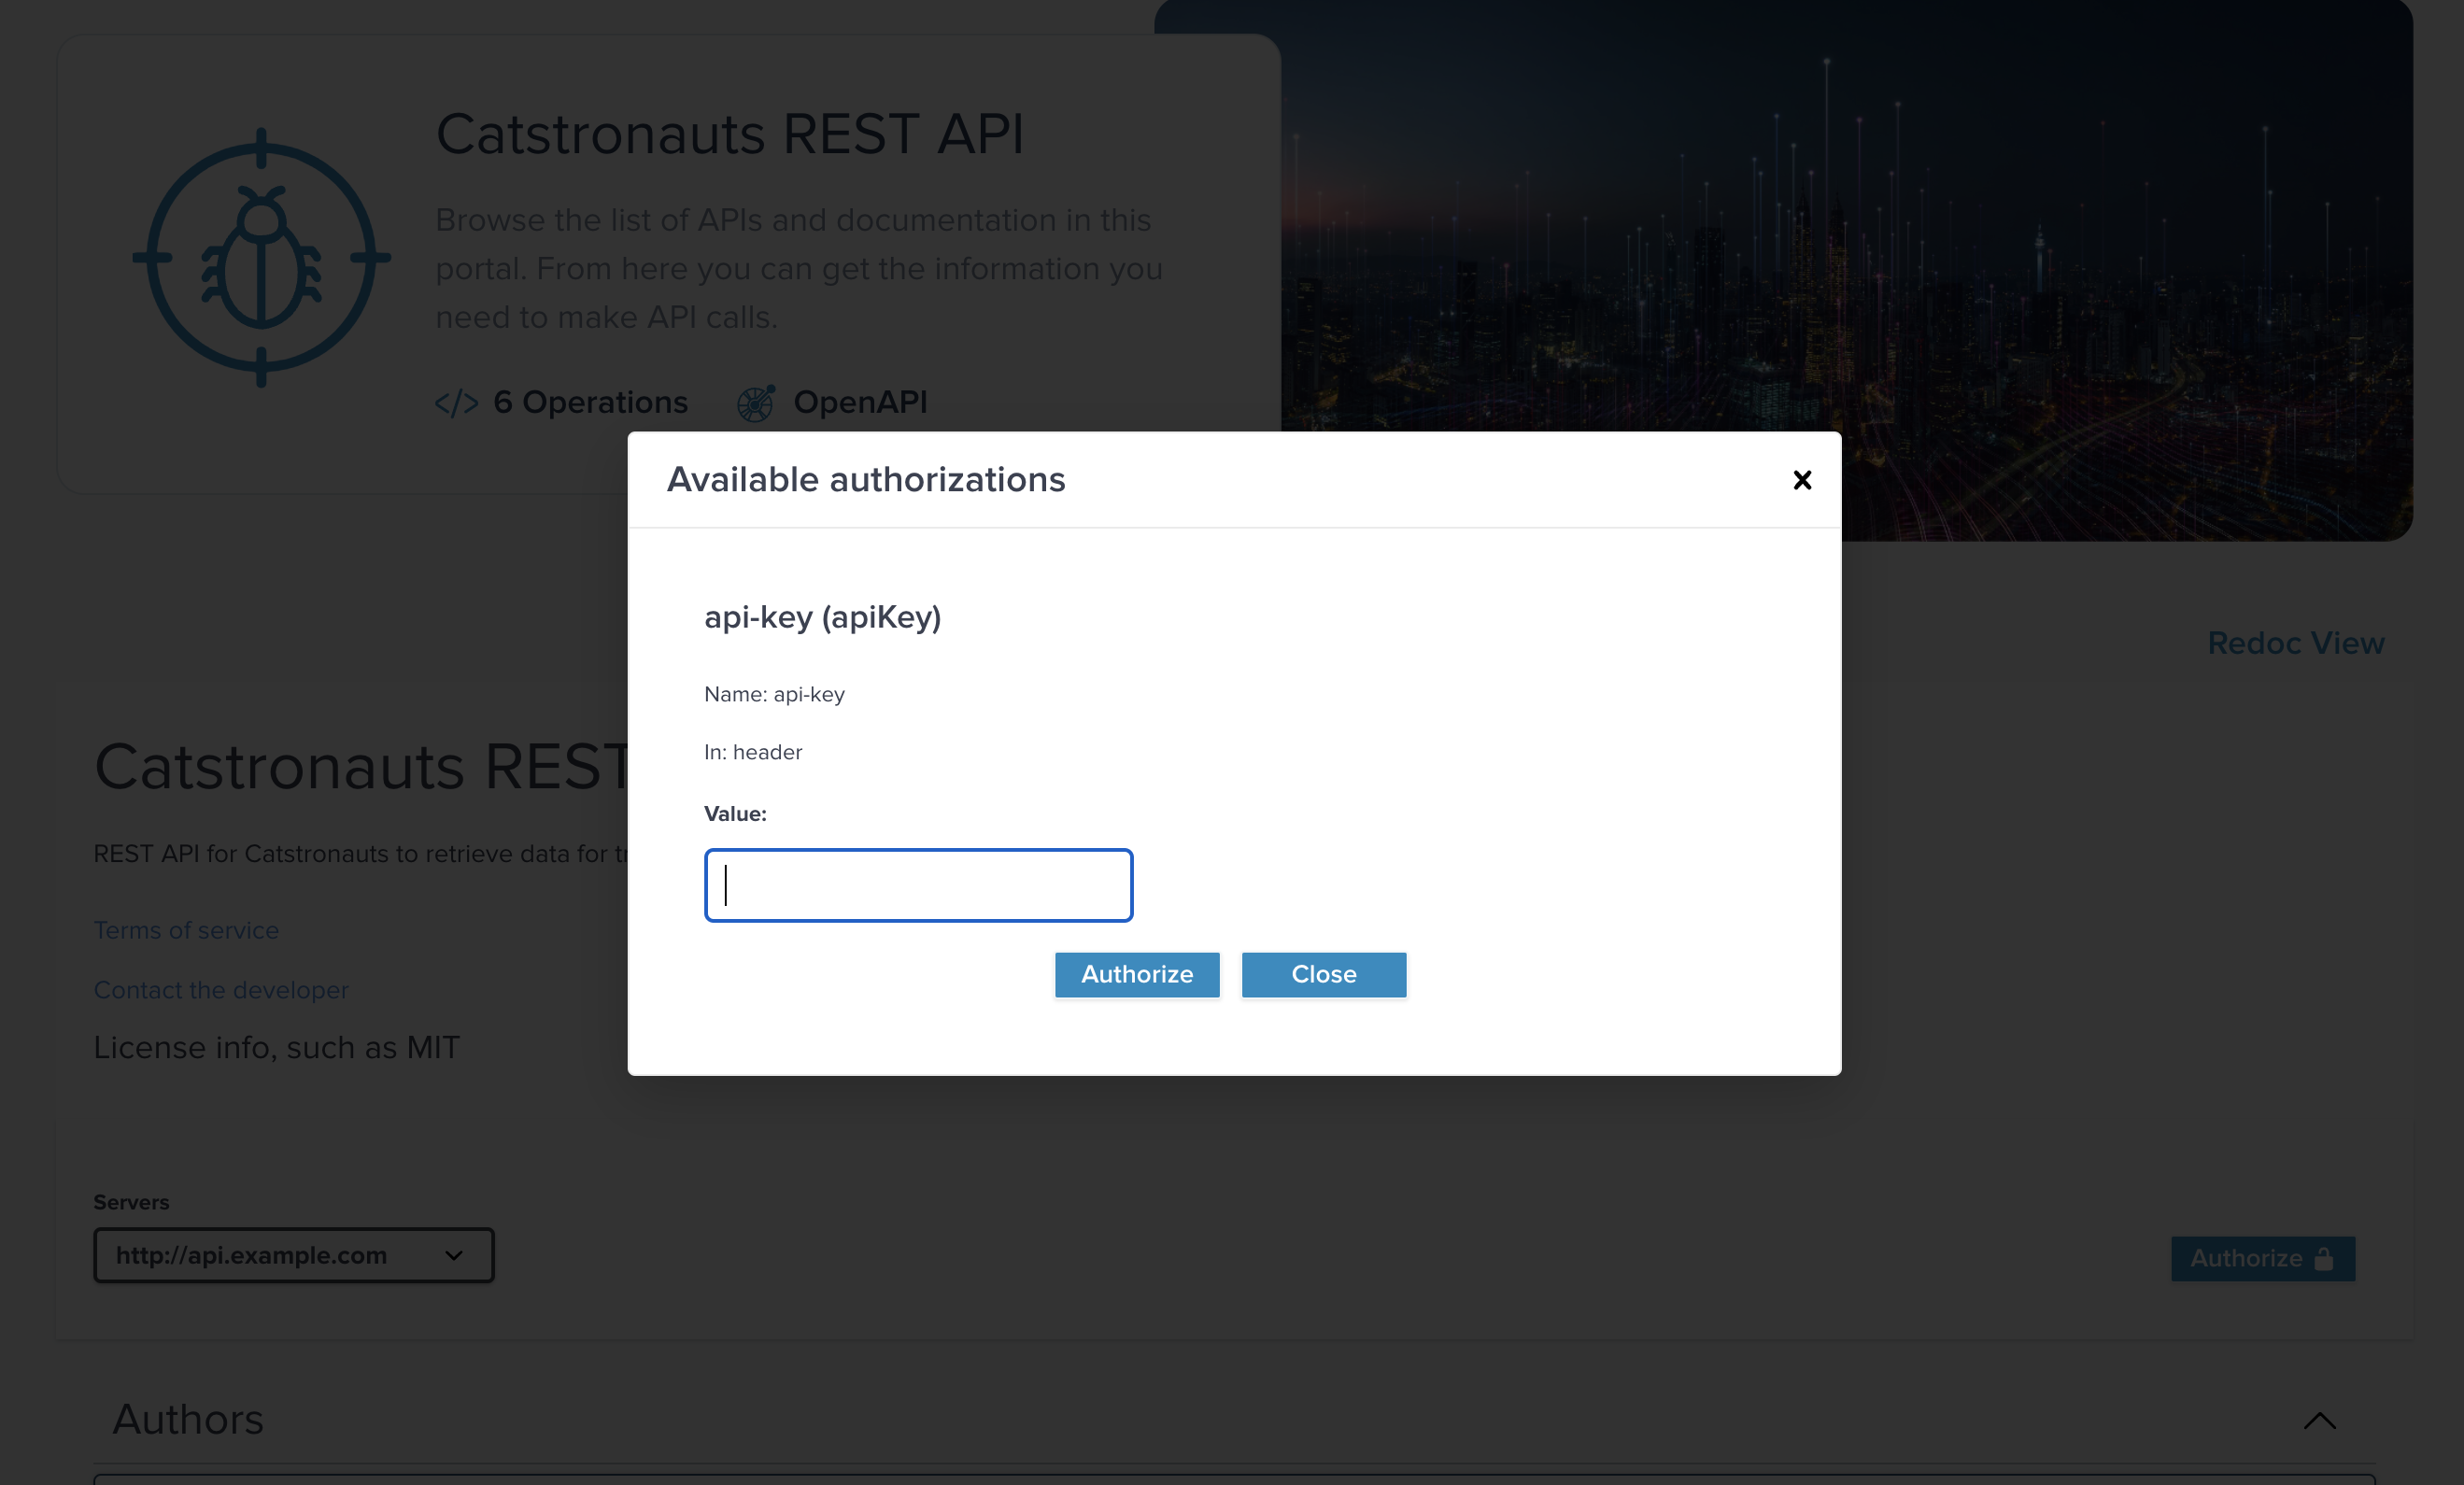
Figure: React sample app portal swagger try-it-out authorize - Click Close to return to the list of APIs in the API product.
- Expand the API that you want to try, such as
Get /trackapi/tracks, click Try it out, then Execute. - Review the server response details, or copy the curl command to try it out in your own environment.
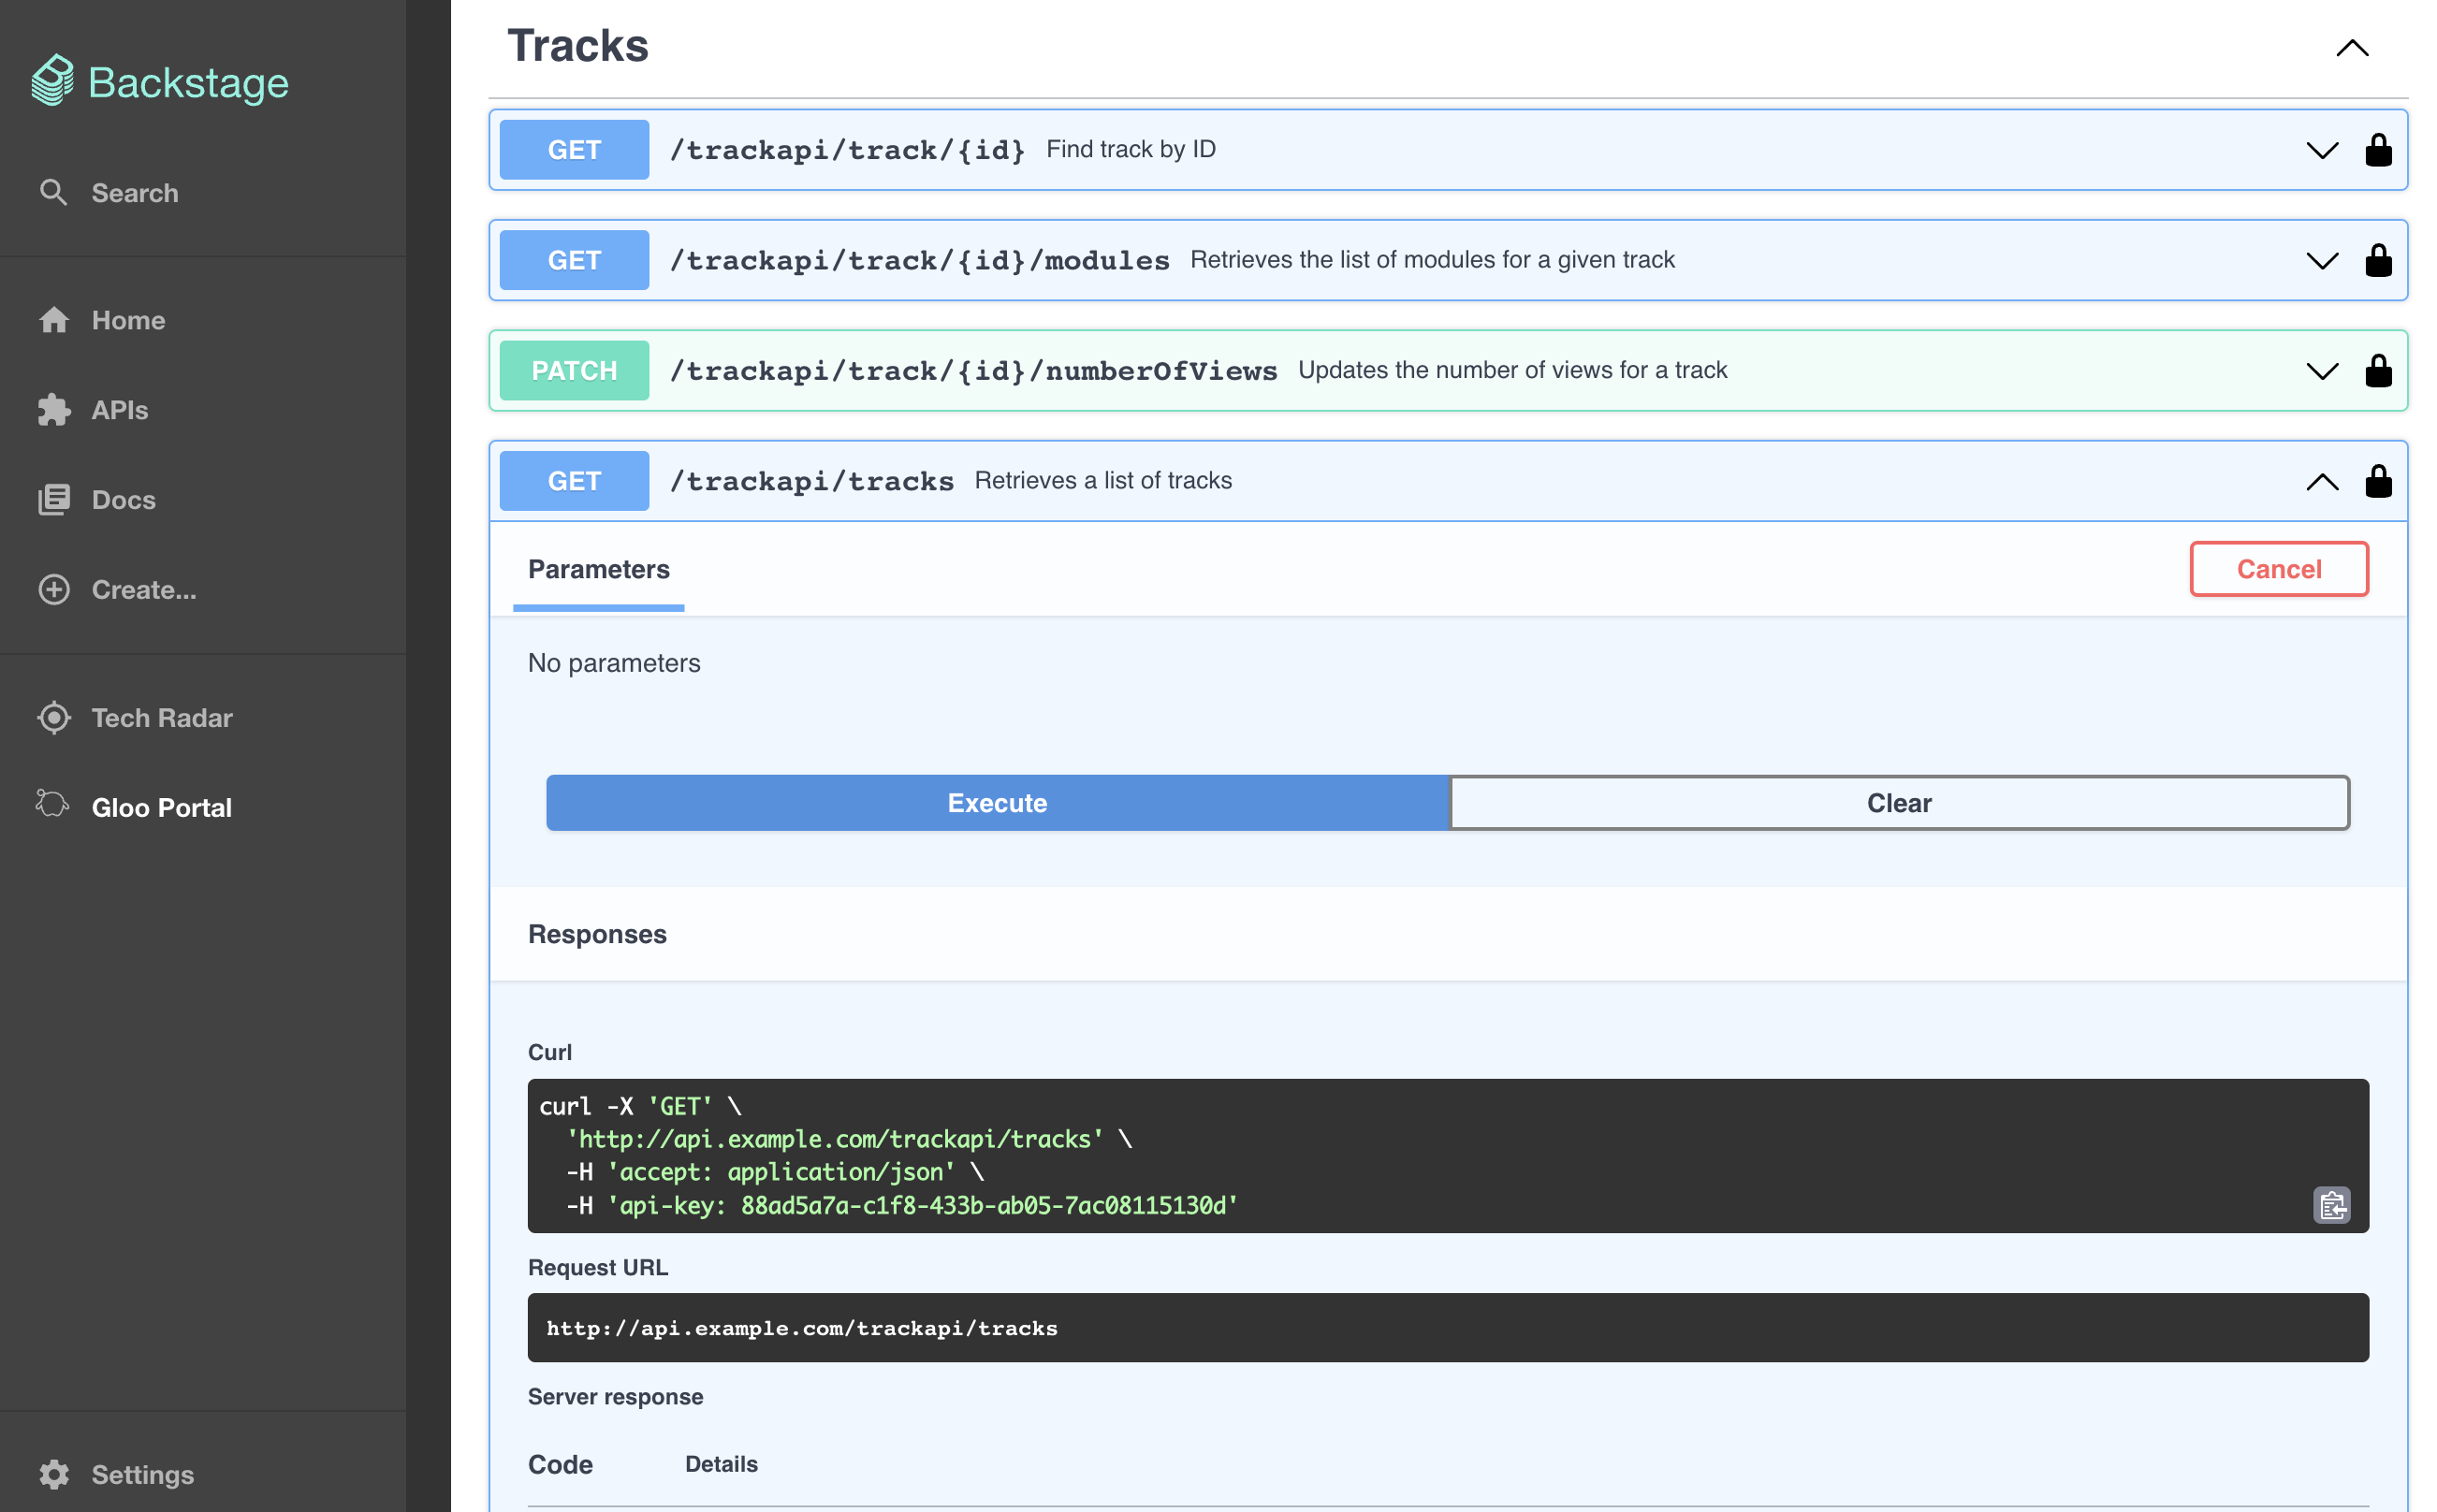
Backstage portal swagger try-it-out execute 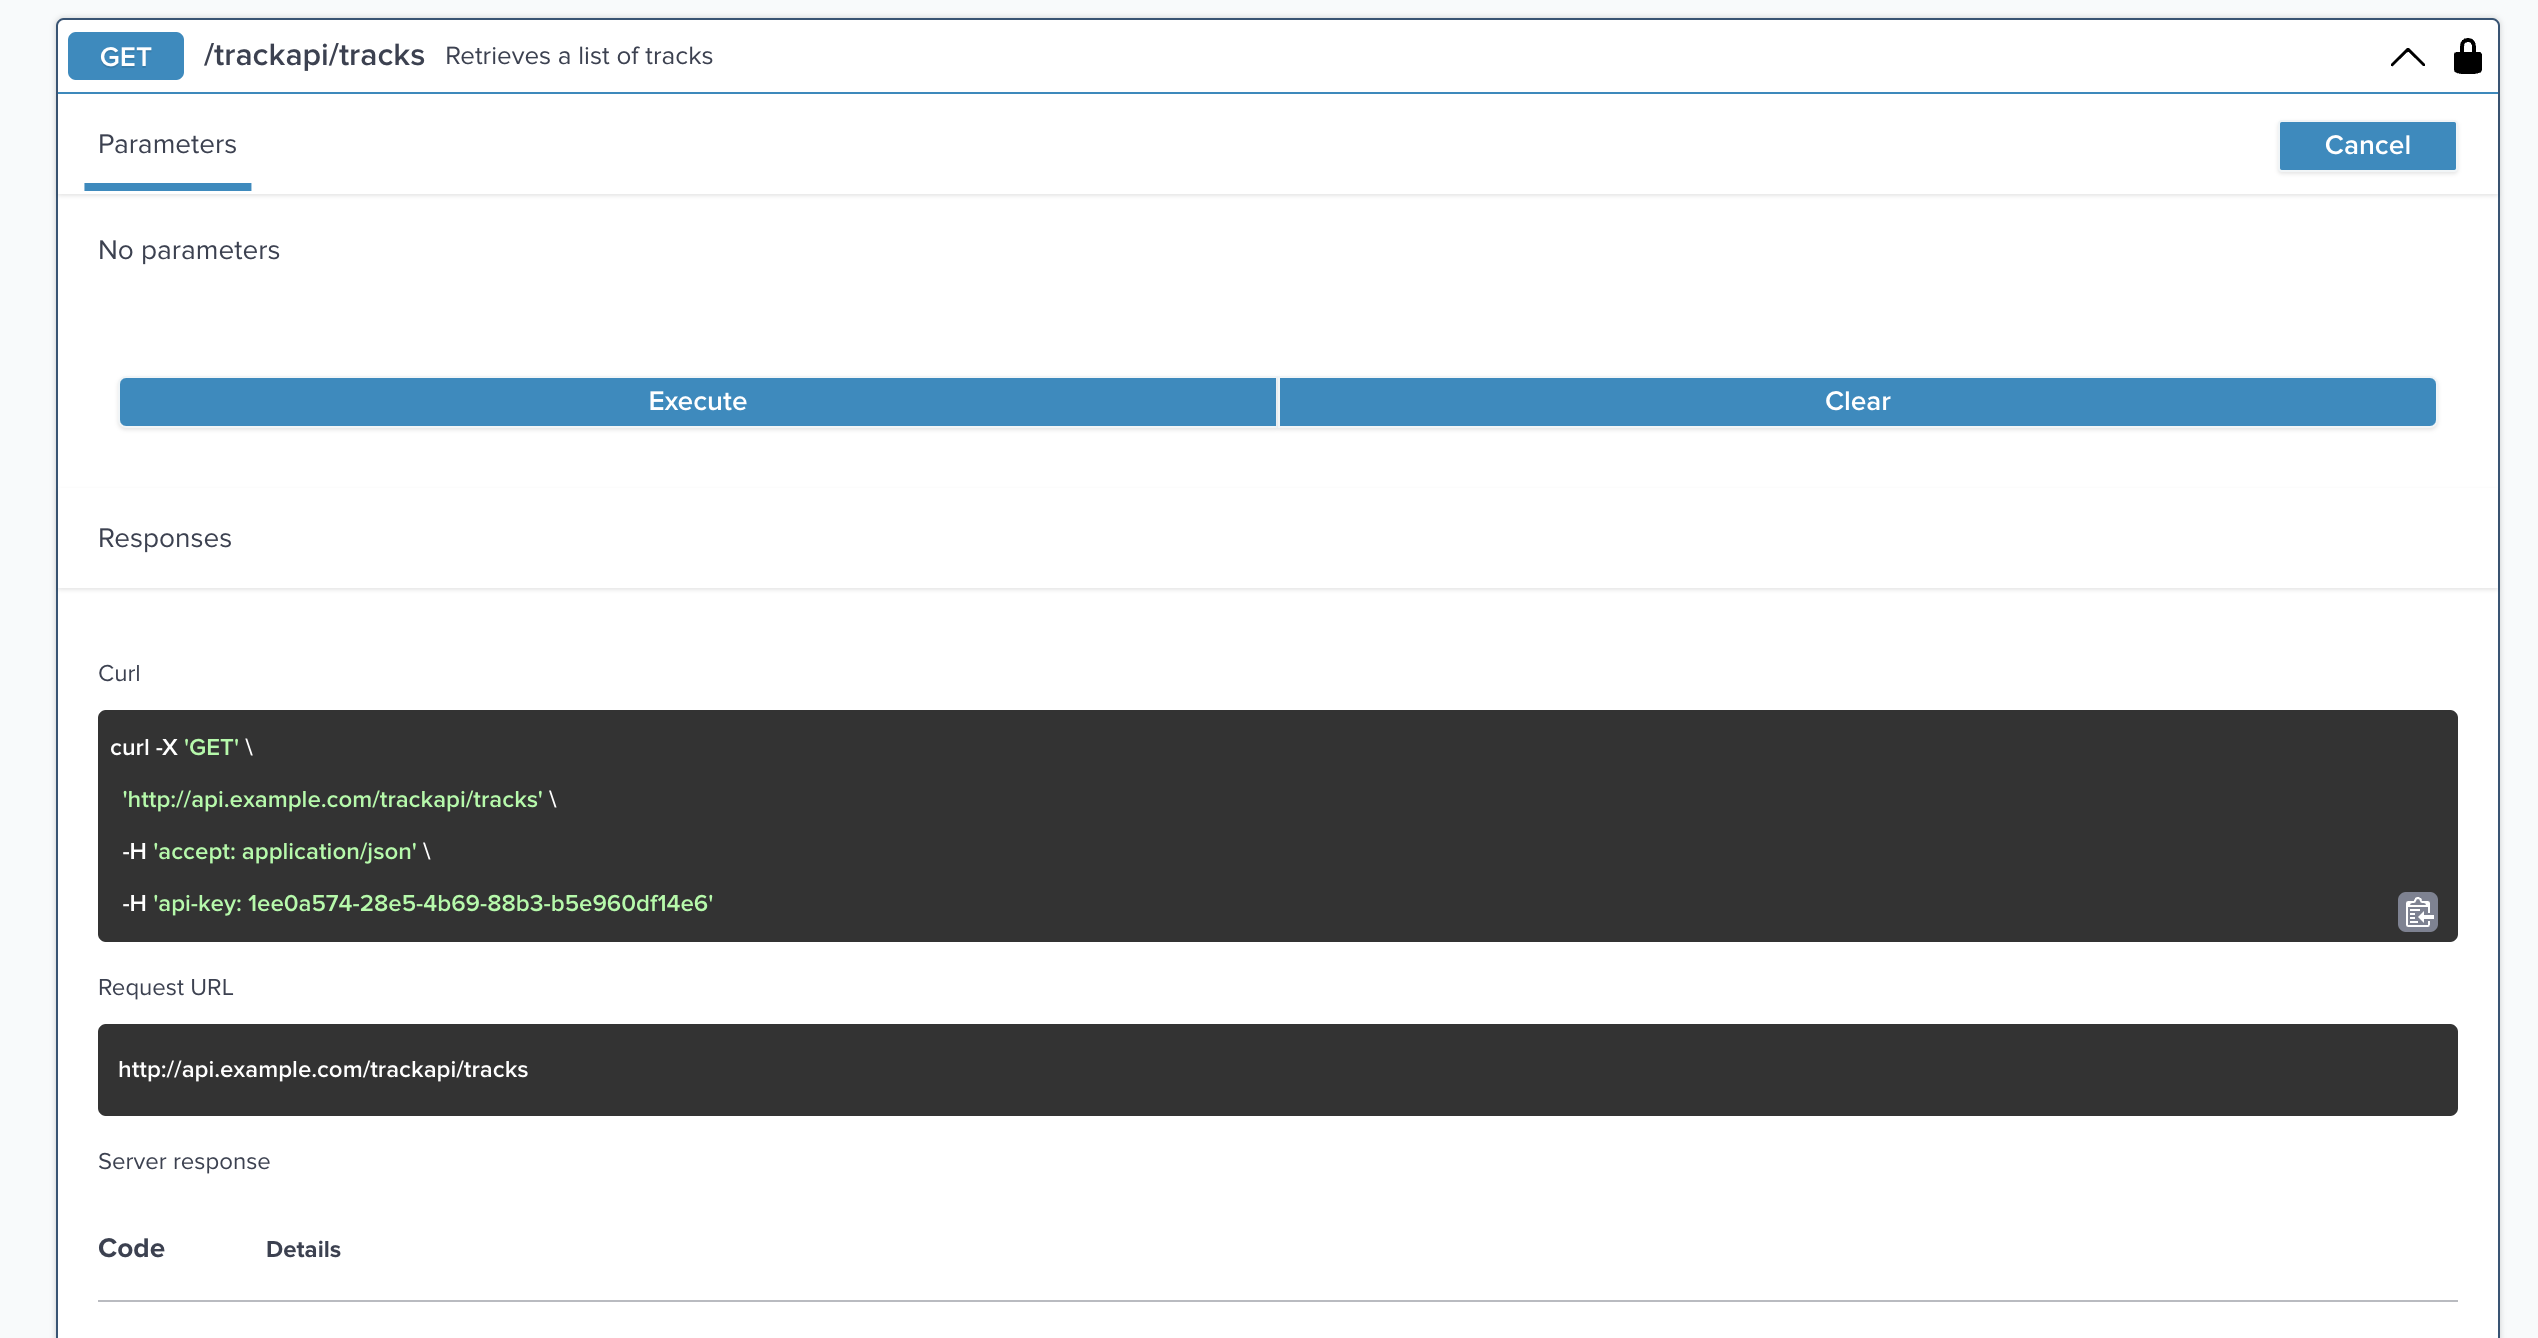
Figure: React sample app portal swagger try-it-out execute
Delete an API key
End users can use the developer portal to remove API keys that are not used anymore.
- To view API keys, follow steps 1 - 3 in View usage plans.
- Select the API product and usage plan for which you created the API key and then find the API key that you want to remove.
- Remove the API key. The steps vary depending on the frontend application for the developer portal.
- Click the Trashcan icon (the alt text is
Delete this API key.). - Confirm the deletion of the API key by clicking Delete.

Figure: Backstage portal delete API key - Click the x icon.
- Confirm the deletion of the API key by clicking Delete.
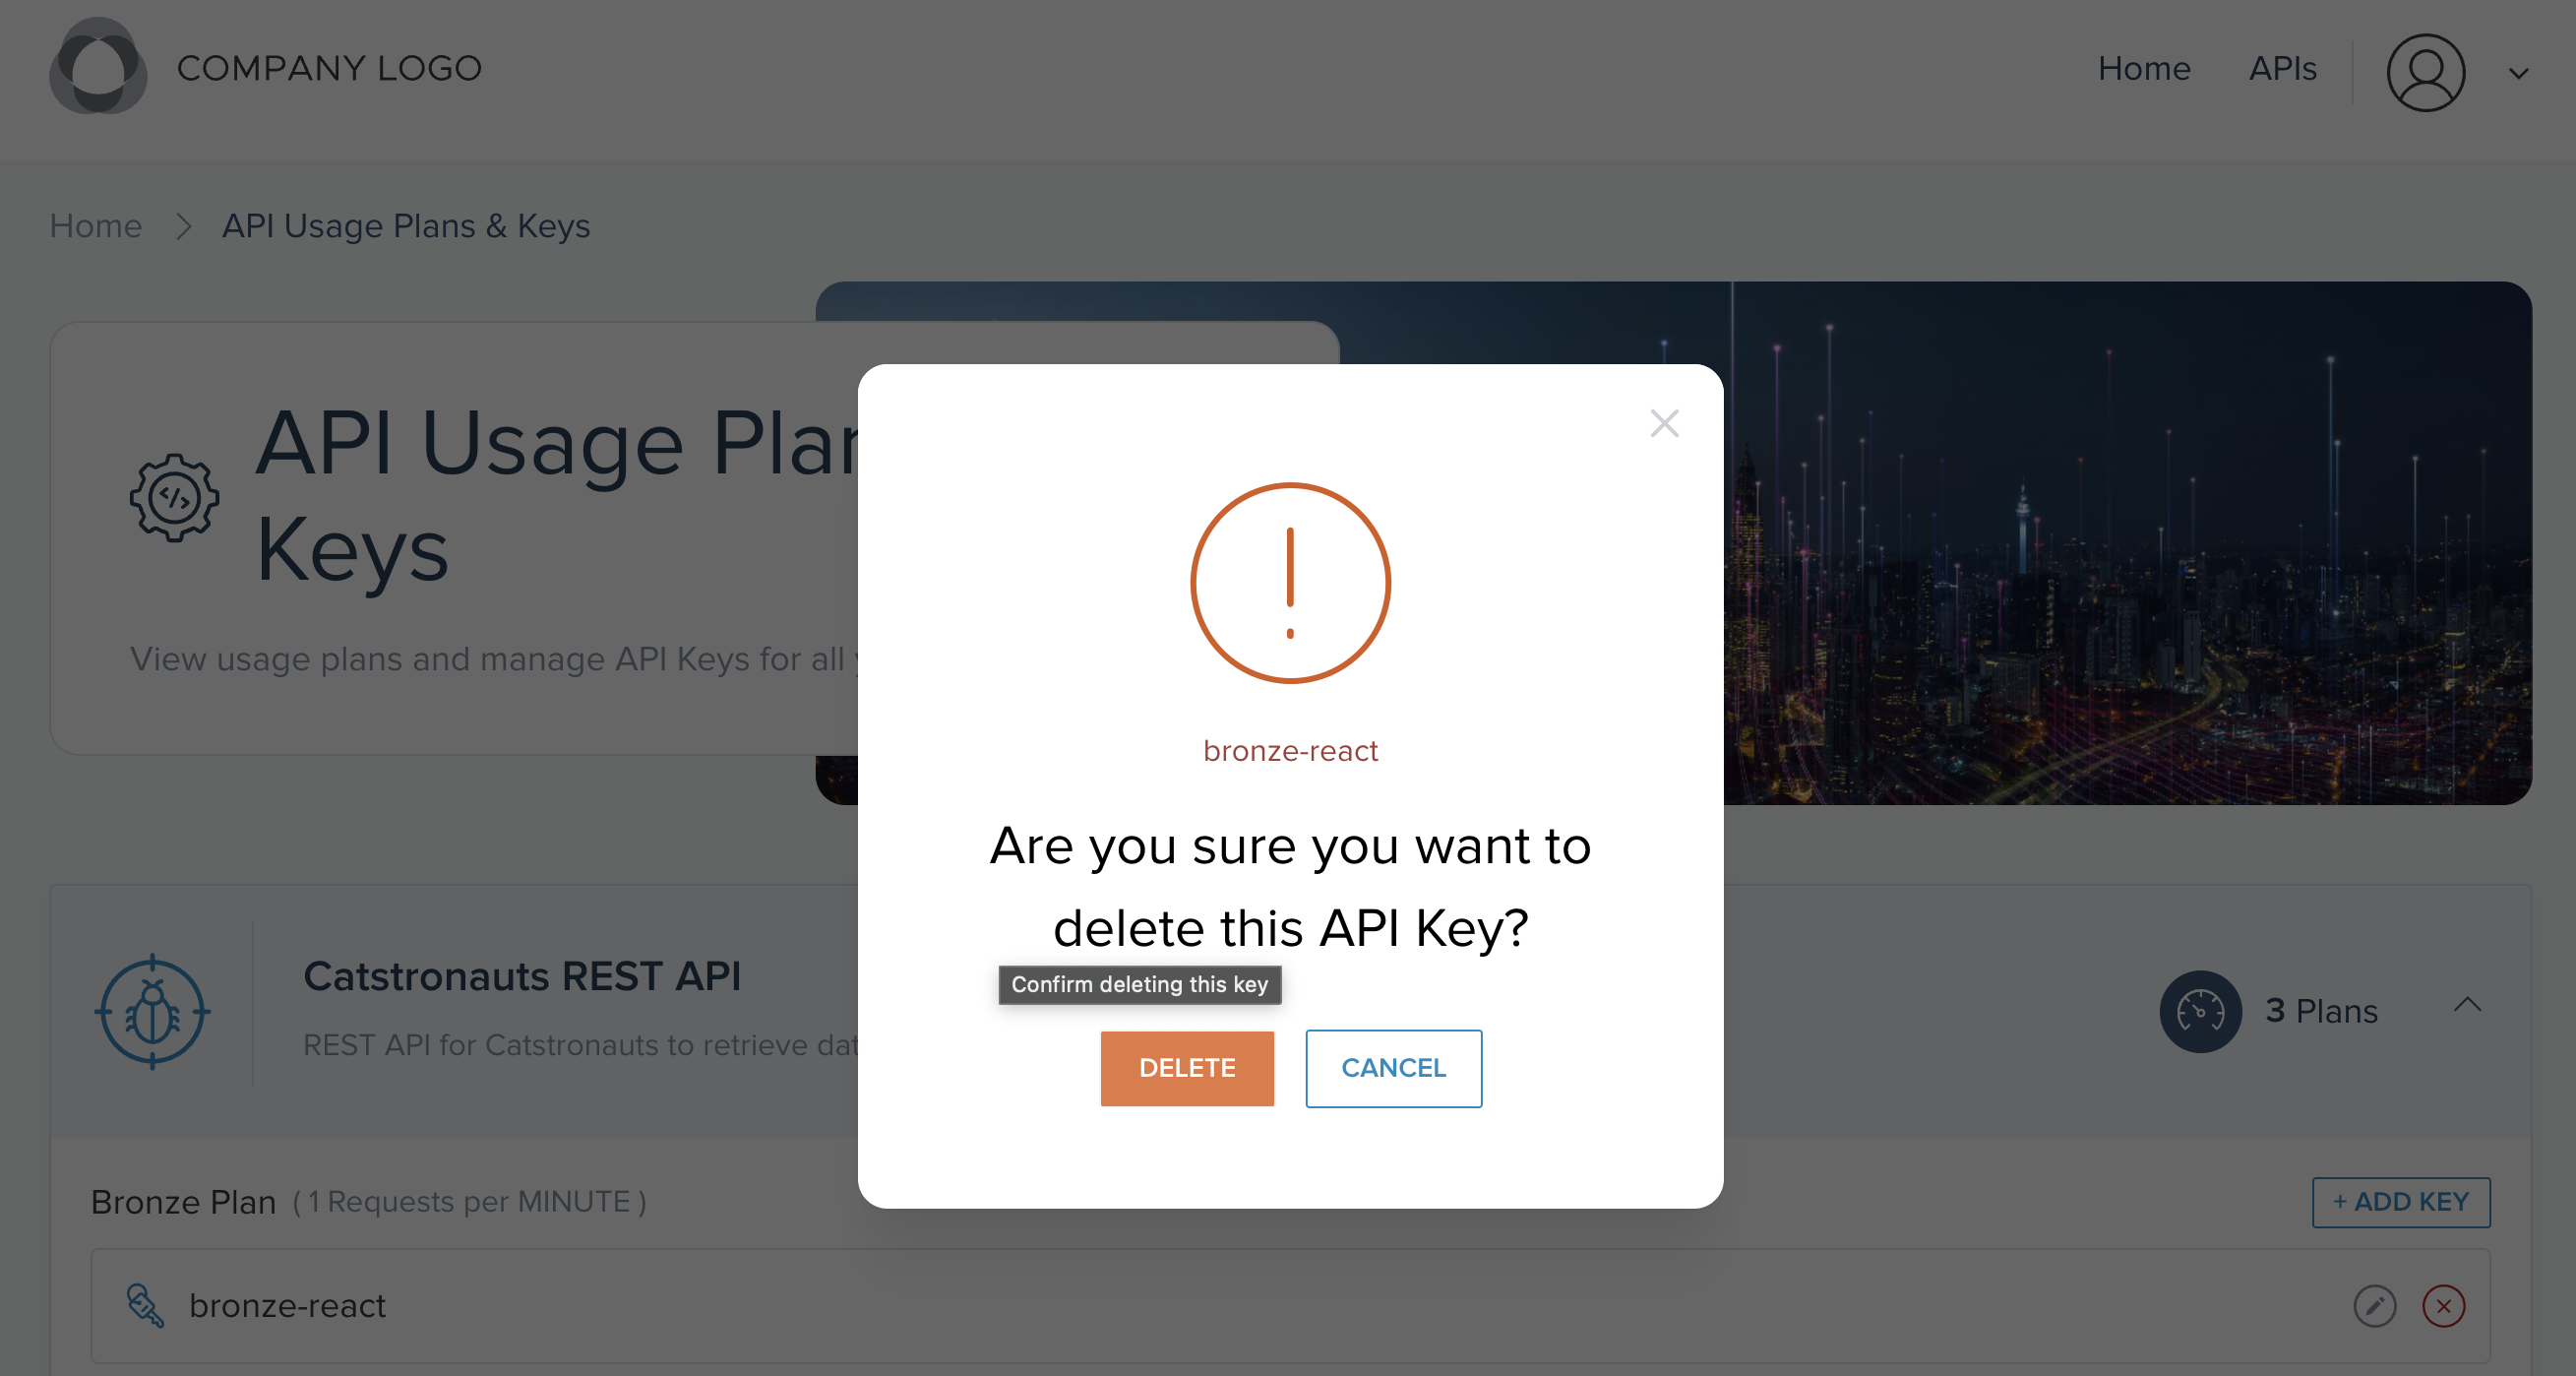
Figure: React sample app portal delete API key - Click the Trashcan icon (the alt text is