Portal database
Set up a backing database for Gloo Portal.
About the database for Portal
To use Gloo Portal, you must configure a relational database management system (RDBMS) as backing storage for the portal server.
Types of data
The types of data that the portal server reads and writes include the following:
- The teams, apps, and subscriptions that you create in the frontend portal.
- The OIDC and API key authentication details that you create for APIs in the frontend portal. Note that client secrets are not stored in the database and can only be viewed once upon initial creation.
- ApiProduct information such as versions and claim groups.
Database options
Review the following options to store data for Gloo Portal.
- Default in-memory: By default, the portal server includes a SQLite in-memory database. Any time that you upgrade or restart the portal server, the information in this database is removed. For example, your Teams, Apps, credentials, and other information that you created through the frontend portal get deleted. Use this method only for quick testing and temporary development environments.
- Postgres (preferred): Gloo Portal supports setting up Postgres as the RDBMS. The Postgres instance can be a deployment in the same cluster as Gloo Portal or in an external instance. If you use an external instance, make sure that your cluster can connect to the instance. For example, you might need to create the instance in the same virtual private cloud (VCP) and configure firewall, security groups, and other network and access control features.
Step 1: Deploy Postgres
Deploy a Postgres instance to the same cluster as Gloo Portal. The following steps also include an admin UI to help you visualize the data that is stored in the Postgres instance.
Create a Postgres deployment in the same namespace as the portal server. The following example creates a Postgres database named
dbwith credentials ofuserandpass.kubectl apply -f - <<EOF apiVersion: apps/v1 kind: Deployment metadata: name: postgres namespace: gloo-system spec: replicas: 1 selector: matchLabels: app: postgres template: metadata: labels: app: postgres spec: containers: - name: postgres image: postgres:13 ports: - containerPort: 5432 env: - name: POSTGRES_DB value: "db" - name: POSTGRES_USER value: "user" - name: POSTGRES_PASSWORD value: "pass" volumeMounts: - name: postgres-storage mountPath: /var/lib/postgresql/data volumes: - name: postgres-storage emptyDir: {} --- apiVersion: v1 kind: Service metadata: name: postgres namespace: gloo-system spec: ports: - port: 5432 targetPort: 5432 selector: app: postgres EOFCheck that Postgres is successfully deployed.
kubectl -n gloo-system rollout status deploy/postgresExample output:
deployment "postgres" successfully rolled outOptionally create an admin UI for Postgres. The following example creates a
user@email.comadmin user with thepasspassword, but you can update these values. If you updated the user credentials for the Postgres deployment in the previous step, make sure to update the same values in the ConfigMap.kubectl apply -f - <<EOF apiVersion: apps/v1 kind: Deployment metadata: name: pgadmin namespace: gloo-system spec: replicas: 1 selector: matchLabels: app: pgadmin template: metadata: labels: app: pgadmin spec: containers: - name: pgadmin image: dpage/pgadmin4:latest ports: - containerPort: 80 env: - name: PGADMIN_DEFAULT_EMAIL value: "user@email.com" - name: PGADMIN_DEFAULT_PASSWORD value: "pass" volumeMounts: - name: pgadmin-config-volume mountPath: /pgadmin4/servers.json subPath: servers.json volumes: - name: pgadmin-config-volume configMap: name: pgadmin-config --- apiVersion: v1 kind: Service metadata: name: pgadmin namespace: gloo-system spec: type: ClusterIP ports: - port: 30002 targetPort: 80 selector: app: pgadmin --- apiVersion: v1 kind: ConfigMap metadata: name: pgadmin-config namespace: gloo-system data: servers.json: | { "Servers": { "1": { "Name": "Portal DB", "Group": "Servers", "Host": "postgres.gloo-system.svc.cluster.local", "Port": 5432, "MaintenanceDB": "db", "Username": "user", "Password": "pass", "SSLMode": "disable", "Comment": "Automatically added server" } } } EOFCheck that the Postgres admin UI is successfully deployed.
kubectl -n gloo-system rollout status deploy/pgadminExample output:
deployment "pgadmin" successfully rolled out
Step 2: Configure Portal to use Postgres
Now that Postgres is running, configure the portal server to store data in the Postgres instance.
Encode the configuration details for Postgres. If you updated any of the values in the previous step such as the user credentials, update them in this command accordingly.
echo -n 'dsn: host=postgres.gloo-system.svc.cluster.local port=5432 user=user password=pass dbname=db sslmode=disable' | base64Create a Kubernetes secret with the encoded configuration details for Postgres.
  kubectl apply -f - <<EOF
apiVersion: v1
kind: Secret
metadata:
  name: portal-database-config
  namespace: gloo-system
type: Opaque
data:
  config.yaml: |
    ZHNuOiBob3N0PXBvc3RncmVzLmdsb28tc3lzdGVtLnN2Yy5jbHVzdGVyLmxvY2FsIHBvcnQ9NTQzMiB1c2VyPXVzZXIgcGFzc3dvcmQ9cGFzcyBkYm5hbWU9ZGIgc3NsbW9kZT1kaXNhYmxl
EOF
Get the Helm values file for your current Gloo Gateway installation.
  helm get values gloo -n gloo-system -o yaml > gloo-gateway.yaml
open gloo-gateway.yaml
In the
gateway-portal-web-serversection, configure the portal server to use Postgres. The portal server automatically looks for the secret that you previously created for the configuration details for Postgresgateway-portal-web-server: enabled: true glooPortalServer: database: type: postgresUpgrade your Helm installation with the new portal values. Make sure to replace the upgrade version with your current version, such as 1.18.1.
  helm repo update
helm upgrade -i gloo glooe/gloo-ee \
  --namespace gloo-system \
  -f gloo-gateway.yaml \
  --version $UPGRADE_VERSION
Verify that the Gloo Portal components are healthy.
glooctl check
Step 3: Verify that Portal stores data in Postgres
The more you use Gloo Portal, the more data is stored in Postgres. If you are setting up Gloo Portal for the first time, you might not have any data right away. However, you can come back to this topic after you generate data, such as by creating a PortalGroup or deploying the frontend app.
Trigger the writing of data by following the guides to create a PortalGroup or create Teams and Apps in the frontend.
Enable port-forwarding for the Postgres admin UI.
kubectl port-forward svc/pgadmin -n gloo-system 8080:30002In your browser, open the Postgres admin UI and log in with the
user@email.comandpasscredentials.open localhost:8080From the Object Explorer menu, expand Servers and click Portal DB. When prompted, enter the password for the user you configured when you deployed Postgres:
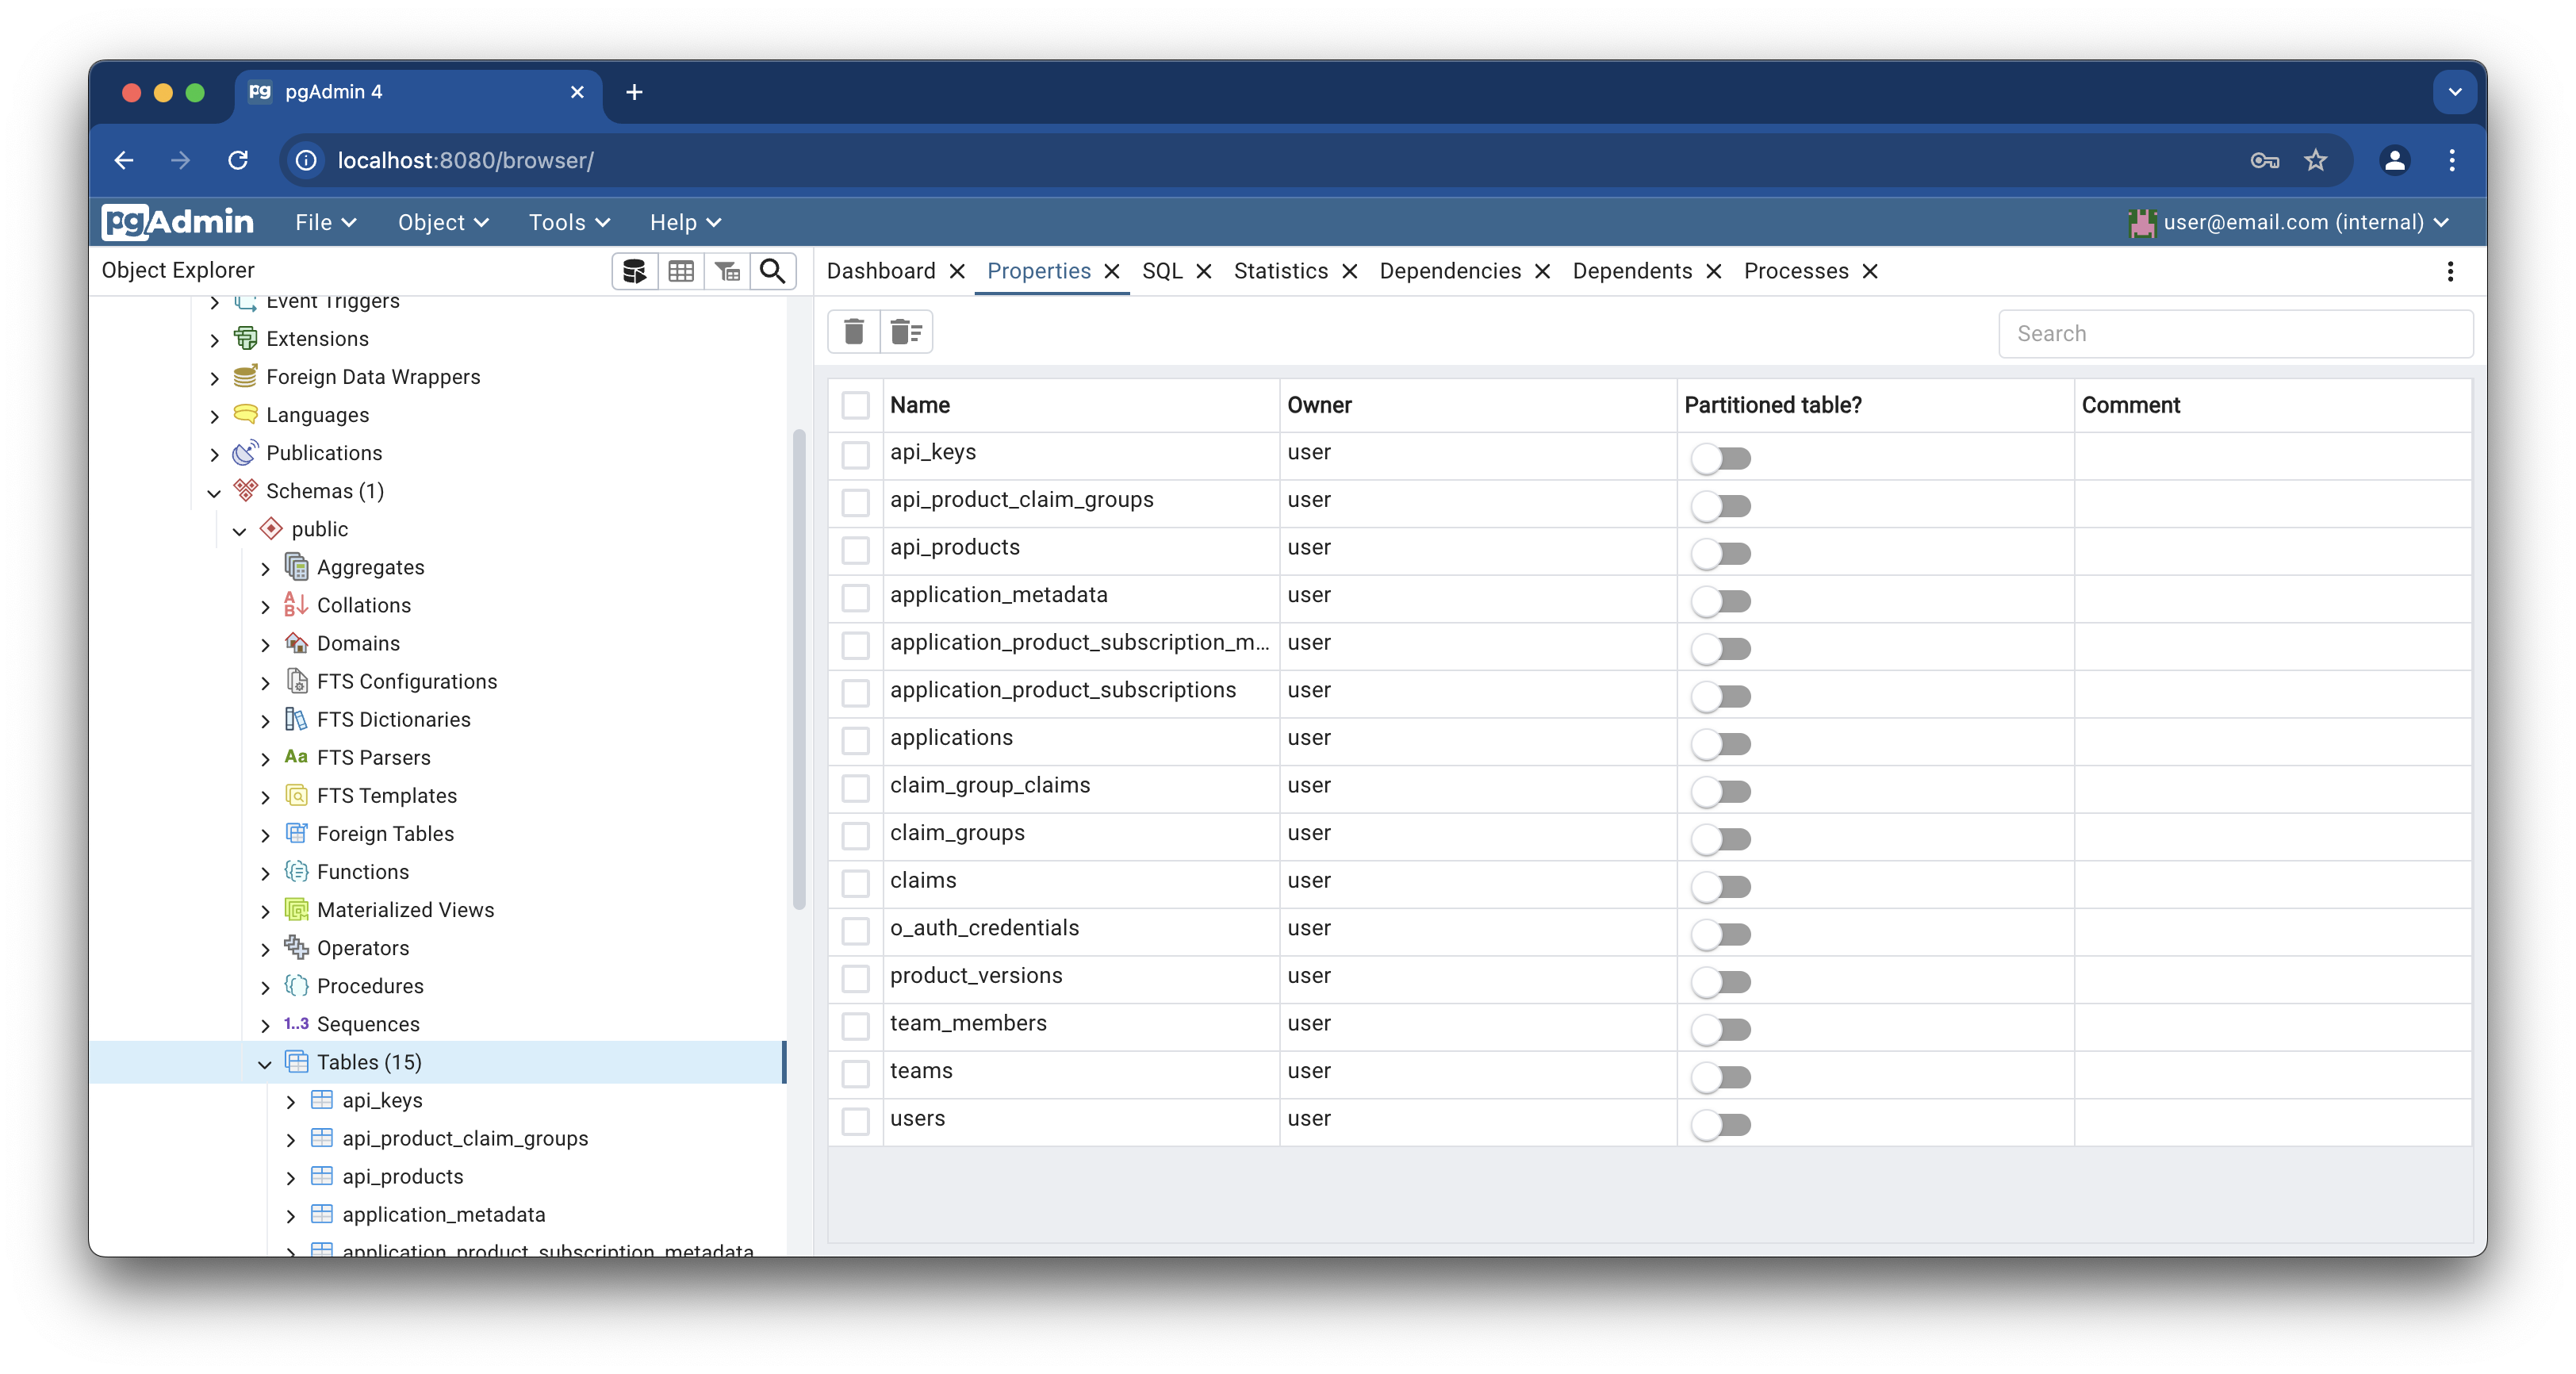
pass.If you get stuck in a login loop with anErrno 2message, restart thepgadminpod and try again.From the Object Explorer menu’s Portal DB server section, expand Databases > db > Schemas > public > Tables.

Figure: Postgres Portal DB 
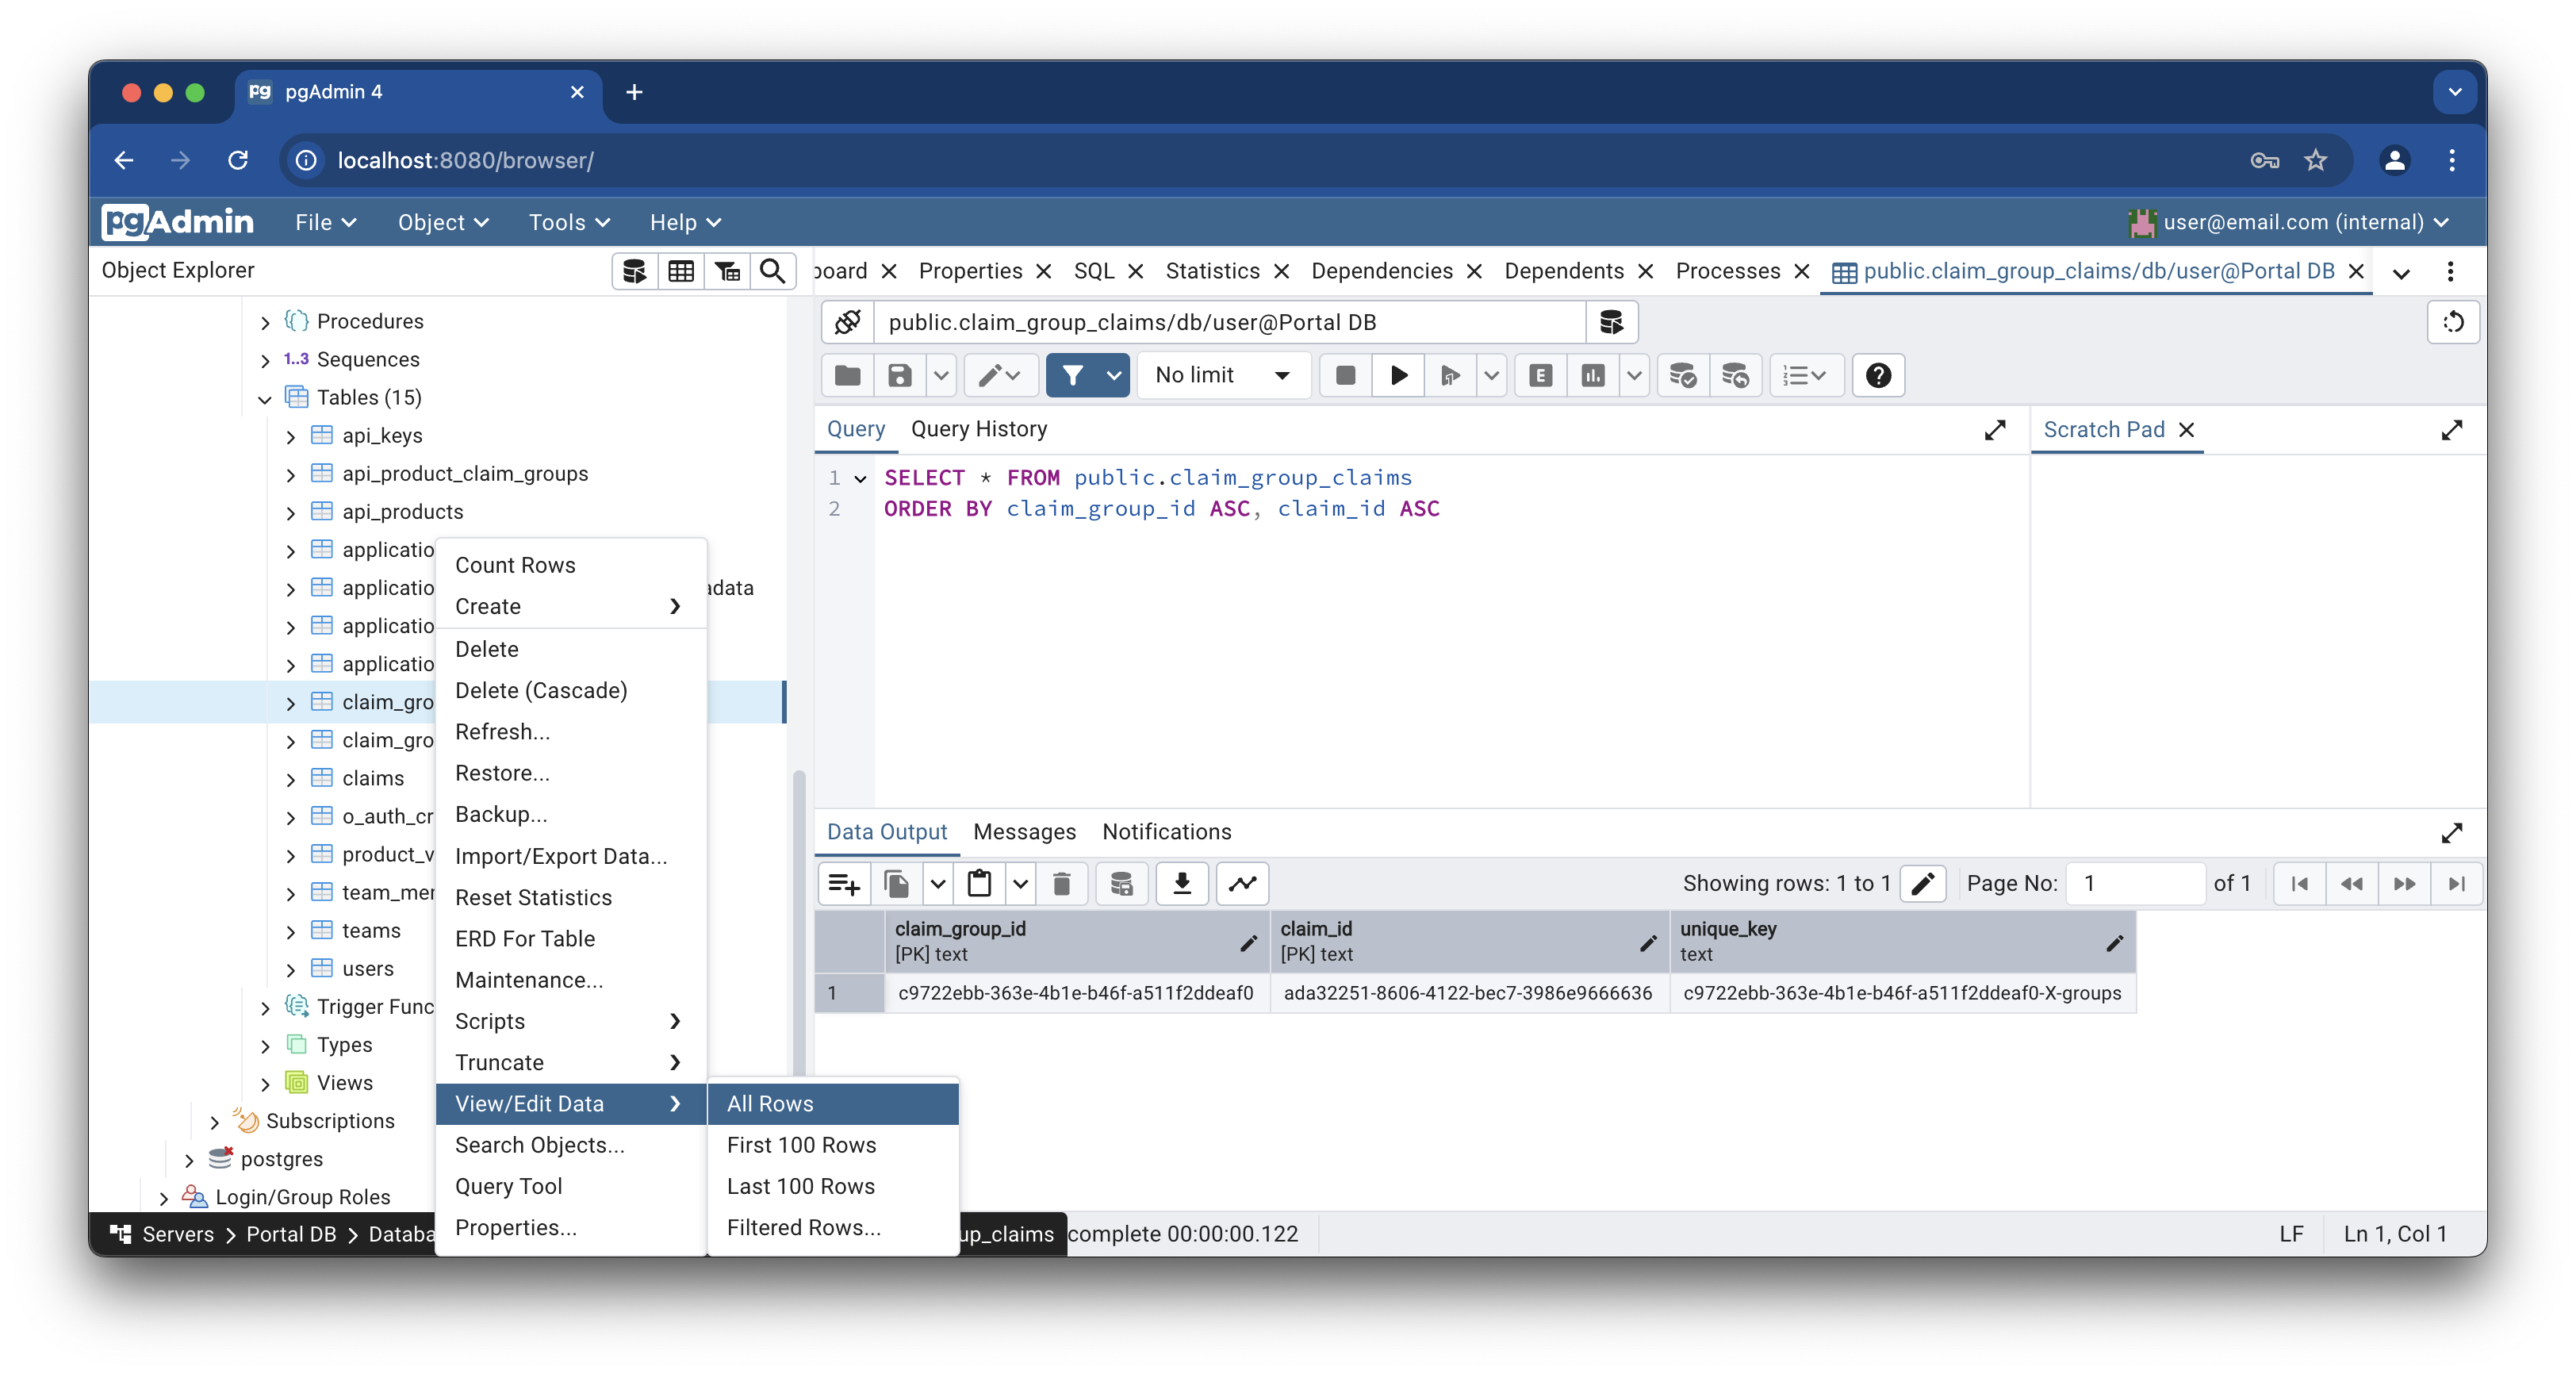
Figure: Postgres Portal DB To check the values in a table, right-click the table name and then click View/Edit Data > All Rows. The individual values are shown in the Data Output table.

Figure: Postgres data view 
Figure: Postgres data view